Winter Climbing
This is an article that I wrote for MSR's blog. You can find it published on their site here.
The freedom of moving high in the mountains is one of the best feelings in the world. Unfortunately for many with the mountain climbing bug, these experiences are limited to a few summer-time months. If this is you, then what do you do with your mountain-starved soul the other eight to nine months out of the year? Do you catch yourself dreaming of trails through colorful alpine meadows and scrambles up high rocky ridges? You might be able to keep your soul semi-satisfied by climbing lowland rock, heading to the busy ski resort, or holing up with some good mountaineering literature, but we all know that these are just meager replacements for the real thing—the deeply rewarding adventure of climbing mountains.
So why not climb mountains the rest of the year as well? Particularly, in the winter and spring?
Yeah, it’s complicated, I know. The weather is not as good. Days are short. It’s really, really cold. Snow and ice make what would be simple summer scrambles committing and dangerous. There’s the risk of an early entombment by avalanche. And all that extra gear…
But I would argue that it’s worth it. So worth it. If not just for the freedom and challenge of moving in the hills year-round, off season climbing is great preparation for bigger mountains like Mt. Rainier or Denali, where “winter conditions” permanently exist.
After I moved to Seattle two years ago, I had a hard time getting though my first Pacific Northwest winter. It was rainy and dark, and the dry and sunny rock climbing that I was used to coming from the Front Range of Colorado was not always an option. I realized I needed to diversify my skillset, otherwise I’d be stuck daydreaming of summer. Enter winter climbing.
What’s the best way to get started? Here are a few of my observations.
1. Find a partner and/or mentor.
This might be the crux! Finding someone with an obsessive love for the mountains to be your partner on cold winter climbs can be tough.
Ideally this person is more experienced then you and can act as a mentor. The nuances of snow, weather, clothing, and equipment are a bit overwhelming in the winter, so it is almost essential to find someone to learn from. And sadly, the practice of mentoring seems to be dying out in our Information Age. You can easily find articles like this and go try something new on your own, which is good and bad. It’s wonderful that you can learn so much for free and on your own, but nothing replaces being “in the field” with someone more knowledgeable than you. So how do you find a mentor? First, they are never strangers—they can only be found among the people with whom you already interact. Search your current network. Maybe you can be introduced to a friend-of-a-friend who gets after it year ‘round. Oftentimes it is the mentor that chooses you, not the other way around. So be someone you would want to climb with.
2. Learn about snow.
Avalanche awareness may be the biggest barrier to getting into winter climbing. Don’t let it be a barrier and be proactive about learning. There are abundant resources out there. Reading a book with good visuals is also recommended, but there is no replacing learning from experience. Taking an avalanche awareness course is recommended, especially if your climbing partner is not an expert. Most areas have avalanche danger forecasting, like what’s provided by the Northwest Avalanche Center here in Washington.
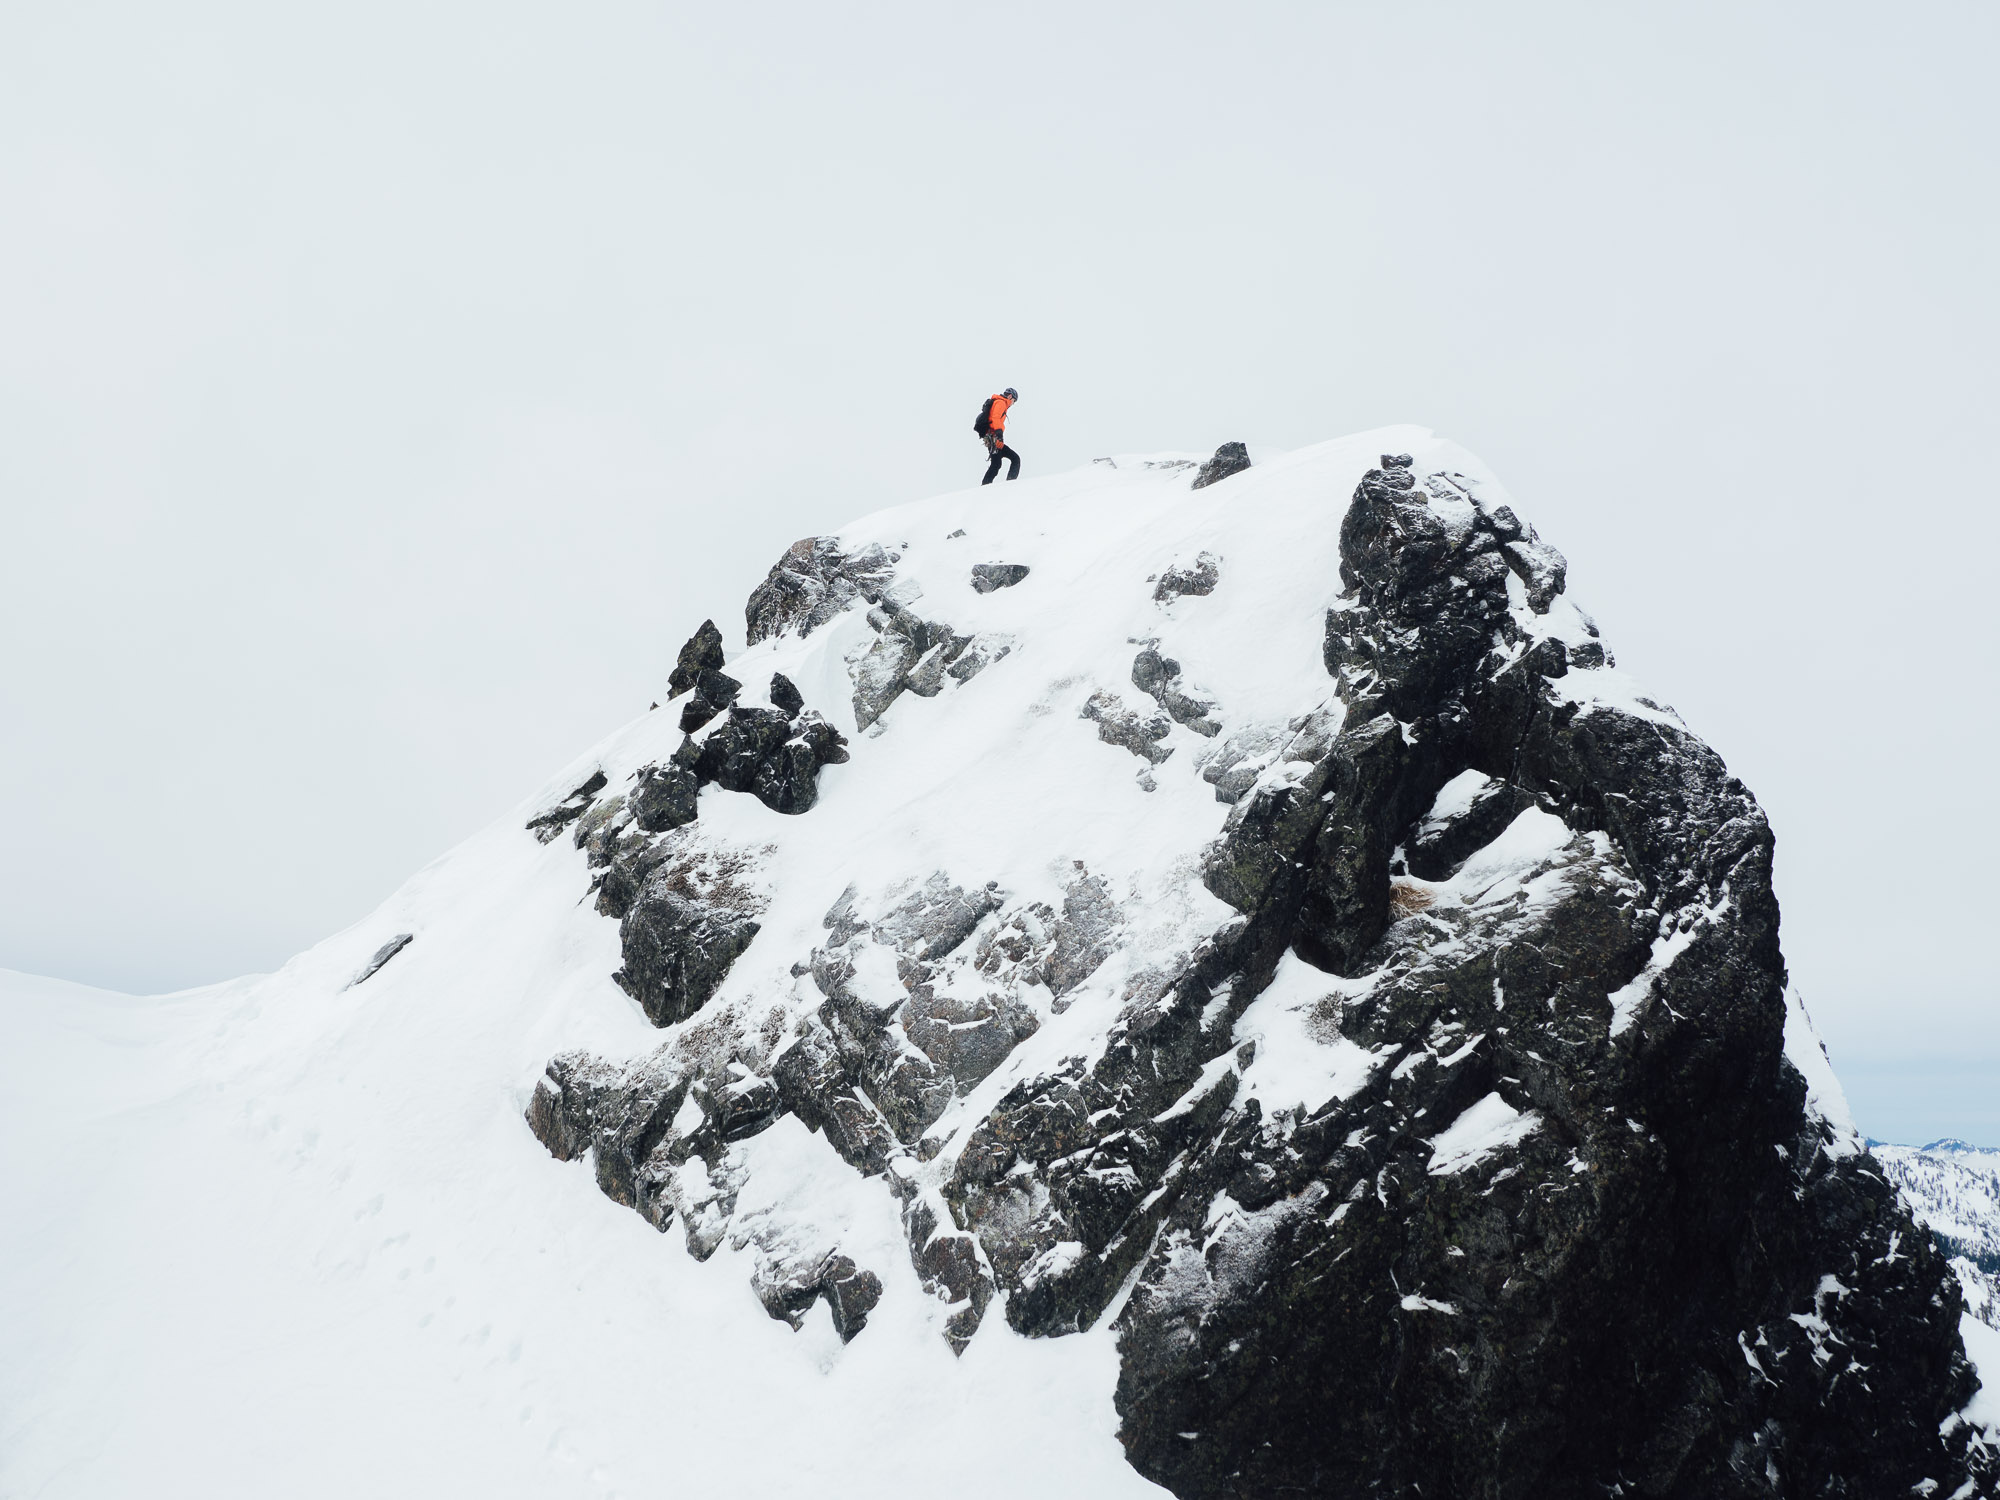
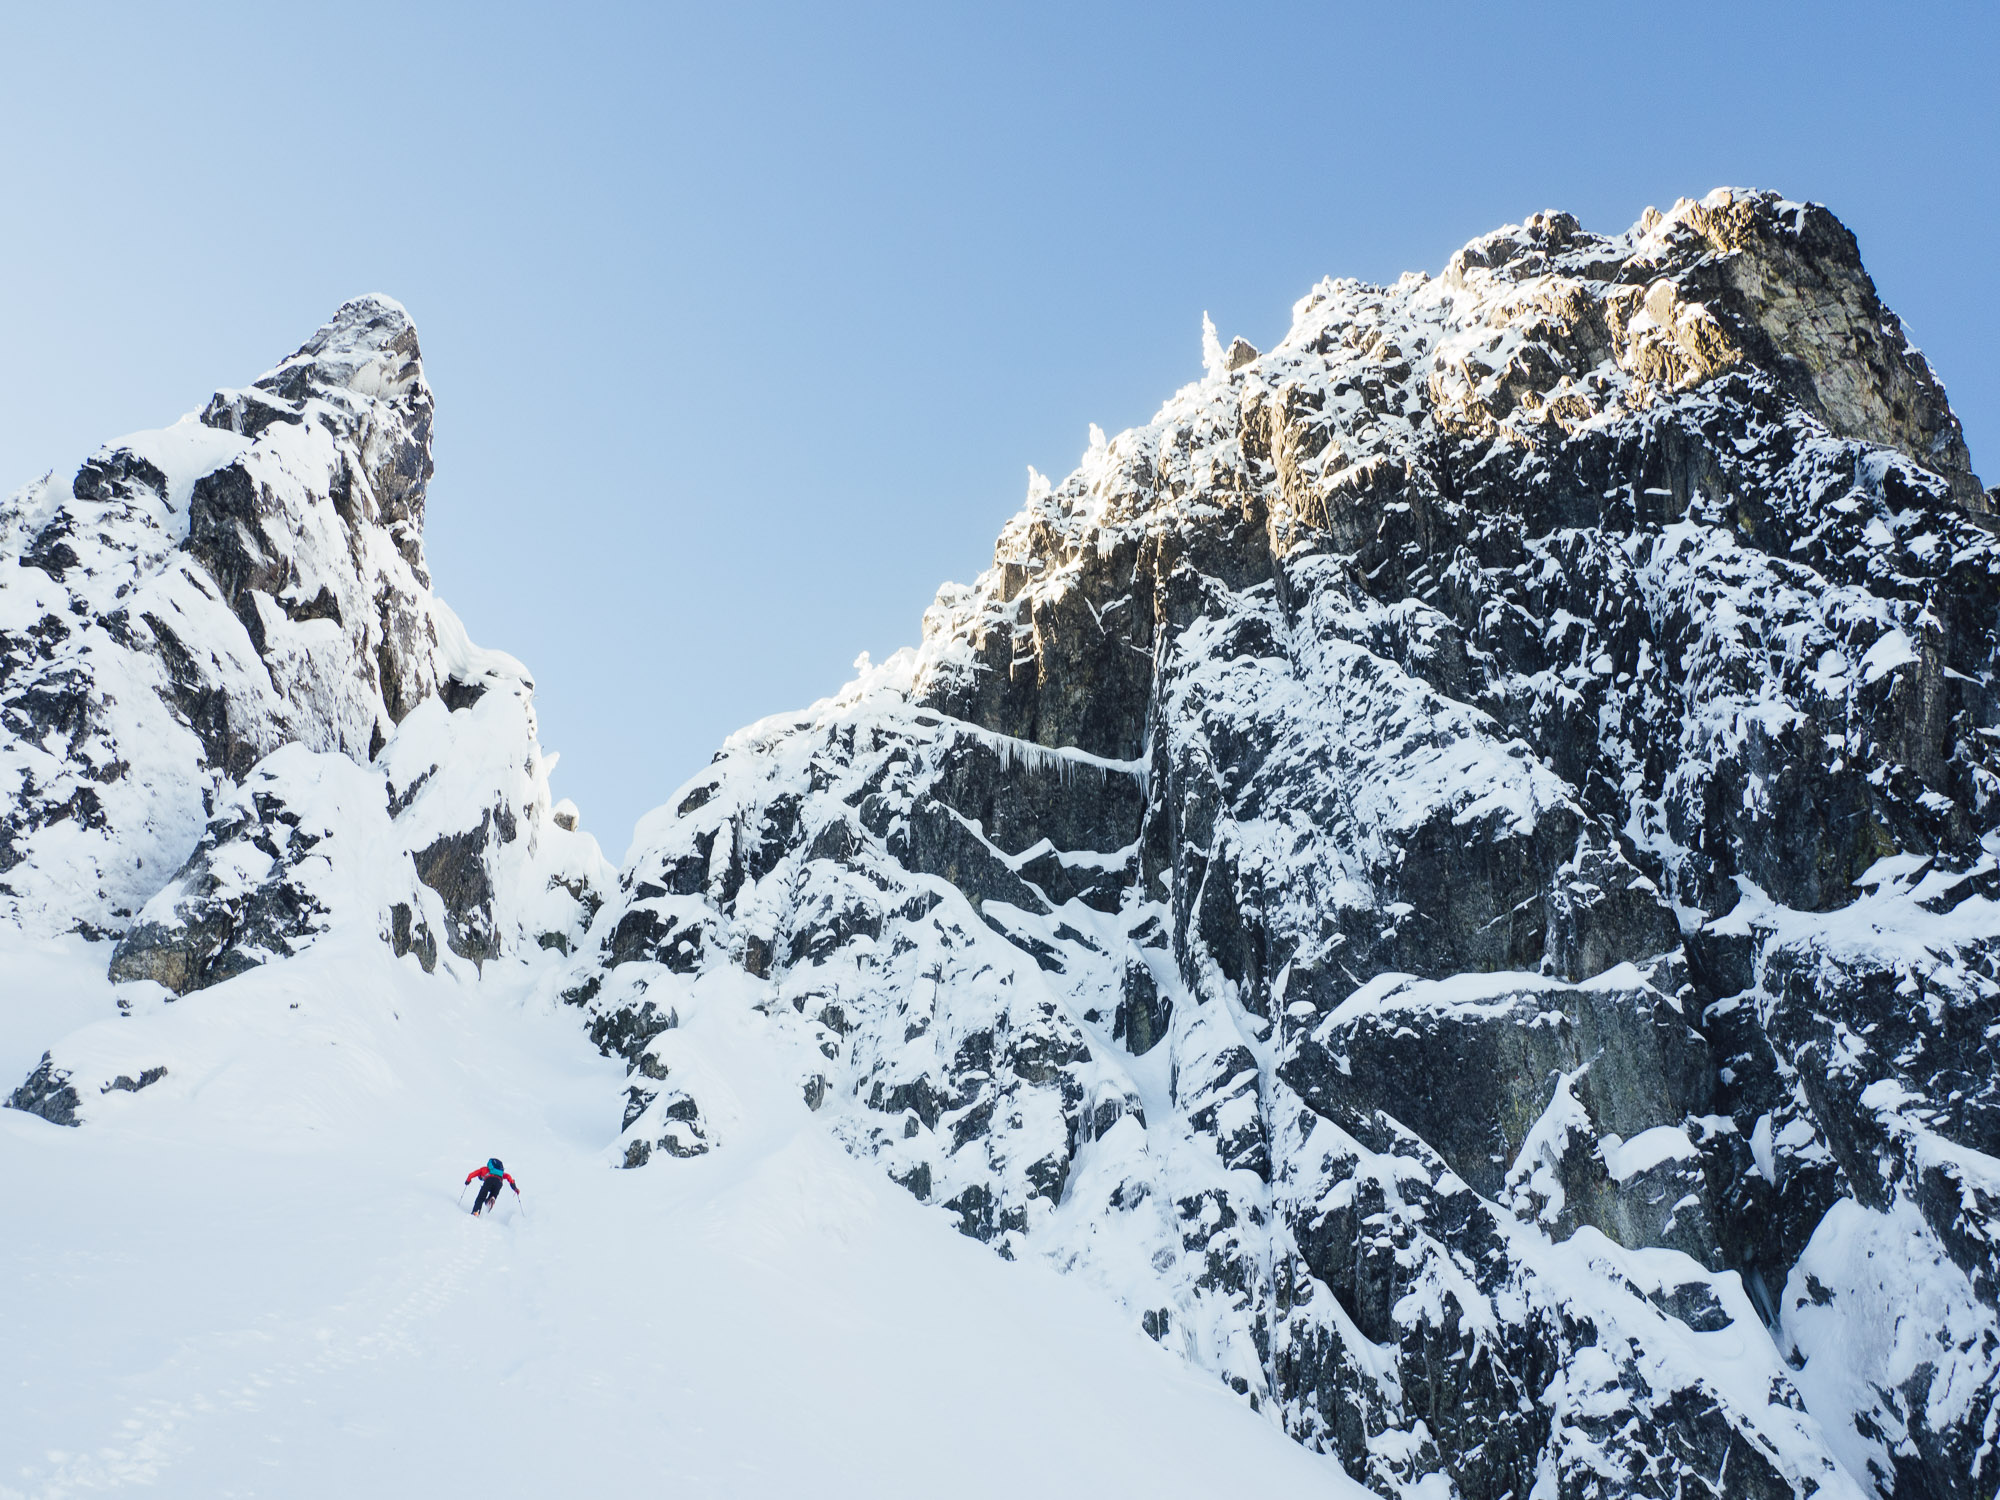
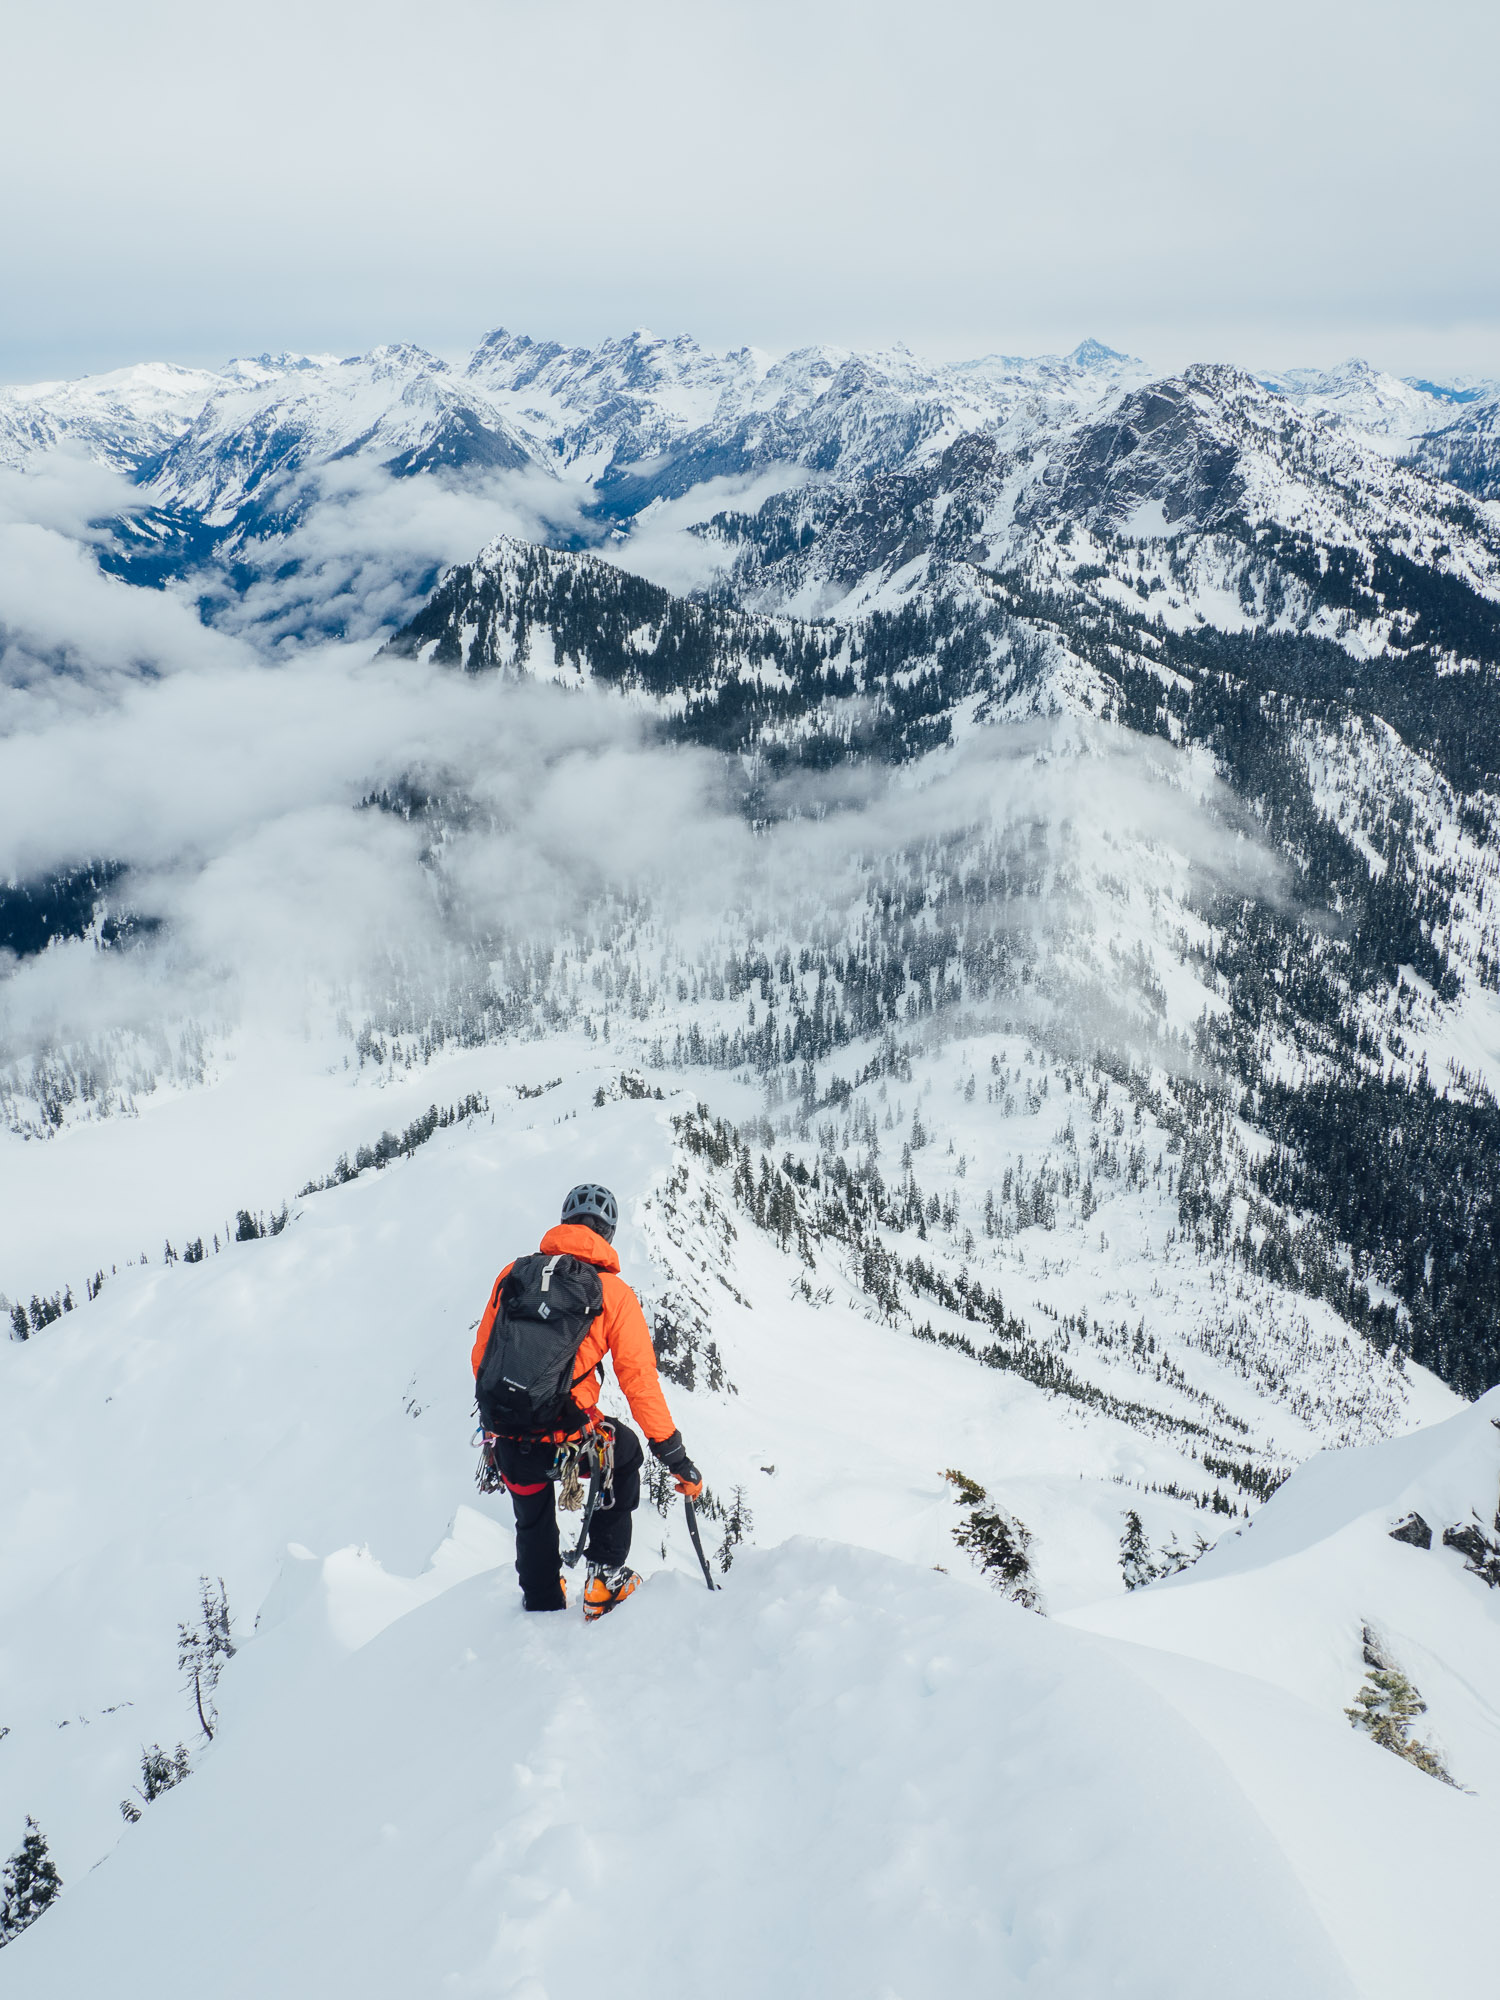
Cornices, another winter-specific danger, form when windblown snow accumulates horizontally on ridge crests, hanging suspended out past supporting rock. Like avalanche slopes, cornices can collapse without warning, or a climber could break through. To be safe, travel well below the probable fracture line, which can be much lower than you’d think. Mature cornices could have a fracture line 30 or more feet back from the lip. The safest strategy is to completely avoid traveling near cornices.
3. Pick an objective.
Start small. Pick a route that you can very comfortable climb without a rope in the summer. This may mean a class 1 “hike.” Remember that what is trivial in the summer turns into an exciting challenge in the winter. Think Grade 1 or 2 for starters. Winter specific route information can be hard to find. Some winter climbing beta can be found on SummitPost.com, so start here. Study route beta for summer conditions online (summitpost.com and mountainproject.com) and in physical guidebooks, and check online trip reports, at the very least. You can’t bet on finding a climbers trail—it will be buried in snow!—so it is extra important to be knowledgeable of the main features of your chosen route. Print out a photo of the whole route to take with you, as well as extra photos of key features, including the descent (!!).
I’ve listed a few examples climbs to get the wheels turning. There is lots of information online about each of these popular routes. If you pick a nice weekend day to climb any of them, you should have company and hopefully a pre-broken trail!
Lion Head Route, Mt. Washington (6288’), New Hampshire.
What Mt. Washington lacks in height, it makes up for with brutal weather. The wind and cold temperatures can be extremely severe, so pay attention to the weather forecast. The Lion Head Route is perhaps the easiest and least avalanche prone route to the summit.
East Ridge, Quandary Peak (14,265’), Colorado.
This may be the most popular first Colorado fourteener to climb in the winter. The trailhead near 11,000ft is accessible in the winter, making the climb itself only about 3000ft. The avalanche danger on the ridge is low. I climbed this route a while ago on a warm spring day with my wife and forgot sunscreen. Long story short, because of the intense radiation due to the snow-covered slopes and high elevation, we looked like Oompa Loompas for the next week.
Worm Flows Route, Mt. St. Helens (8,364’), Washington.
Since the top got blown off, this has become a much more reasonable climb in the winter. As with the Lion Head Route, don’t let the lack of elevation deceive you—this mountain gets dumped on in the winter! This route is long—gainng about 5,700 feet in elevation over about 6 miles from trailhead to summit, so start early.
Whitney Trail Route, Mt. Whitney (14,505’), California.
Whitney is kind of the holy grail of winter mountaineering in California, and not necessarily a good first winter climb, though it is reasonably well sought-after, with good information available. Most of the Californian’s I met when I climbed Denali had done a practice climb on Whitney in winter as training. The Whitney Trail is a long trail in the summer, gaining almost 6000ft, so be prepared for a very long day, or better yet, plan to bivy. The Mountaineers Route is also a popular objective in winter, though it is much more technical.
4. Gather the right clothing.
It goes without saying that it’s important to stay warm and dry. We do want this to be fun, right? OK, maybe we just want to survive. The ideal system will vary based on preference, weather, season, and location.
A basic system includes:
· Warm wool socks
· Long johns
· Long sleeve baselayer, preferably with a hood (no cotton!)
· Soft shell and/or hard shell pants depending on conditions
· Breathable insulated mid-layer or fleece
· Shell jacket
· Parka
· Gloves: two or three pairs recommended to have an extra dry pair
· Warm hat
· Balaclava or BUFF for wind and sun protection
· Sunglasses: category 3 or 4 lenses
Dealing with gloves is one of the trickiest issues of cold weather climbing. You may have to sacrifice warmth and waterproofness for dexterity. I usually carry a thinner fitted glove and a bigger warmer and more waterproof glove. If your gloves get wet, don’t worry—this is usually unavoidable when you plunge your hands in snow for hours. That’s why you pack extras.
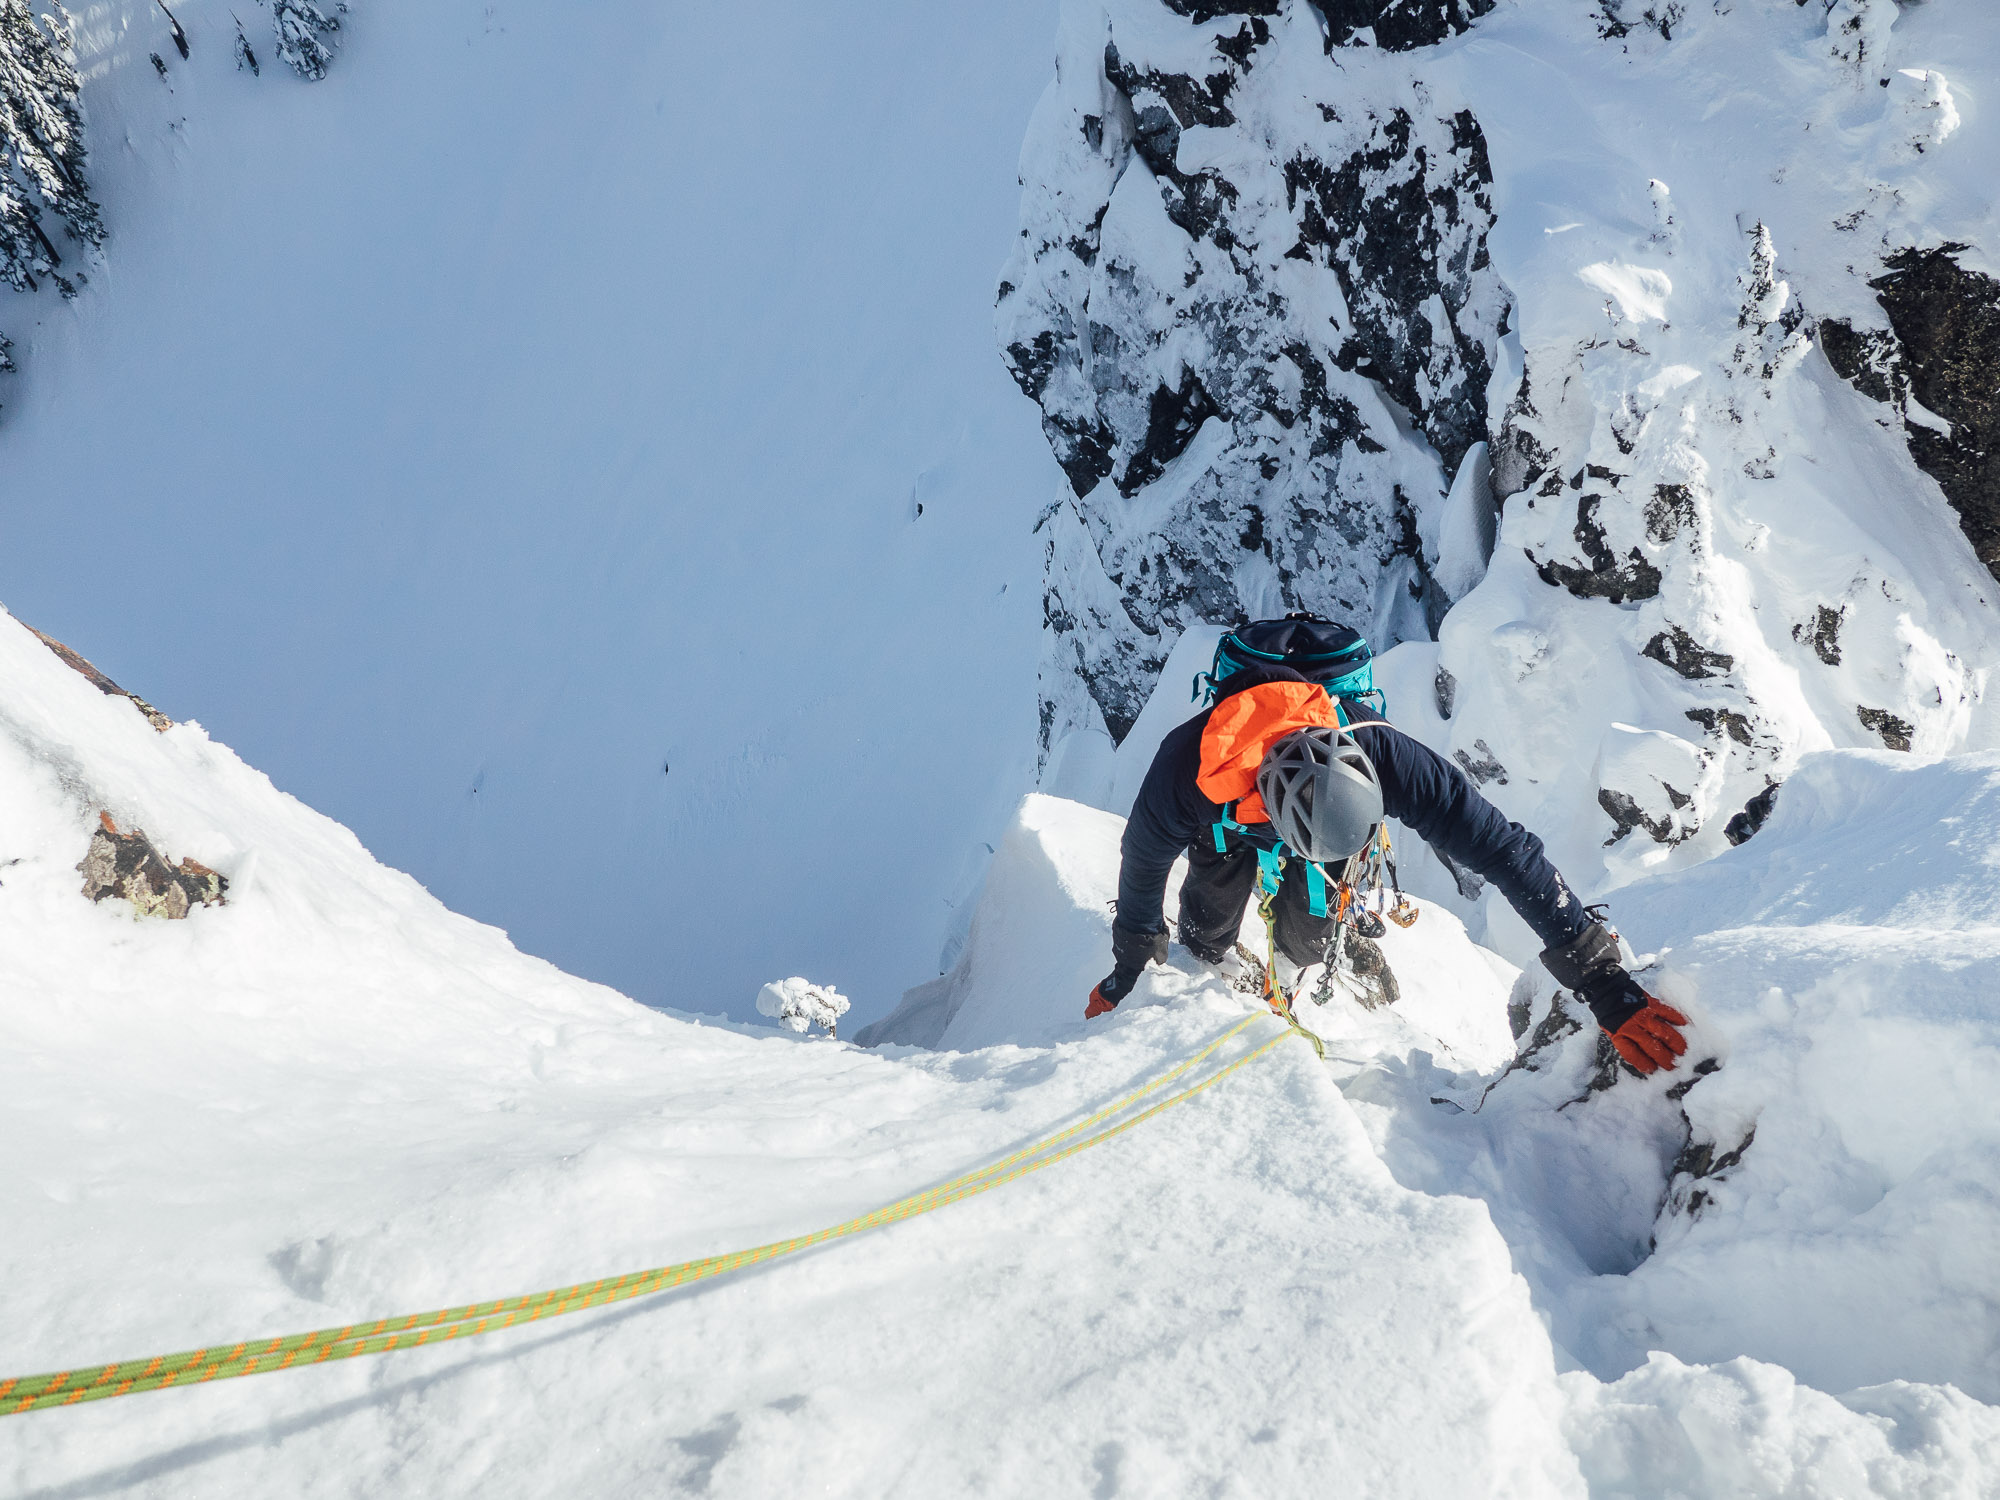
5. Gather the right gear.
My usual tactic is to borrow as much as I can so I can try difference kinds of gear out before spending large amounts of money. And don’t be afraid to try to make do with what you already have. I used waterproof summer boots for many of my first winter jaunts—I just made sure that my socks were extra thick! It’s better to get after it then sit around blabbering about the newest technology and worrying about getting the “right” gear. Sometimes the right gear is what you already have or your grandpa’s hand-me-downs. Either way, it will be hard to get around having to invest in some new and expensive shiny things, because the right gear is about your comfort and safety.
Below is a basic list for the new winter mountaineer. Yeah, it’s long. If you haven’t realized it yet, you have to carry a lot more in the winter.
· 45ish liter pack
· Harness with adjustable leg loops (to fit over bulky clothing)
· Dry-treated rope
· Boots: leather insulated mountaineering boots (warmer and stiffer than hiking boots)
· Crampons: step in mountaineering (strap-on) crampons with horizontal front points.
· Mountaineering ice axe and/or ice tools depending on route
· Climbing helmet
· Snowshoes or skis
· Trekking poles
· Shovel
· Avalanche beacon and probe
· Nalgene w/bottle insulator (so your water doesn’t freeze!)
· Small thermos: optional, but nice to have
· Backpack: 35 – 70 liters.
· Gaiters
· Map and compass (be prepared to navigate in a whiteout)
· Food: anything that can easily and quickly be stuffed in your mouth!
· Climbing gear (pickets, cams, stoppers, pitons, ice screws, etc) depending on route
If you’re planning to bivy, you’re going to need a new tent—3-season tents are not designed to withstand the weight of snow or sub-freezing temperatures. A single wall tent is usually the lightest/best option. If you are basecamping, a double-wall tent cuts back on condensation, and might be worth the weight. It’s normal for temperatures to drop to around 0°F in most ranges, so bring a warm enough sleeping bag. An insulated sleeping pad is essential—nothing steels heat like lying on a bed of snow! Also, you’ll be carrying a warm parka, so plan on wearing it to bed!
If you’re not planning on bivying, then pay attention to time, and bail if you’re moving too slow. Remember, days are short! Know the time of sunset. Bringing an emergency bivy sack or shelter is wise. They are super light and usually not too expensive.
Ideal climbing protection is different in the winter. Spring-loaded cams that are bomber in the summer can be a joke in an icy crack, or when frozen solid due to full-on winter conditions. Passive protection, like stoppers and tri-cams, works regardless of ice, so if your route calls for rock protection, carry some cams, but make sure you have plenty of passive protection. Oftentimes, pitons are thrown onto a winter rack because they can be used in thin cracks and seams—where other rock protection does not work. It can be important to have this option when protection is hard to come by (because it’s covered by ice and snow). Pickets are often carried to the top of a climb without being used—they require very firm snow conditions, which can be hard to find in the winter. If all of this protection-talk sounds scary, stick to easy climbs that don’t require roping up, especially if winter climbing is new for you.
A note on food: besides giving you sustained energy, eating keeps you warm, so bring enough to be able to eat consistently. Because it’s cold, you may not feel thirsty, so you will also have to force yourself to drink consistently to stay hydrated.
6. Go for it!
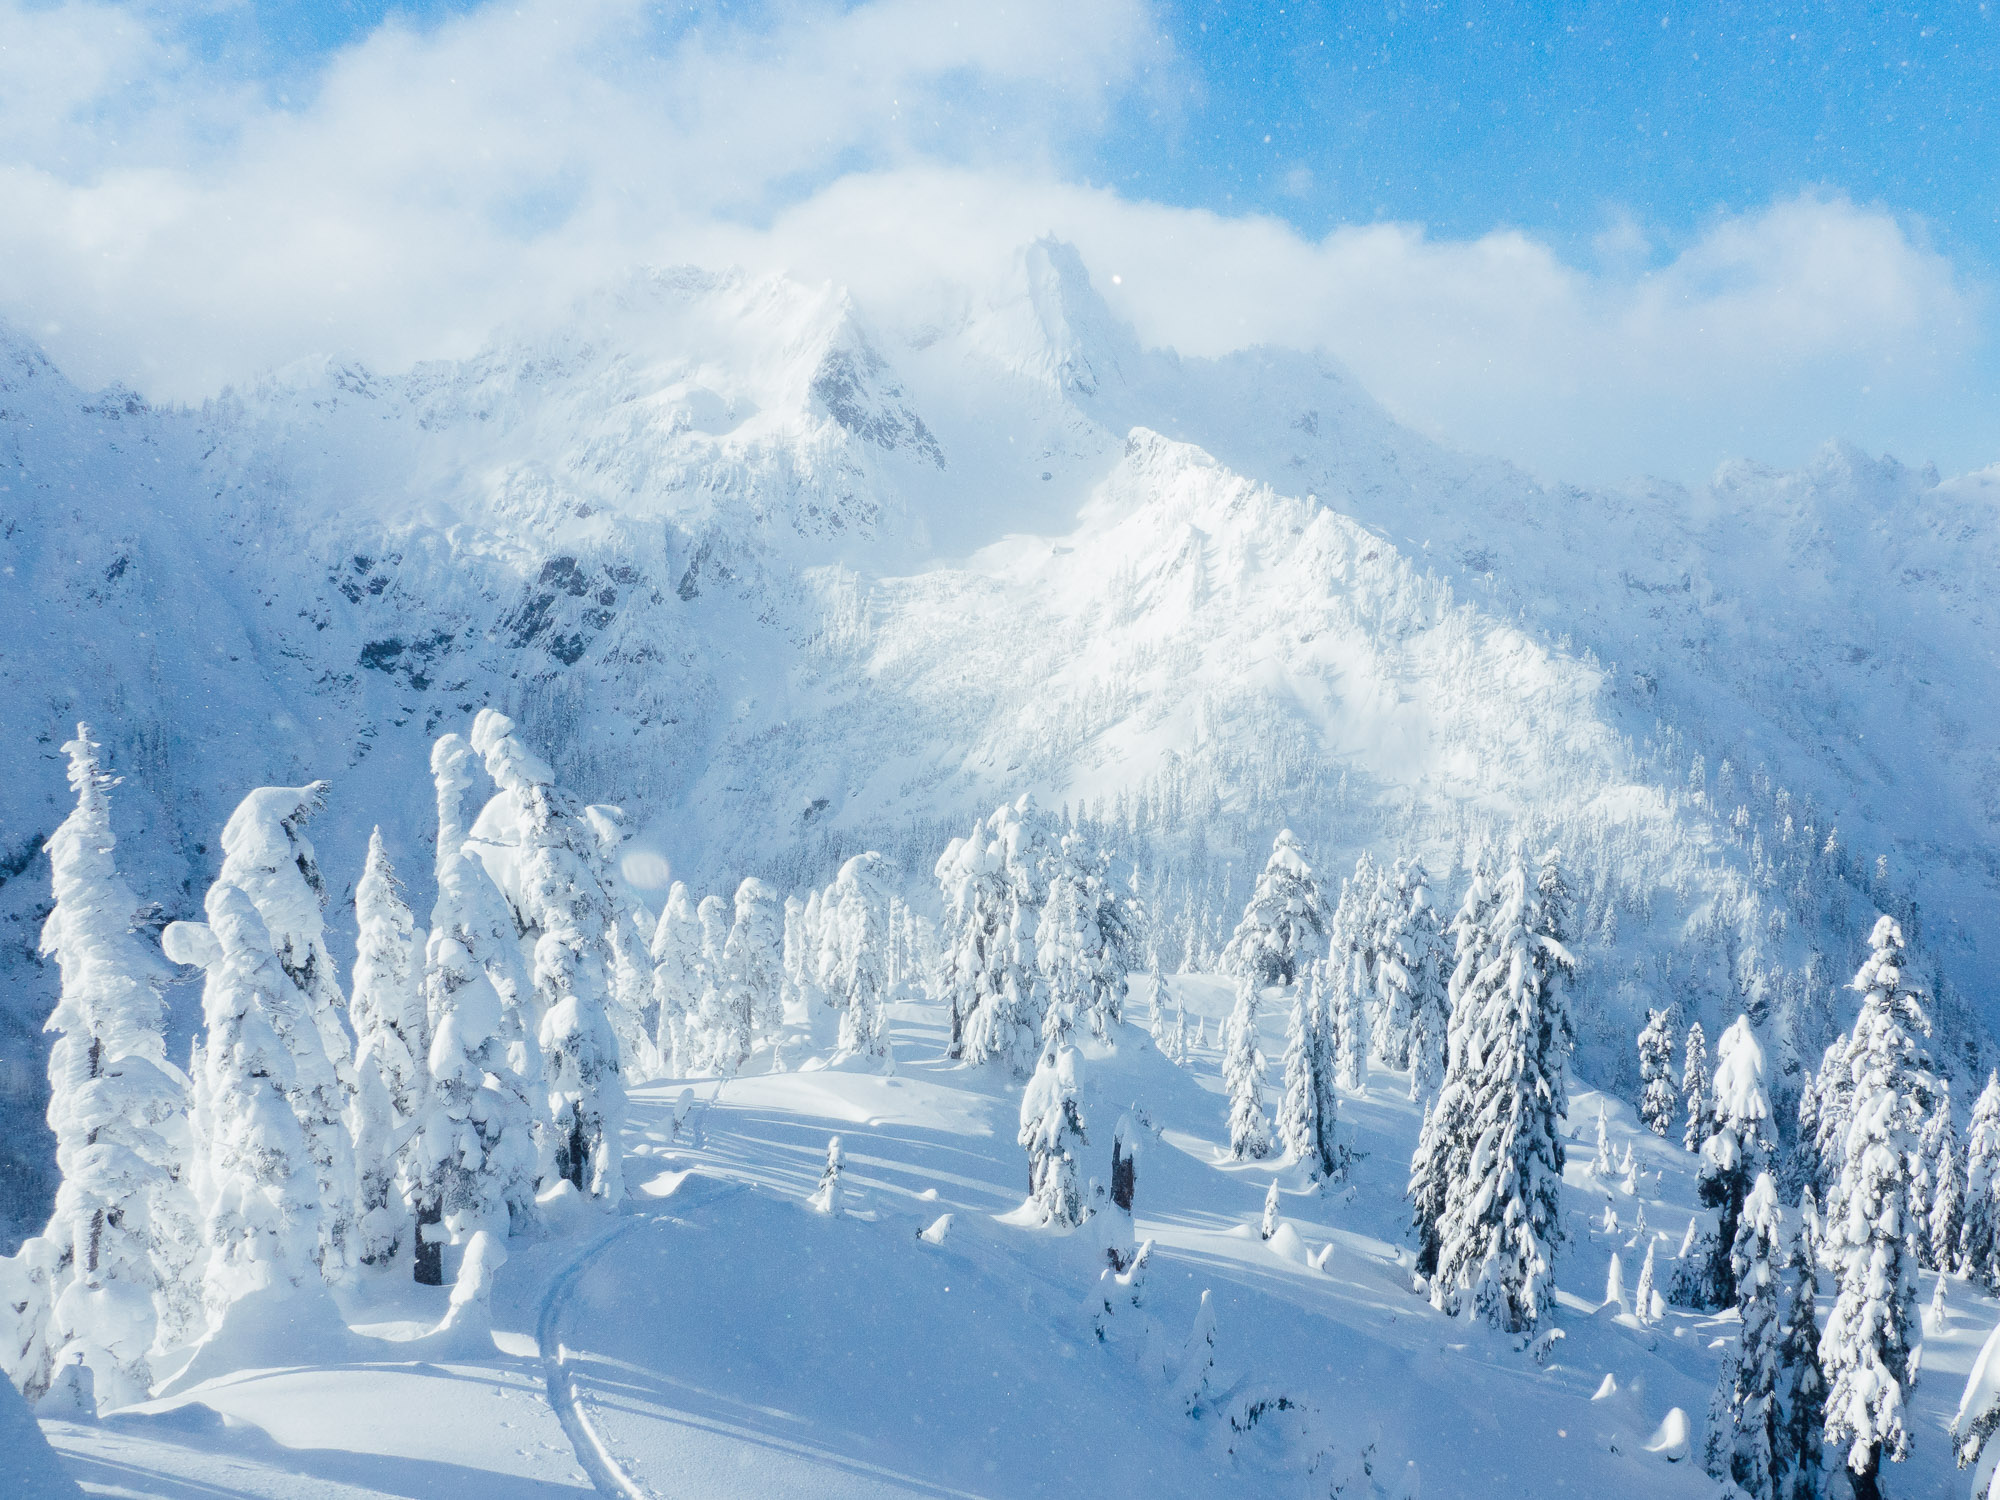
Start small and find the right challenge for you. If you want, take a course. Many guiding companies offer winter climbing courses in New England, the Rockies, Sierras, and Cascades. Try to find opportunities to learn new skills like ice climbing and backcountry skiing that you can bring to the mountains in winters to come. Check the weather. Check noaa.gov and use the spot forecasting function. Mountain-forcast.com is also helpful. Call the local ranger station to ask about up-to-date conditions if you can. Most importantly, get out there, make wise decisions, and enjoy the beautiful transformation winter brings to the mountains.
First Route in the Alaska Range
We made it to Talkeetna last night after a three-hour shuttle from Anchorage. Anchorage was almost as I expected it to be—a little pocket of flat ground on the ocean and surrounded by mountains. In Washington, we joke about learning to appreciate and distinguish the shades of grey, but Anchorage was on another level. It was bleak, but incredibly beautiful. There were trees until the land rose even the slightest—then grey. Even the ocean was grey.
We’re waiting for the weather to clear up in the Range and purchasing last minute gear. Matt and I were persuaded by the climbing ranger to buy overboots. We for sure needed them, he said, “especially in May.” We already had two-layered “double boots”—boots I wouldn’t use again until/unless I go to Antarctica, the Arctic, or high Himalaya. The overboots added a third layer for possible conditions on Denali—like 40 below with additional wind chill. Even though I read on an online forum that you didn’t necessarily need overboots, we got them anyway. Listen to the climbing ranger or online forum? We chose the 200-dollar toe insurance. We definitely wanted to keep the toes.
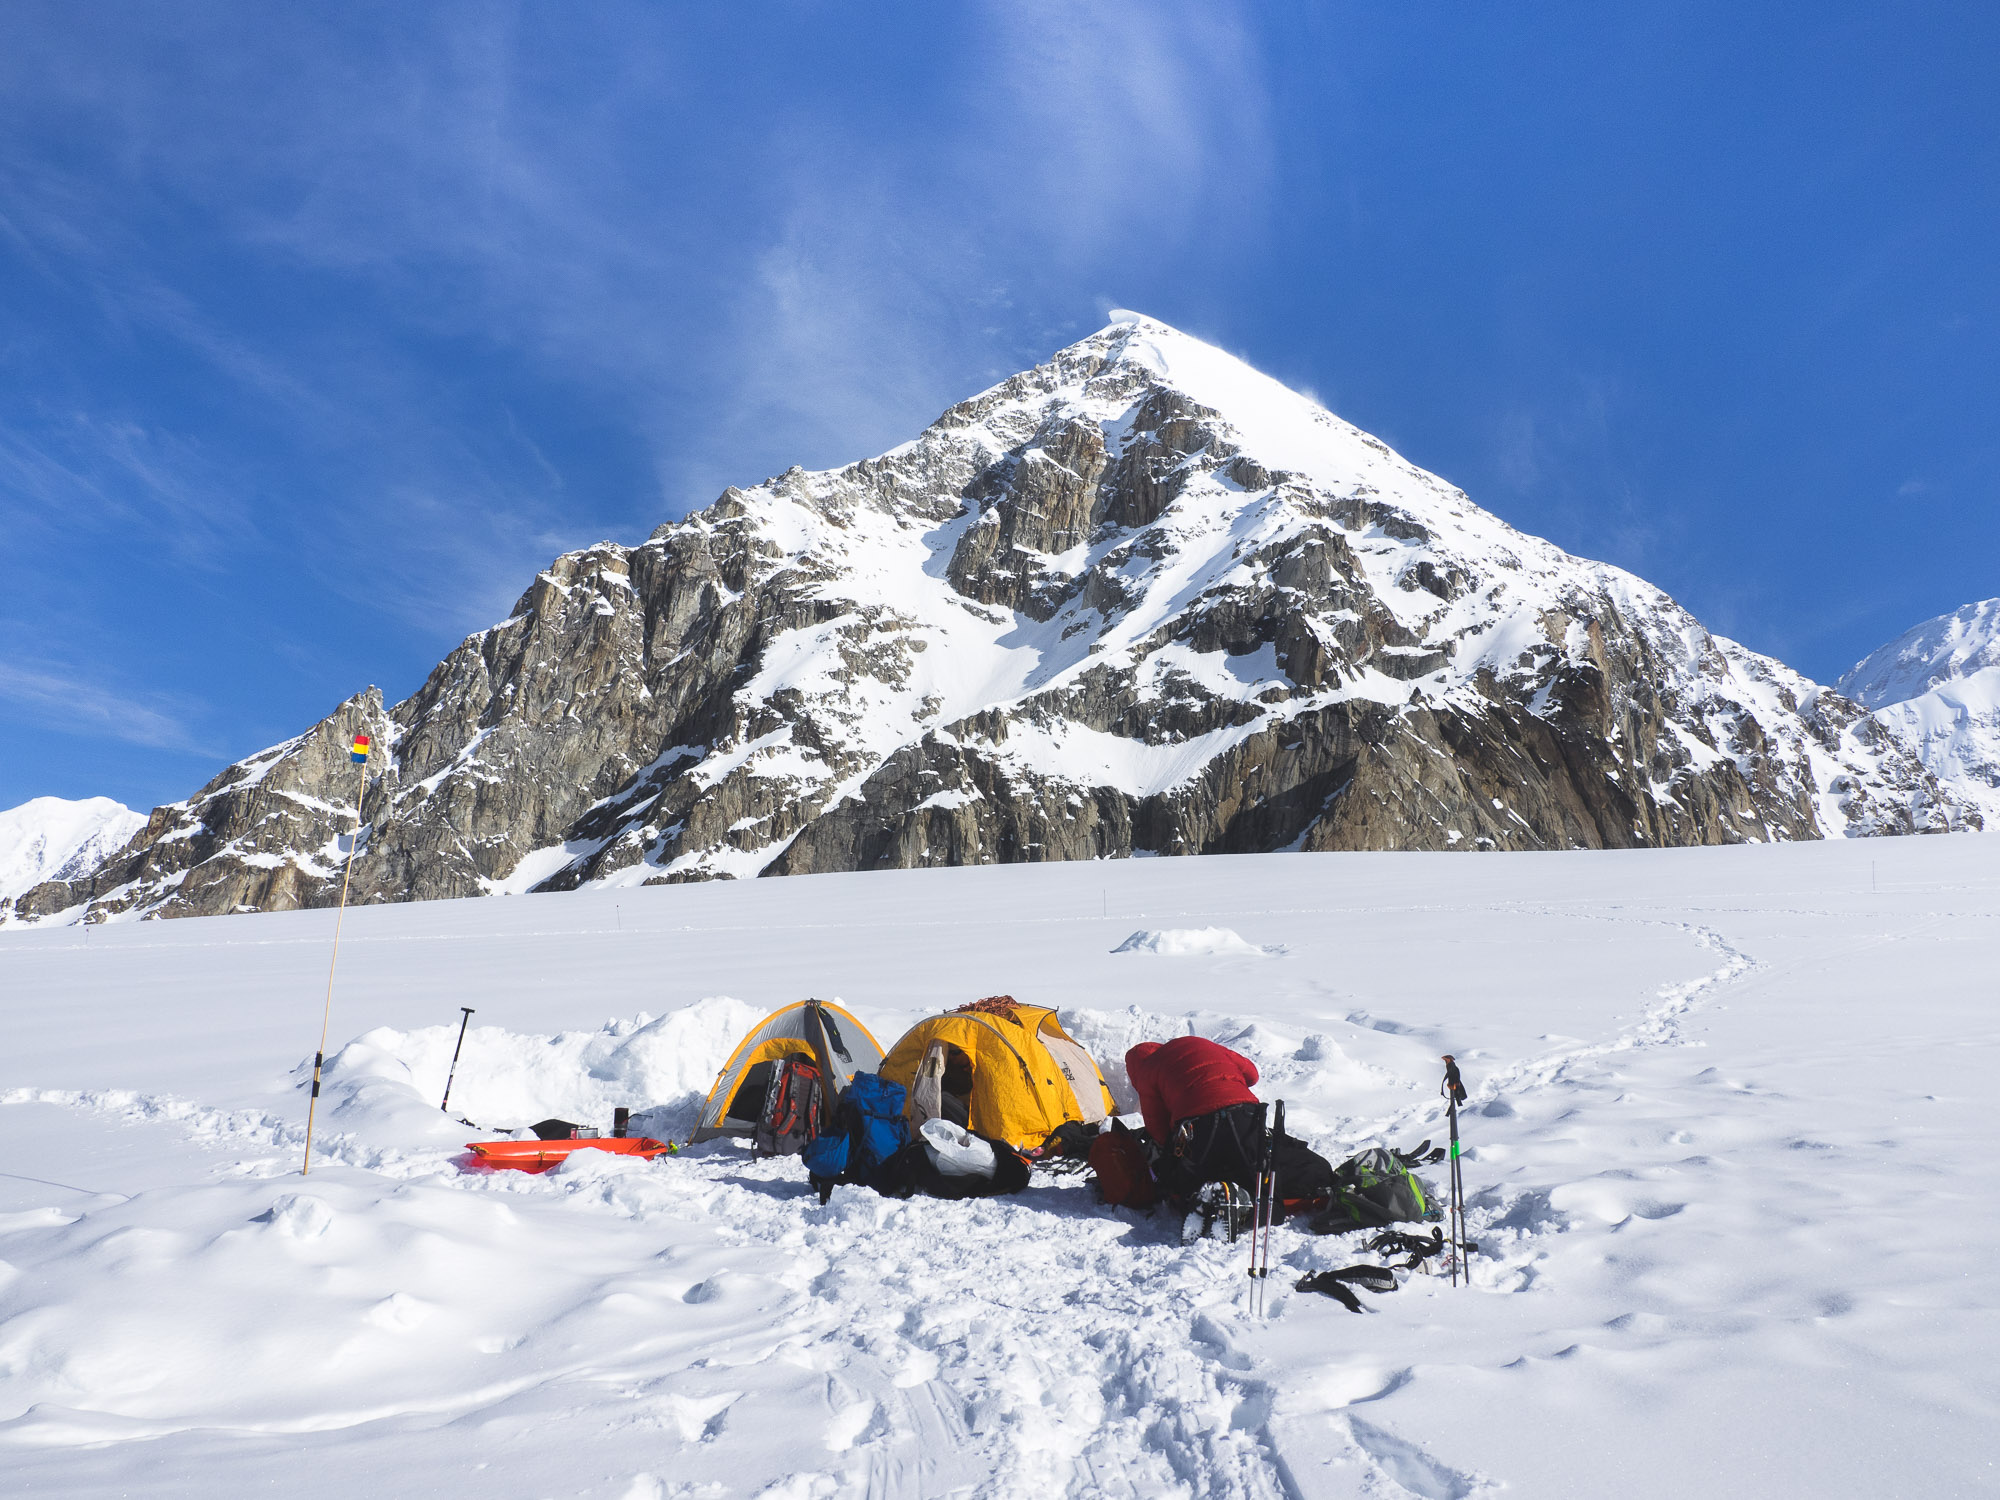
We got our gear sorted and packed in the Sheldon hanger. It was the most gear I’d ever dealt with for a trip by far—about 115 pounds per person. Too much gear it seemed. But we couldn’t throw any of it out because we really didn’t know what we would actually need. We had never done anything like this before. Dave, our pilot, told us we wouldn’t be flying out today. Time to settle in for the night.
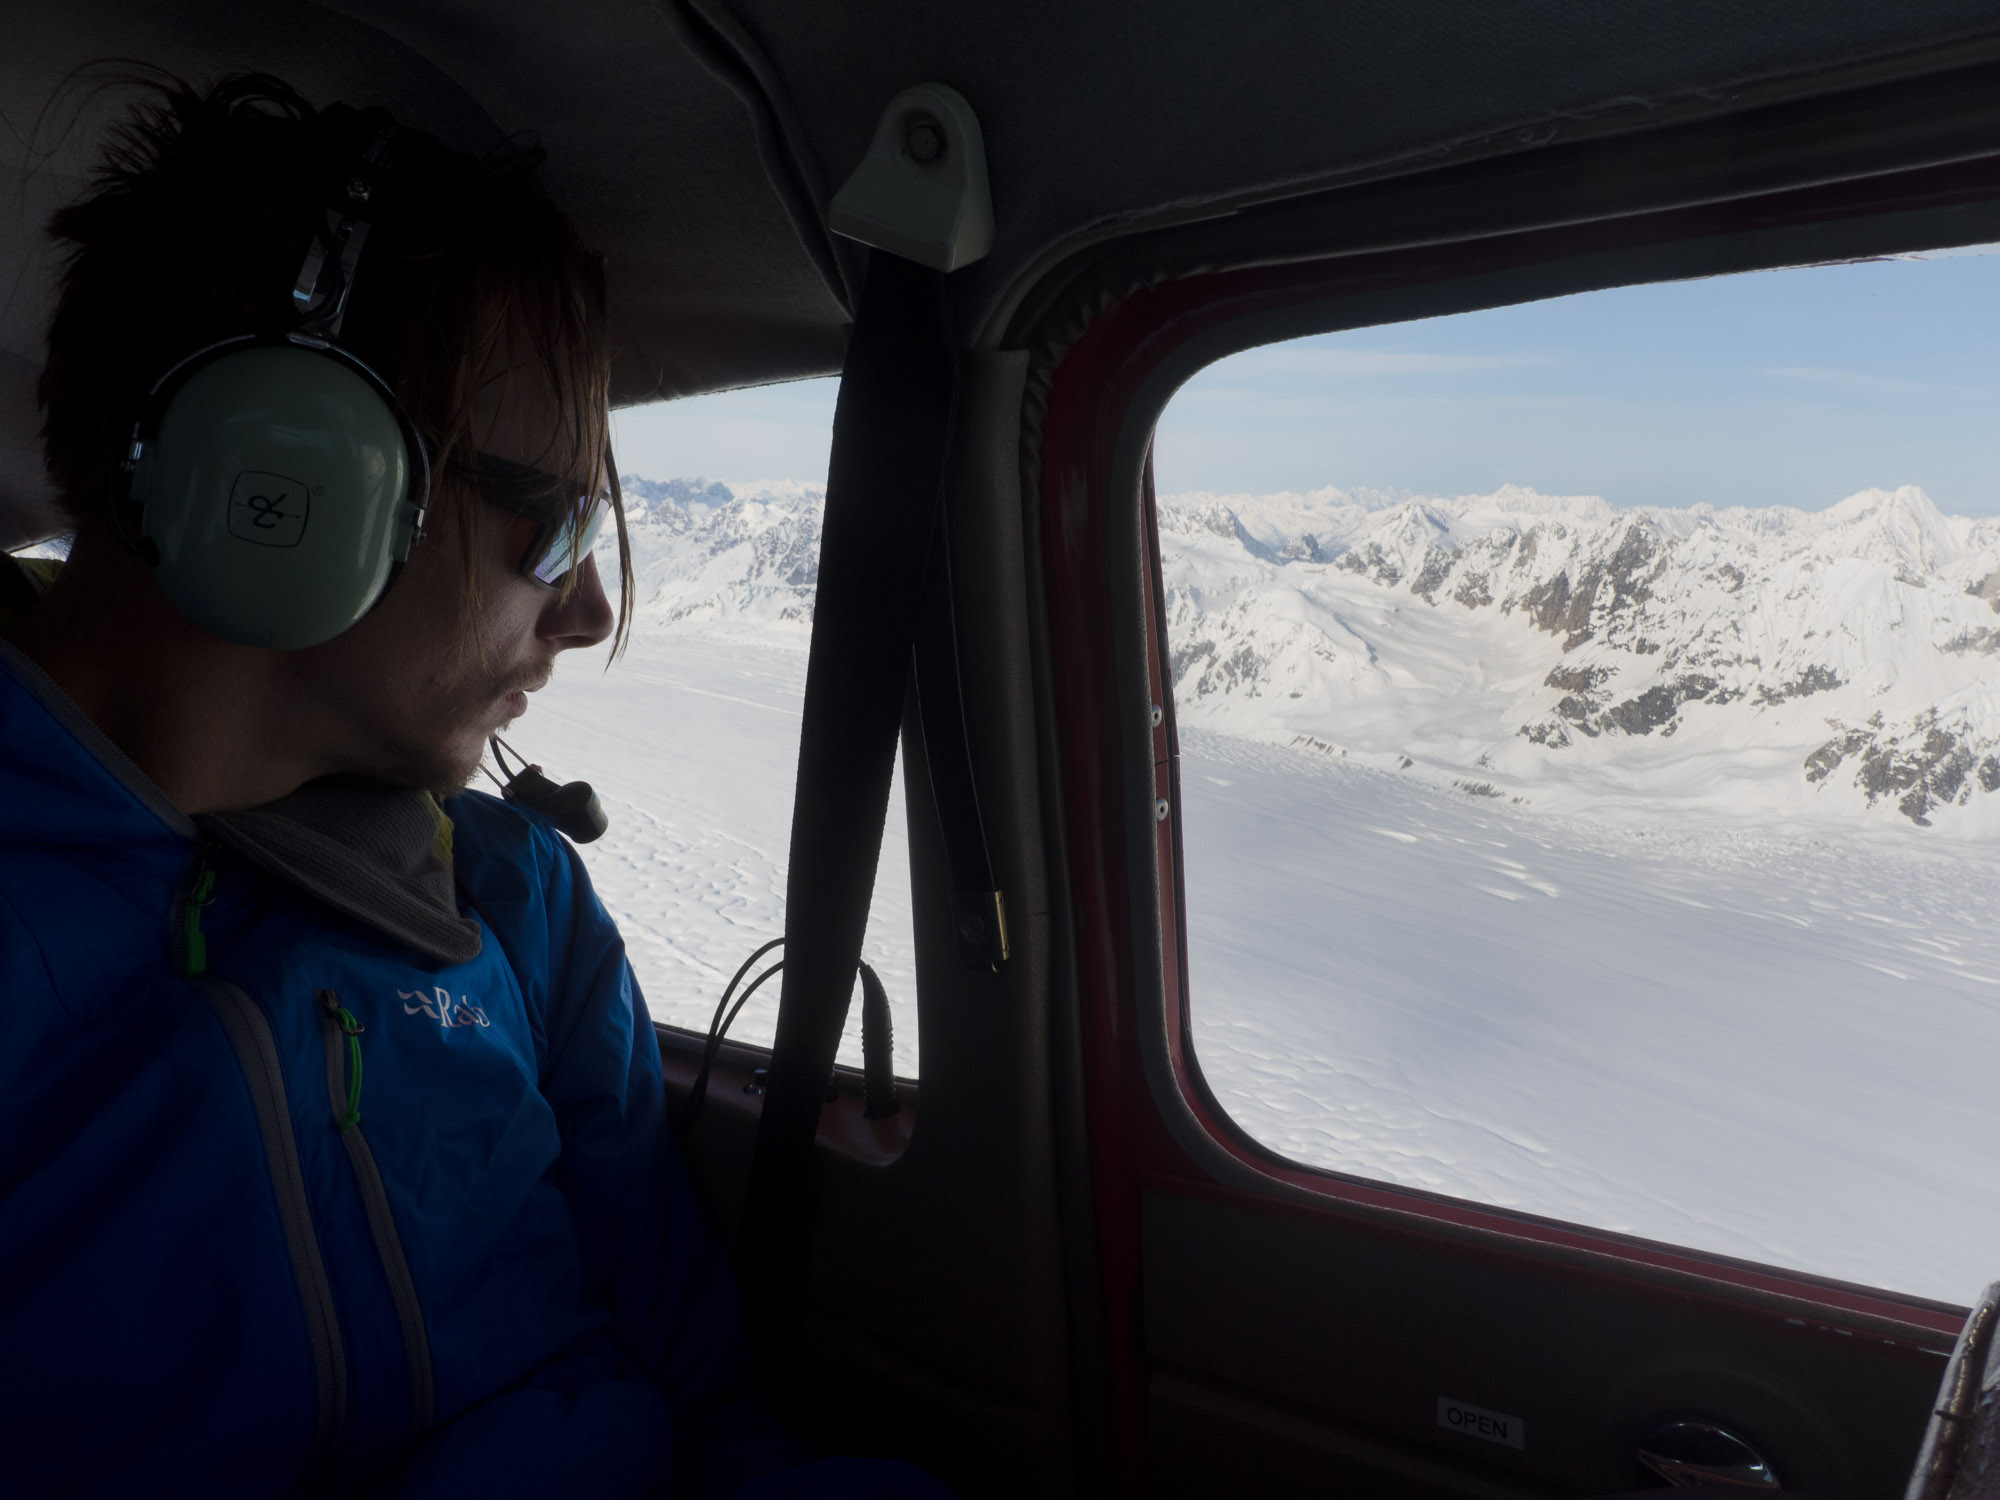
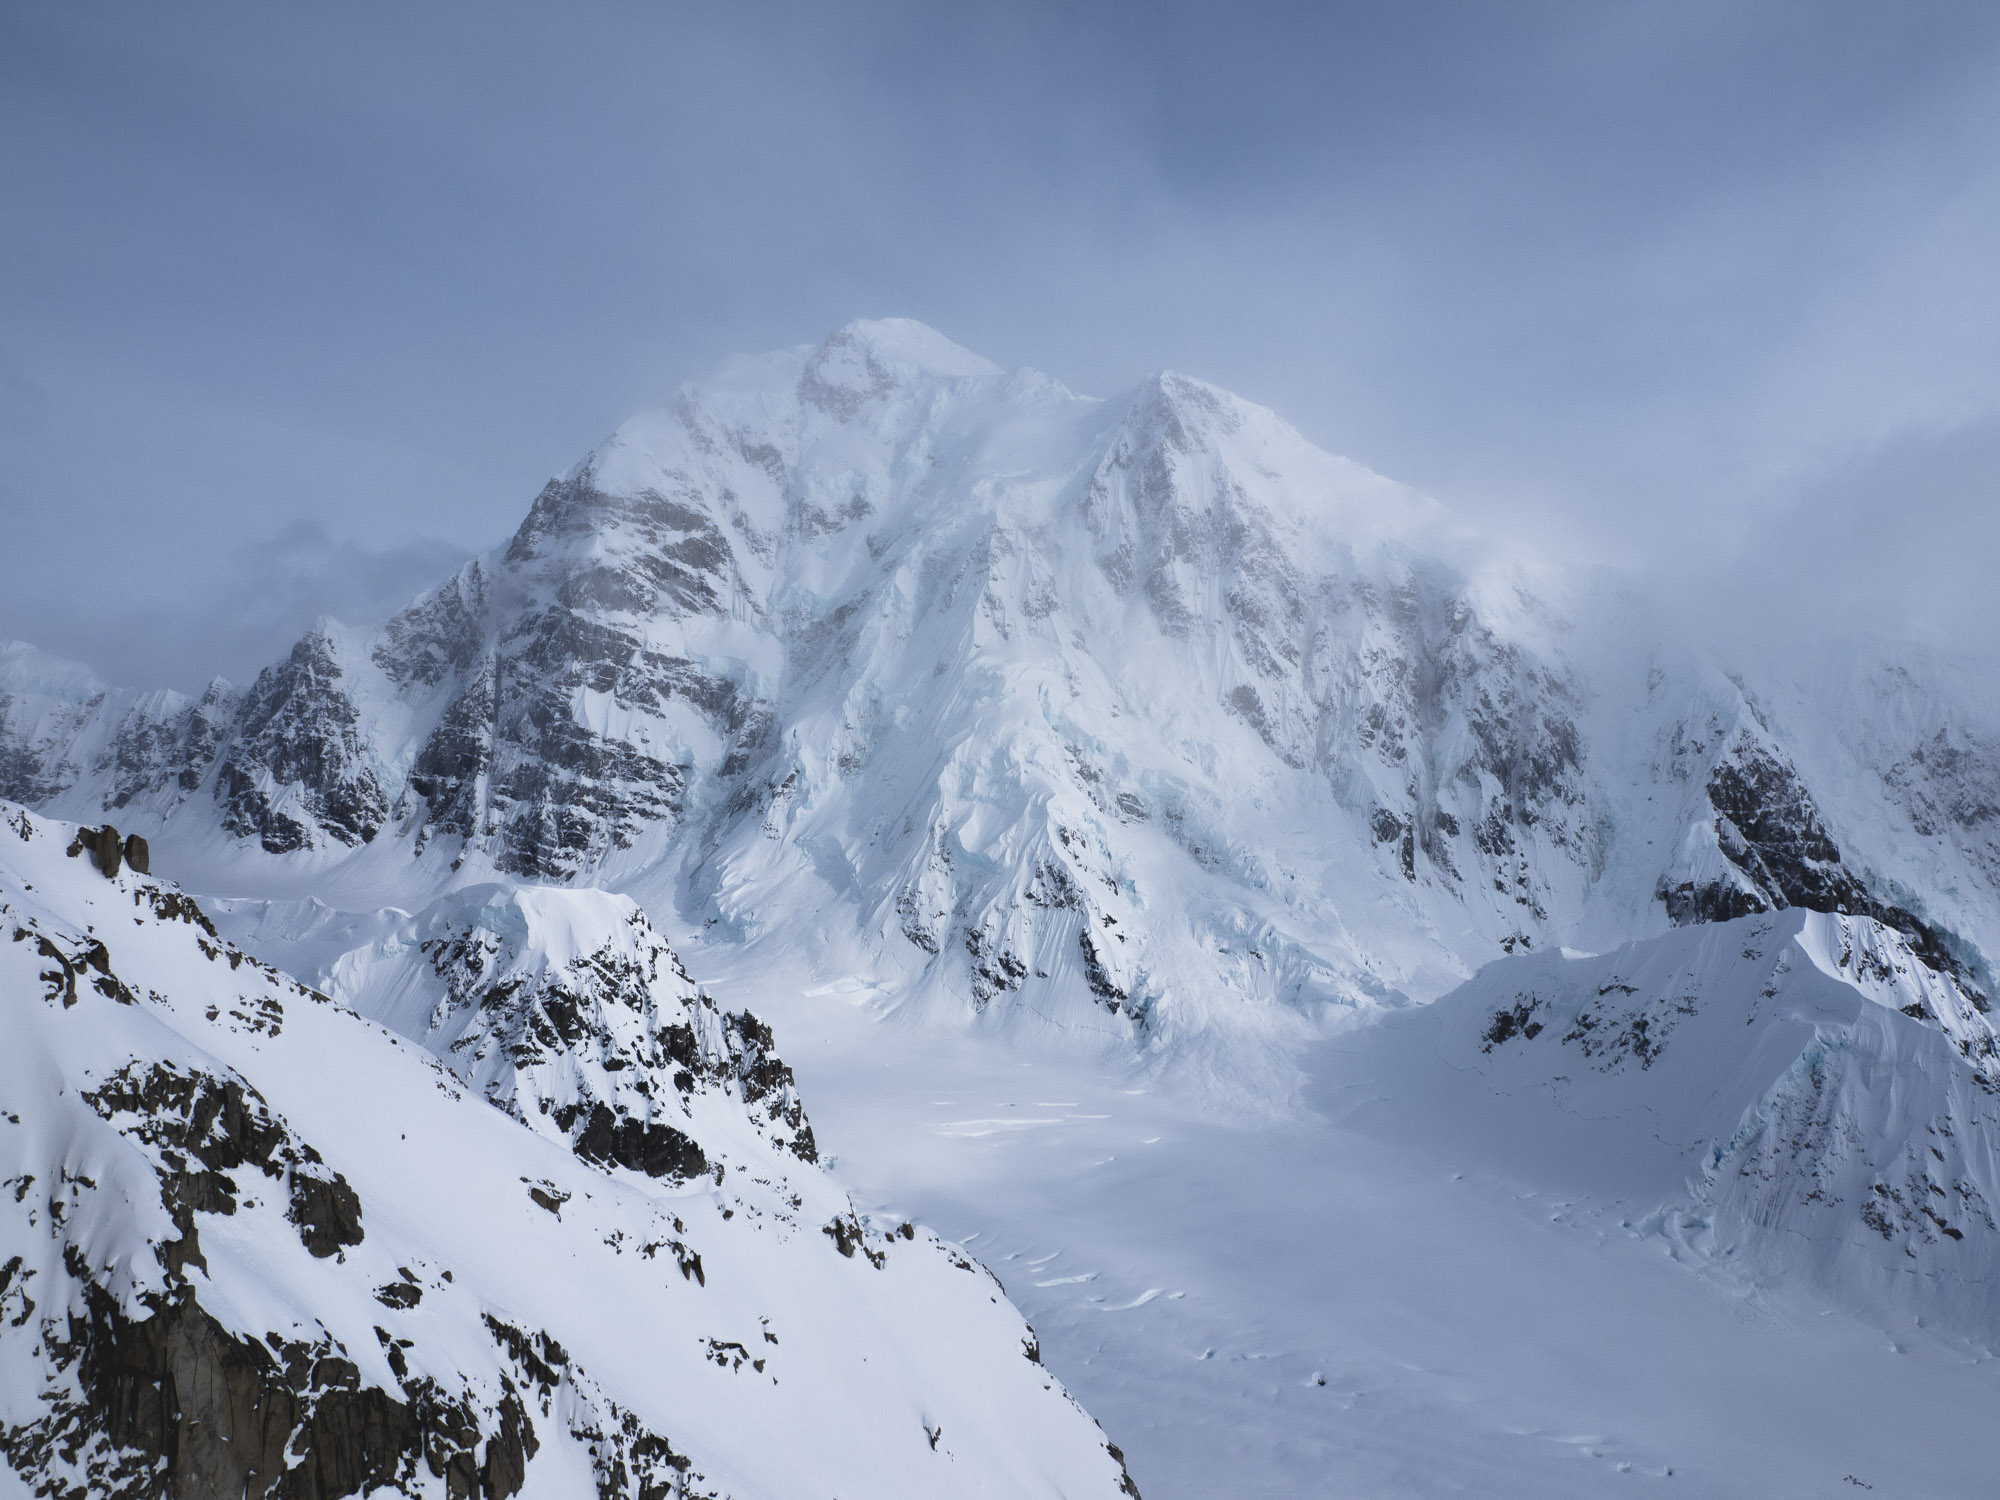
It was clear the next morning. Time to fly in. Dave’s plane was big enough for the three of us, our gear, and Dave. Nothing more. After he strategically loaded our 350 pounds of equipment in the plane, we all hoped in and Dave gave us headphones. We rolled around to the runway and took off. In an instant we rose above the trees, the Alaska range spreading immensely across the horizon—the first time we had seen it clearly. Holy shit it was huge and we were headed right toward it.
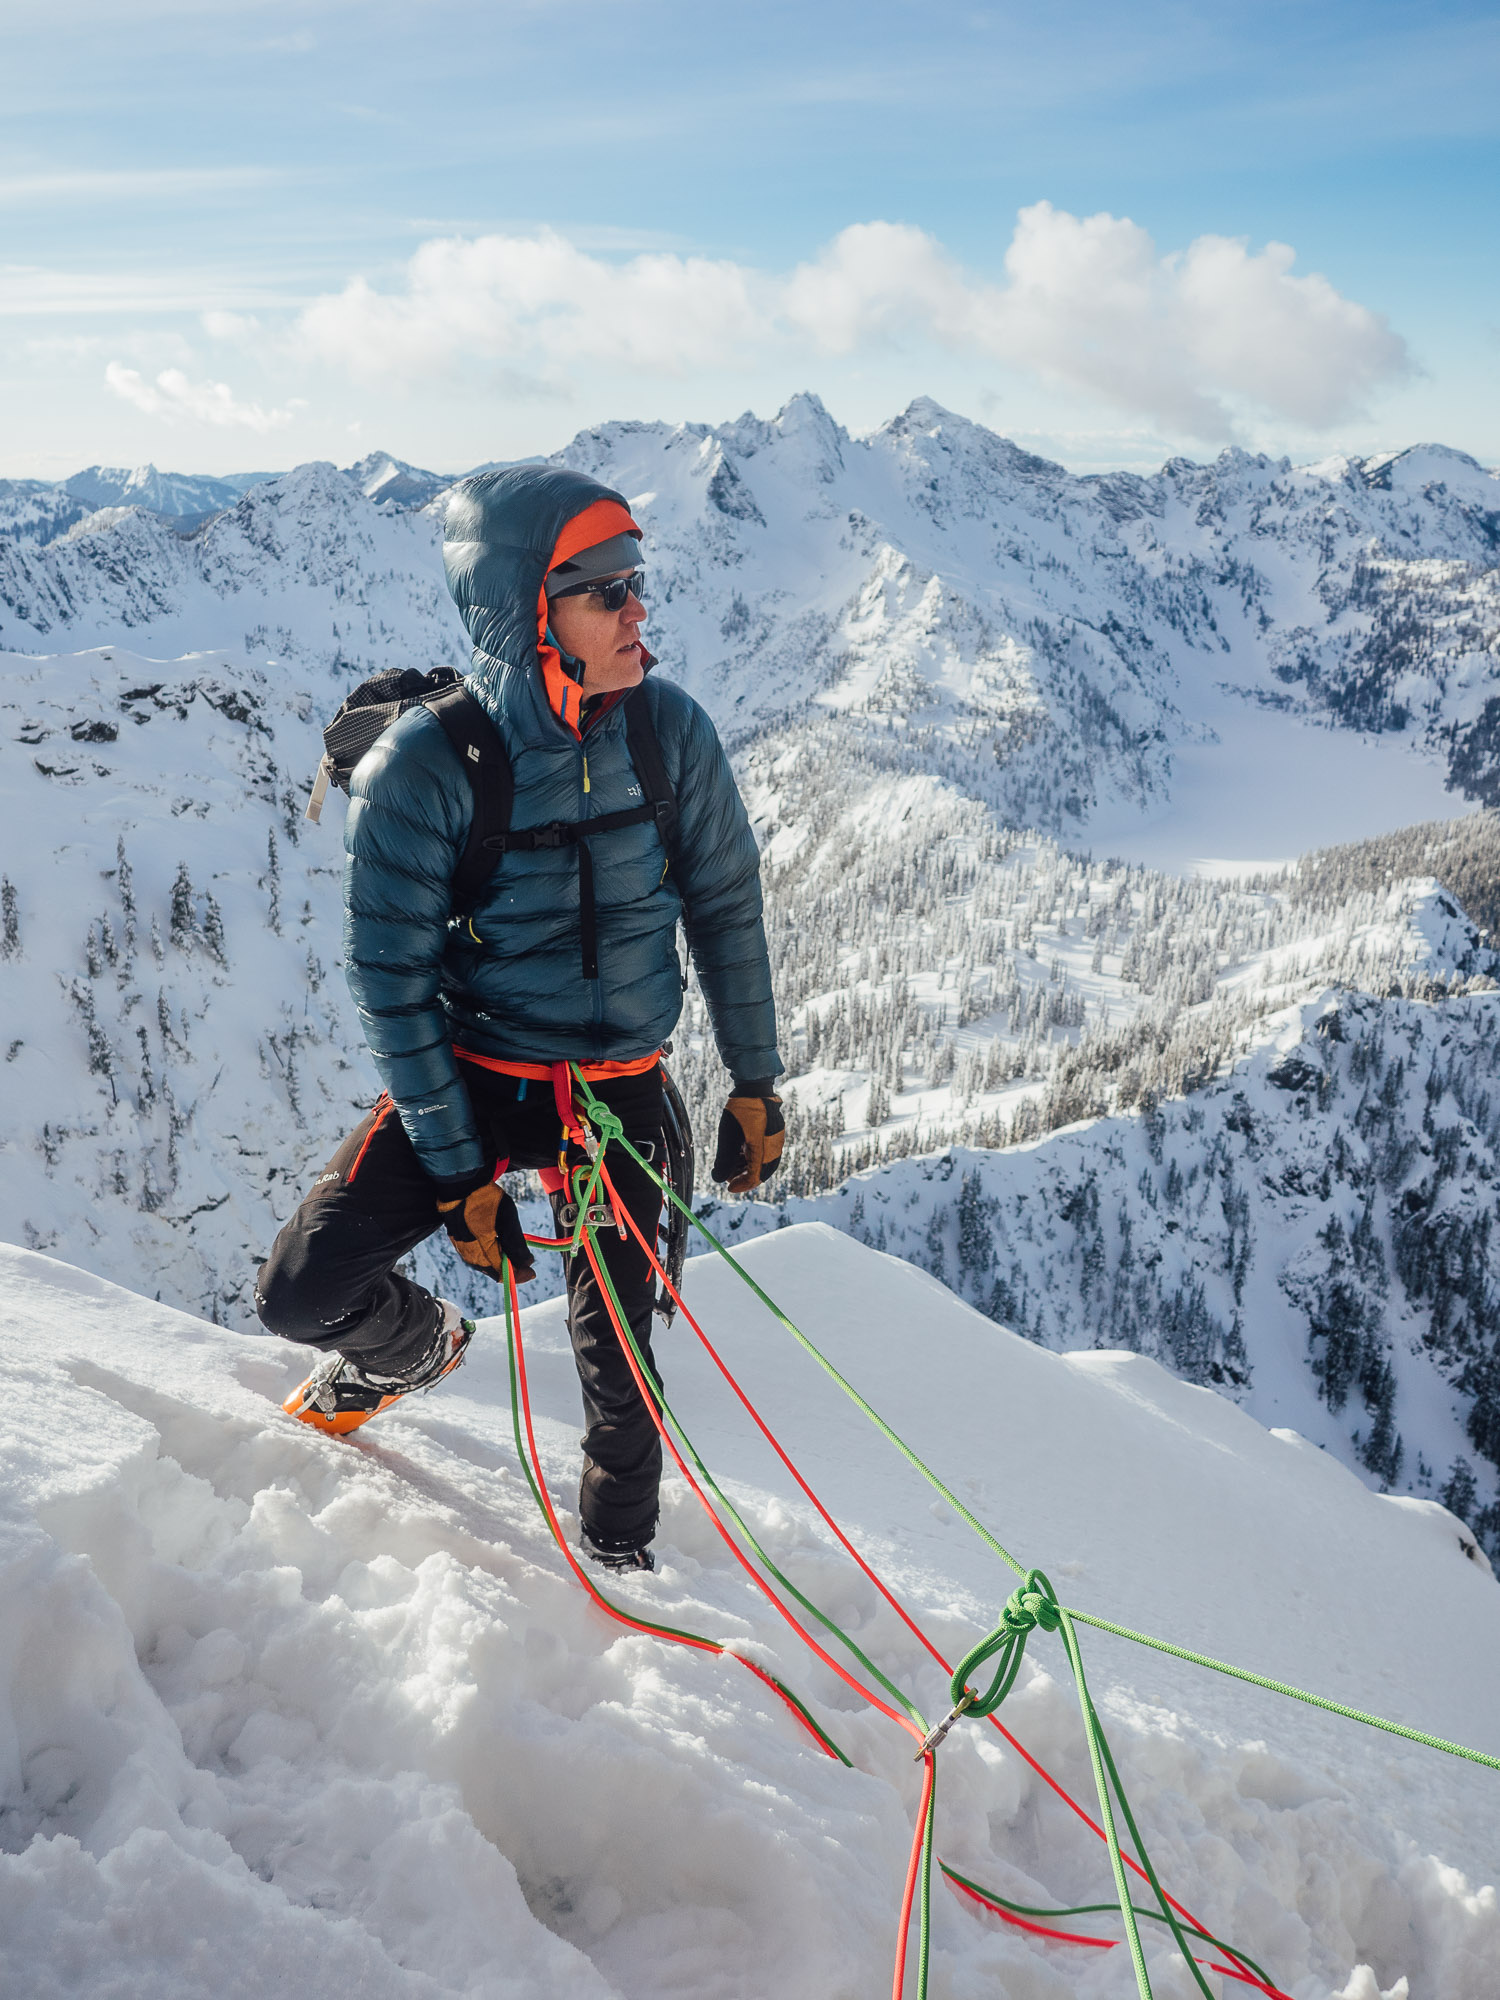
Dave dropped us off on the glacier the next day, a Monday morning, May 2, 2016. It was sunny, but the cold morning air hit us. Shit, it’s cold, and we’re only at basecamp, I thought. The sun warmed the glacier up a bit and after we set up camp we immediately left for the base of the Southwest Ridge of Mt. Frances—our “warm up climb.” We knew that you needed an early start but we left halfway through the day anyway. We were ready to climb. The climb was pretty big—3600 feet—and technical, but we were too excited to sit around. We could always bail, or so we thought.
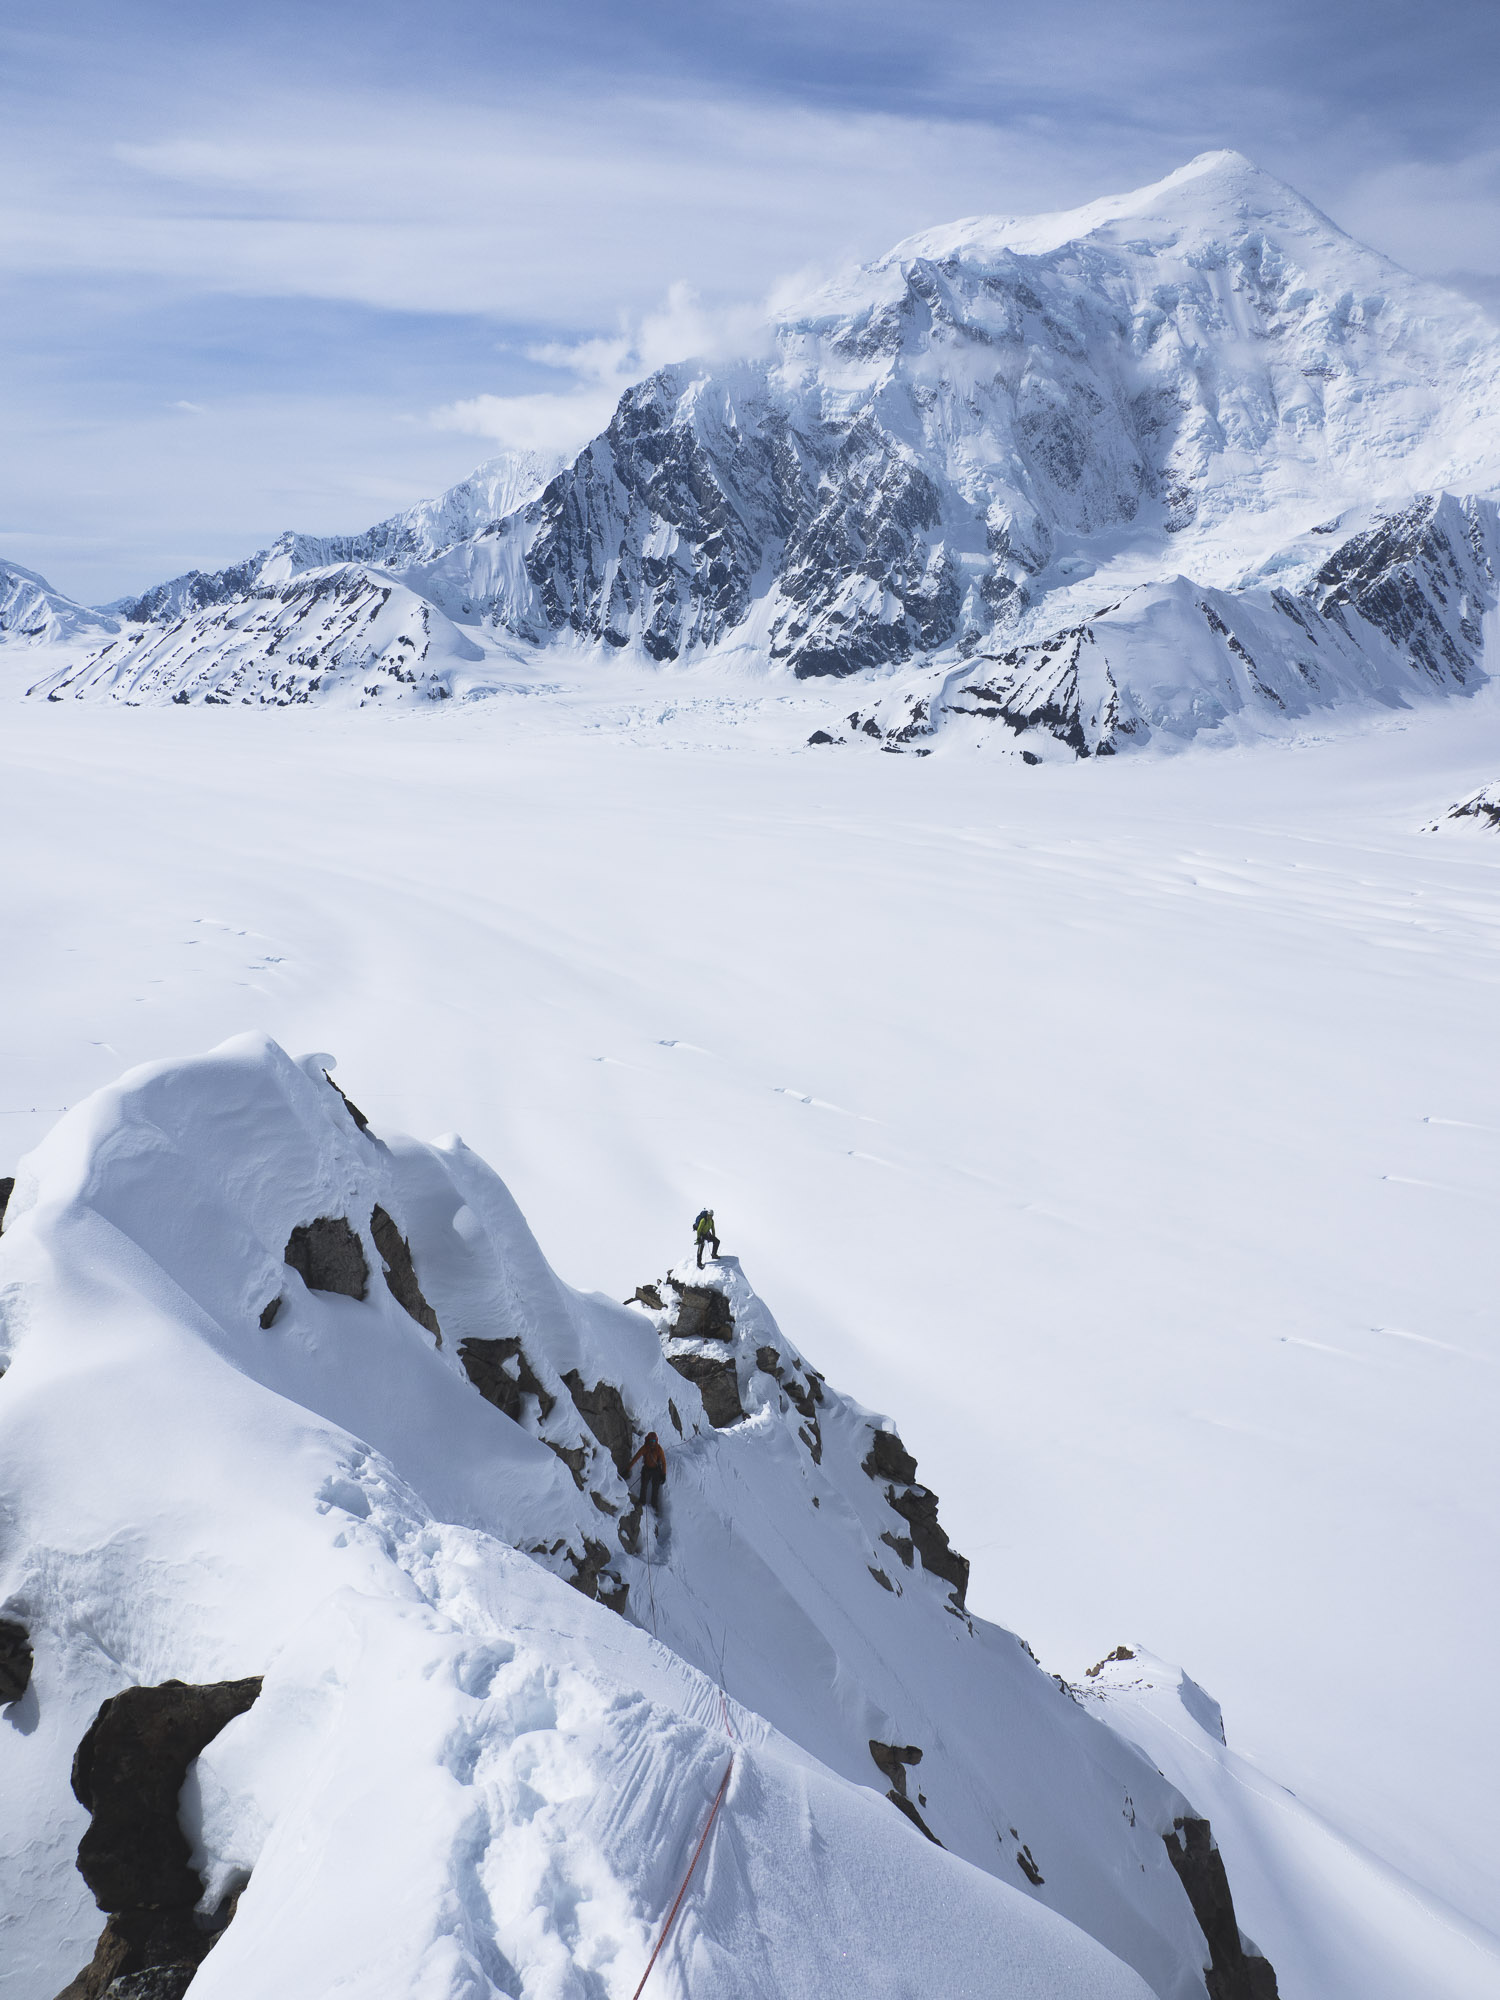
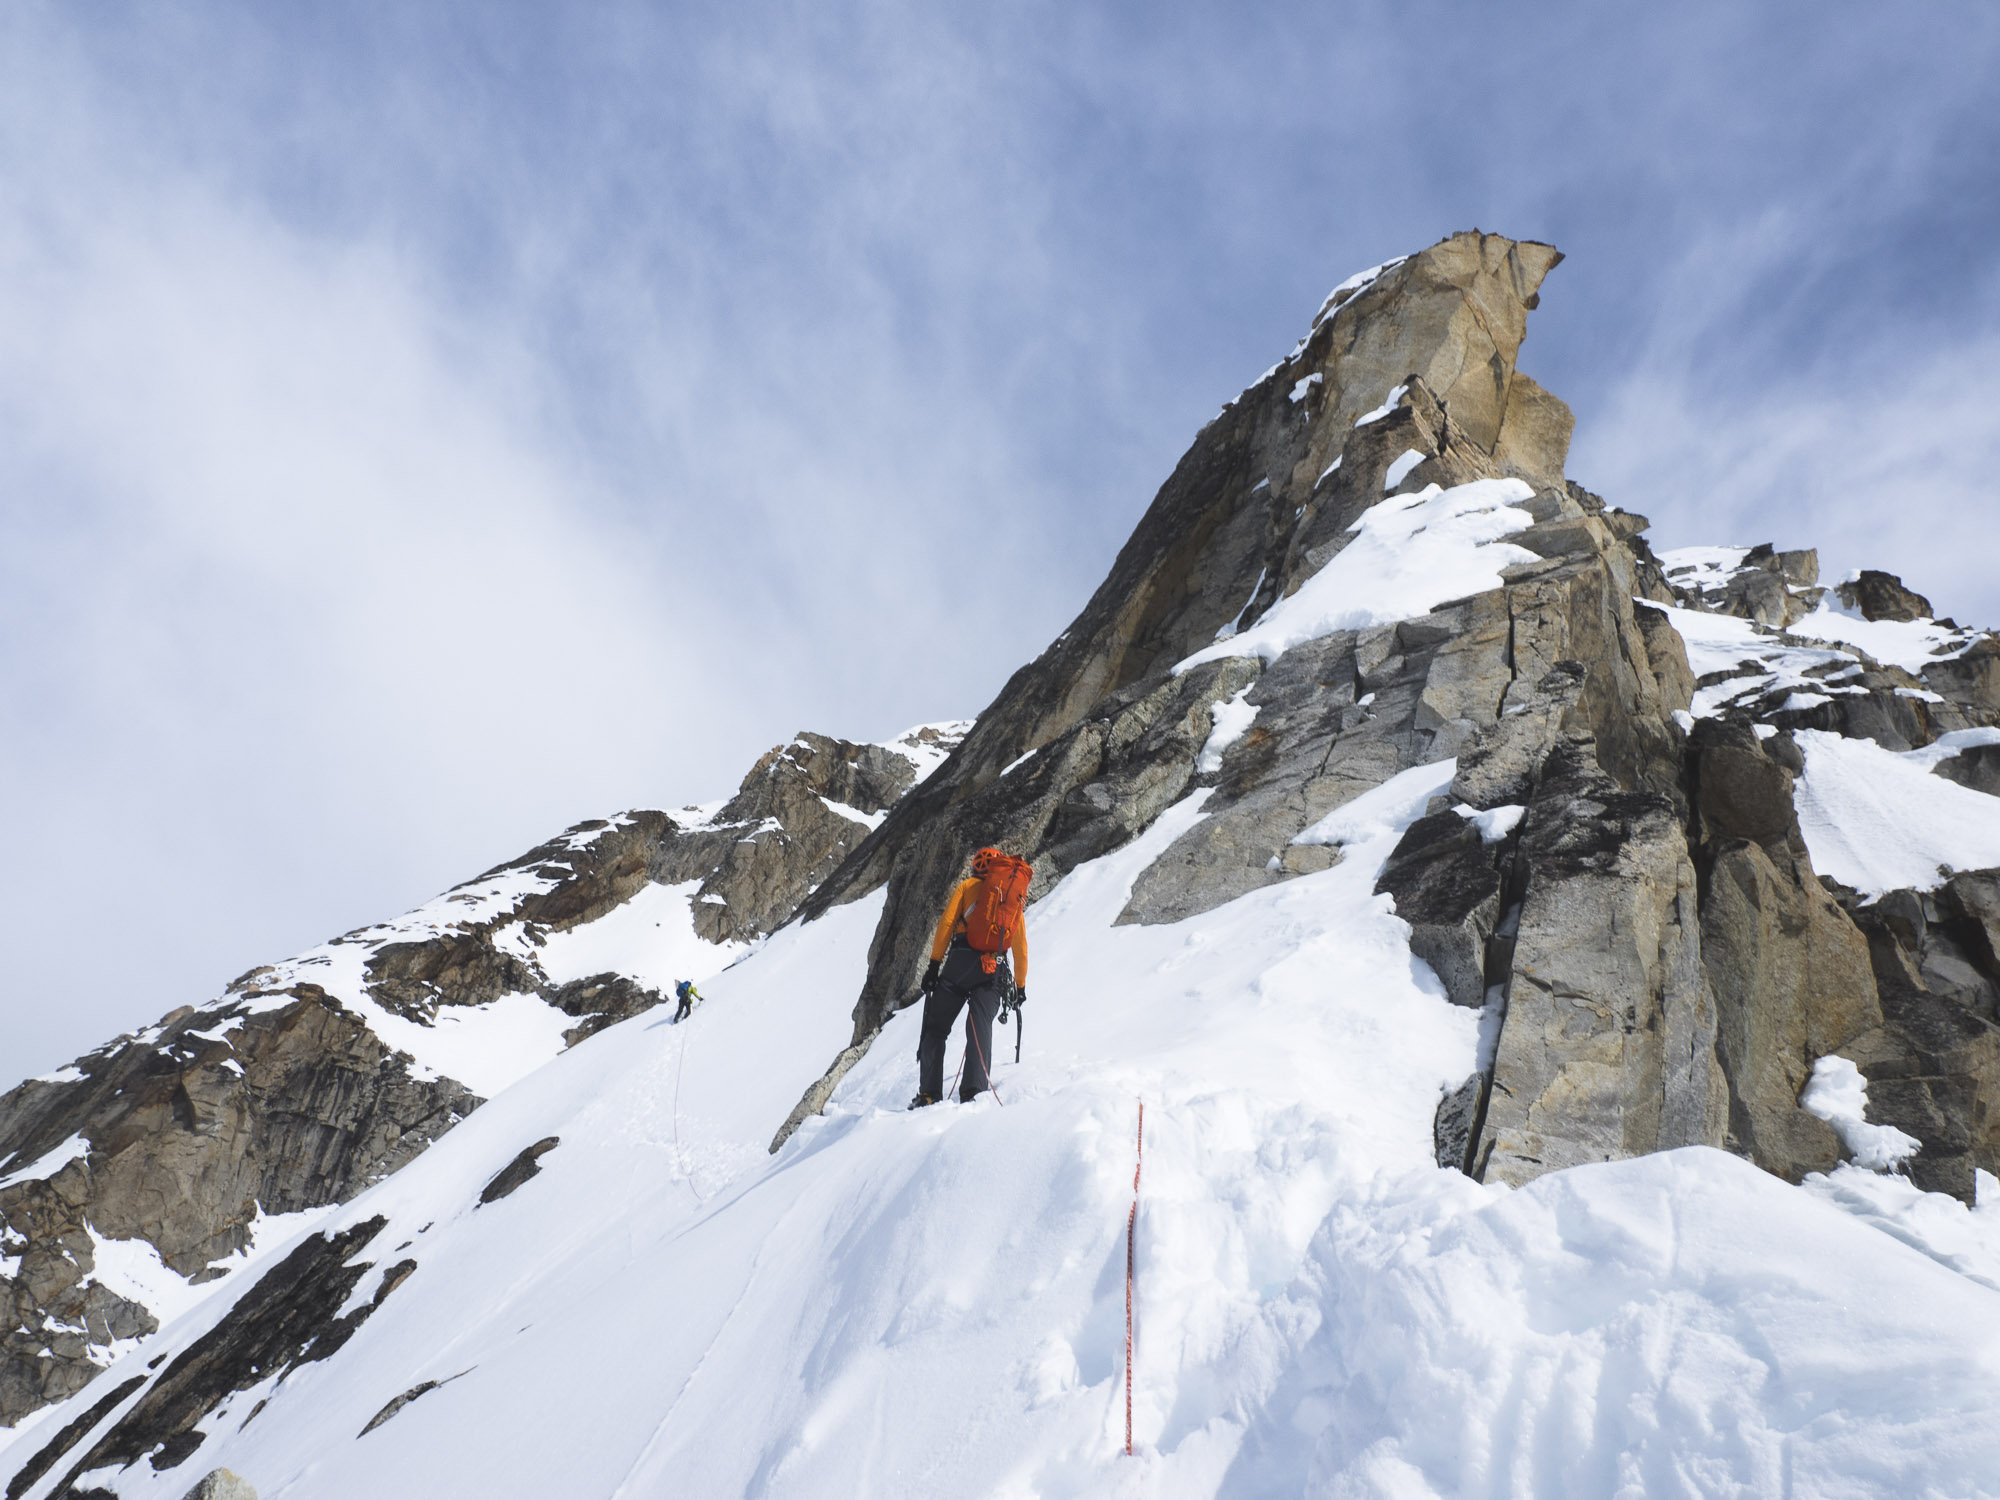
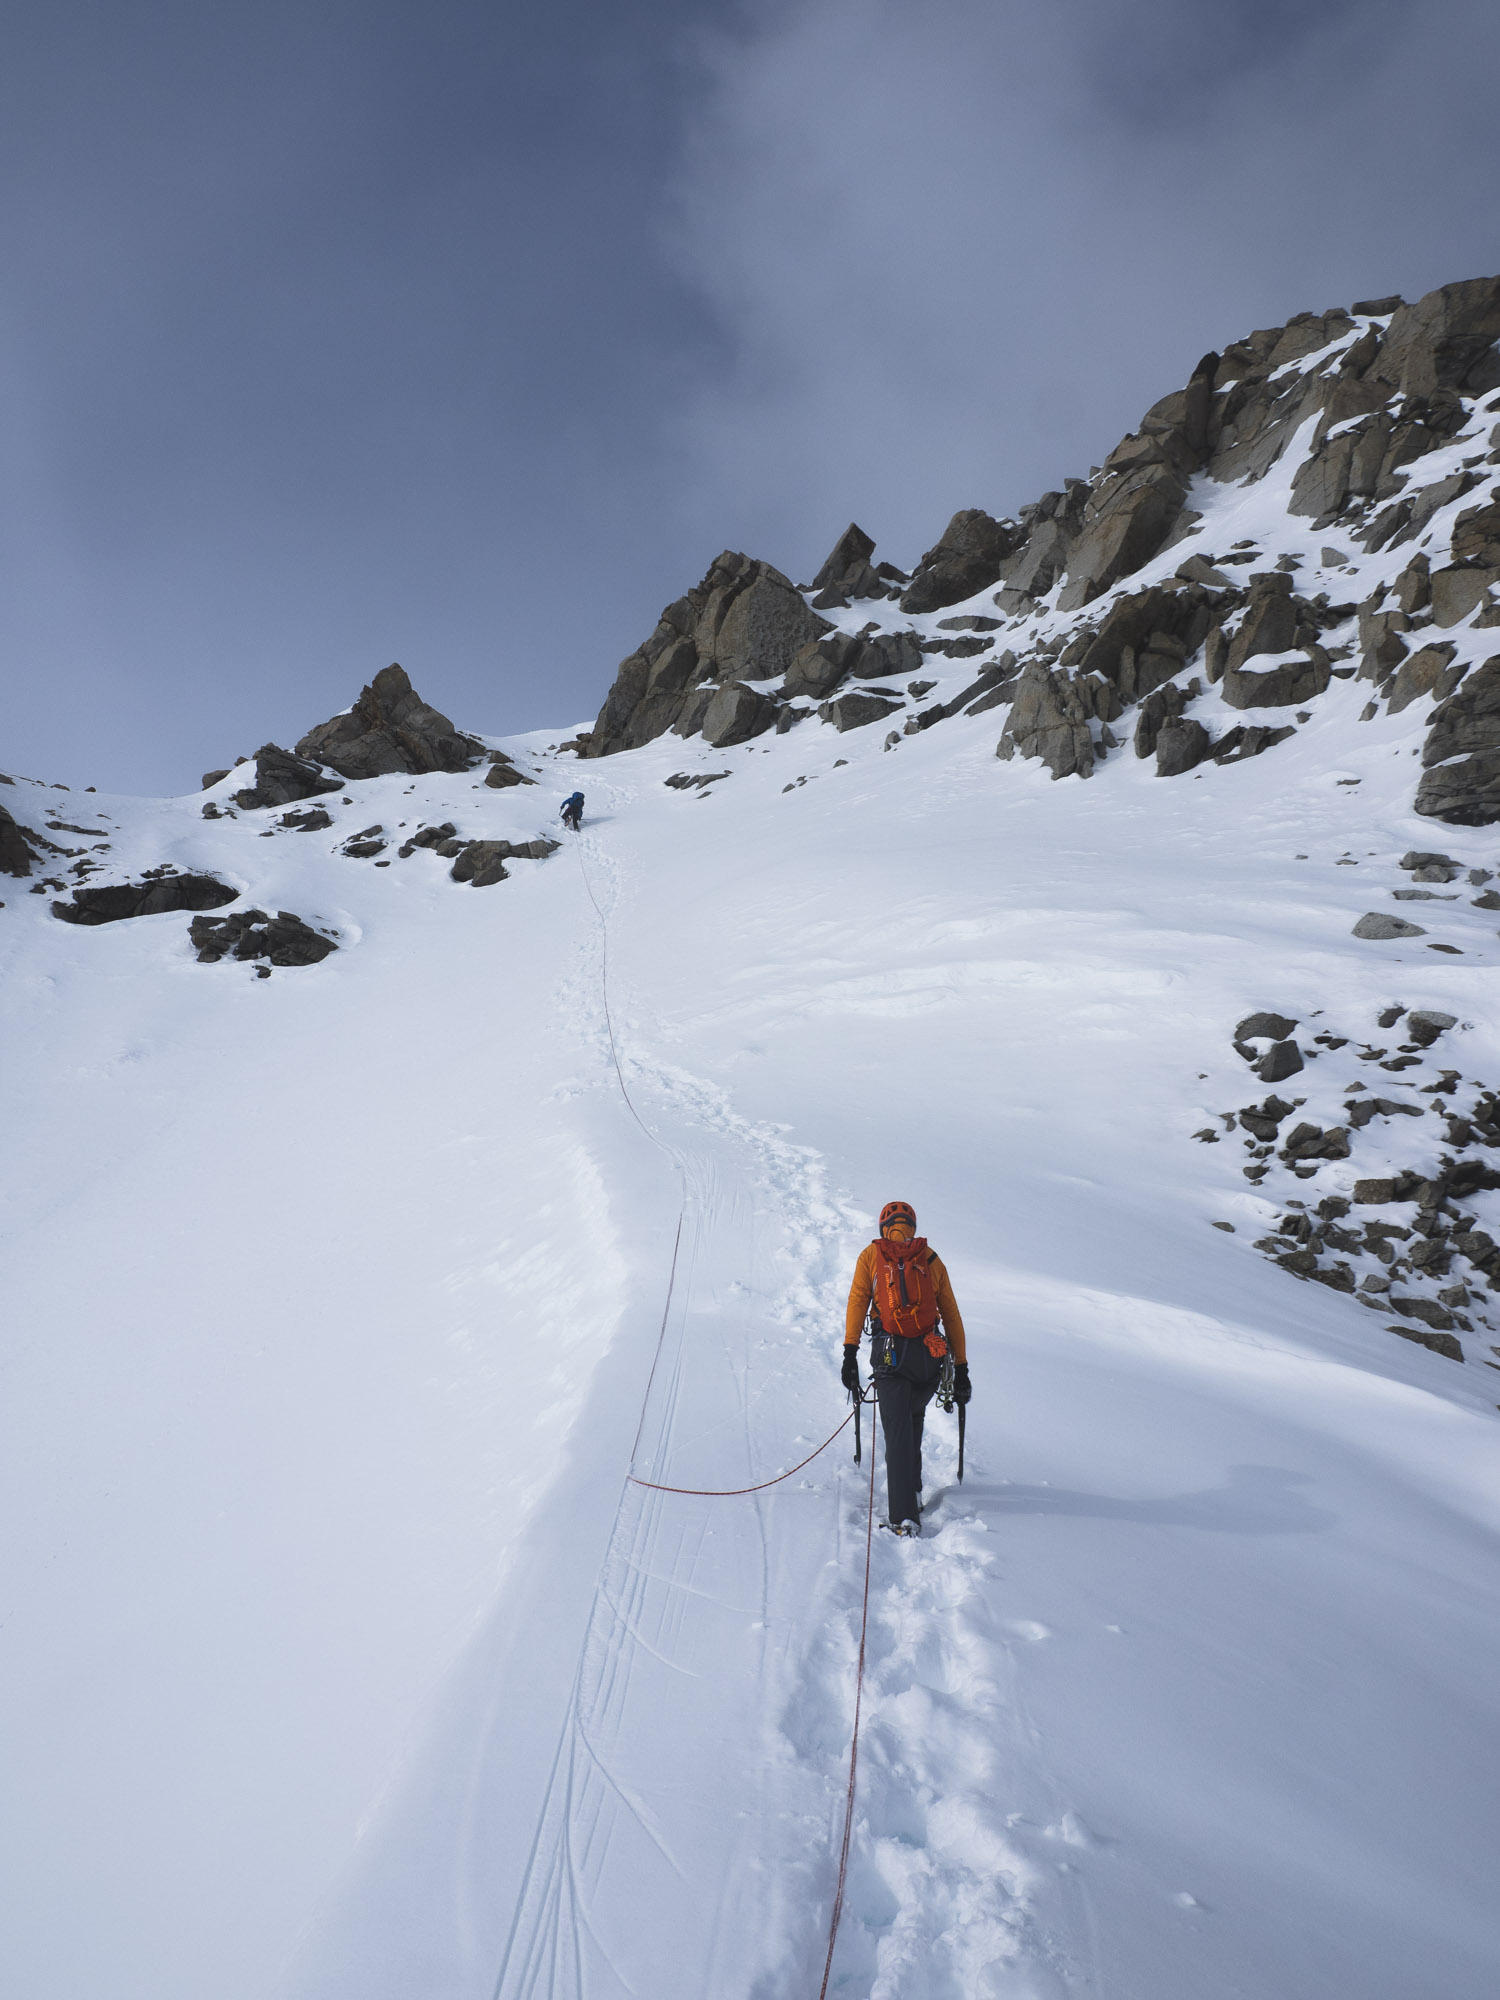
We simul-climbed all the way to the false summit, only 400 vertical feet from the true summit, in seven or eight hours. Matt and I alternated leads six times with Brendon always climbing in the middle. I took most of harder rock portions and Matt took most of the harder snow portions. We simuled right through the 5.7-5.8 mixed rock cruxes pretty easily in our big boots and crampons. We moved fast and it felt good, though the length was beginning to worry me. It was about time to be on top, but the ridge kept going and going until we hit the false summit cornice. Clouds moved in, the visibility diminished, and it started snowing. Moving under the huge cornice—an overhanging mass of hardened snow—I couldn’t help but imagine it collapsing and swiping us off the mountain to the glaciers 3000 feet below.
I was pretty sure we needed to get around the cornice to the right, but Matt saw a boot track leading up to the left.
“Are you sure we should go right?” Matt yelled. I thought about it for a second and remembered seeing photos of climbers moving to the right when they reached the cornice, but in my anxiety I questioned myself. Why was there a boot track up to the left?
“OK, let’s try to the left,” I caved. We traversed across a small ledge above a steep snow slope above a cliff that I couldn’t see the end of. The cornice was overhanging above us. There’s no relief, I thought. I put in my last ice screw and realized I needed more, so I had Brendon and Matt join me on a wider portion of the snow ledge so I could get more gear. Matt was freaking out and wanted to turn around. Brendon and I, more internal compared to Matt, were trying to keep it together.
“Let me check it out a little farther,” I said. Brendon agreed and Matt was out-numbered. I walked a few steps and peered over an edge. The snow ledge disappeared. We would have to turn directly into the cornice, facing it, and traverse its near vertical ice face to continue.
“How does it look?” asked Matt.
“Not good.”
“Ok, we’re turning around.” Matt turned around and blasted back toward the snow slope.
“Wait, Matt, you should take these screws and a picket,” I yelled.
“They won’t do anything.”
He was probably right, but even suspect protection gave me some peace of mind. Again I was imagining sliding off the mountain. I can’t be doing stuff like this. I thought of Liz and shivered.
We weren’t going to try going around the cornice to the right. We were done. Our morale was gone. The weather was deteriorating. It was snowing and getting dark. It wasn’t fun anymore. We just wanted to get off safely, even though we were close to the summit. Instead of going back down our route, we down-climbed a 2500-foot couloir and hoped it wouldn’t slide. We stayed rope together so we could find each other if it did. Eventually we were down and back to our tents after 12 hours of non-stop climbing. A nice warm-up, we thought. Welcome to the Alaska Range. Now, onto the real climbing…
New York Gully
New York Gulley has been one of the main objectives on the winter ticklist for us. It was potentially the perfect route with serious and interesting climbing to do in decent time Seattle-to-Seattle. We were a little too eager to climb it this season. Excited from the early cold temperatures in December, we climbed the first pitch of the direct variation, but decided to bail due to slow, precarious movement on a route that was not in condition.
After a very busy holiday season, we were finally able to attempt it again last Friday, the fateful inaugural day, which was declared by him we shall not name, “National Day of Patriotic Devotion.” I’m not sure we had our priorities straight that day. We made it to Snoqualmie Pass and found that freezing rain and wind had obliterated the area. No one had been up there for days. All the lifts were closed. We started putting in a skin track through 5ish inches of heavy snow sitting on a layer of ice. The ice was causing us to slide around everywhere. We were moving incredibly slow. Too slow. And it wasn’t fun. We bailed after not making it up even a quarter of the approach.
Third time’s the charm, right? We decided to go for it again just a few days later, on Monday, January 23rd. Travis was at my house at 7:15am after dropping his two-year-old, Sawyer, off at their nanny’s. Being the main caretaker of a toddler while his wife finishes up her residency is wearing on Travis a little, to say the least, and making it difficult for him to get into the mountains as often as he’d like. But we were thankful that he has a great nanny who will take his son as early as 7am. No alpine start, which means we needed to move efficiently. We were at the Alpental parking lot around 8am and found slightly better snow conditions and a skin track. Things were looking a lot better for us. We left the truck at about 8:15, skinned up a couple thousand feet of elevation, making it to the ridge over-looking the intimidating north face of Snoqualmie Mountain at about 10am.
We ditched our skis and descend down below the face and then slogged up to the base of the exposed snow ramps that marked the beginning of the route. When I pulled out my crampons, I realized I had grabbed my wife’s set and that the straps were cut too short to fit over my ski boots. I threaded the strap through the toe and immediately back to the buckle, leaving the other side of the heel loose. Amazingly, the lip on the heel of the boot was enough to keep it secure.
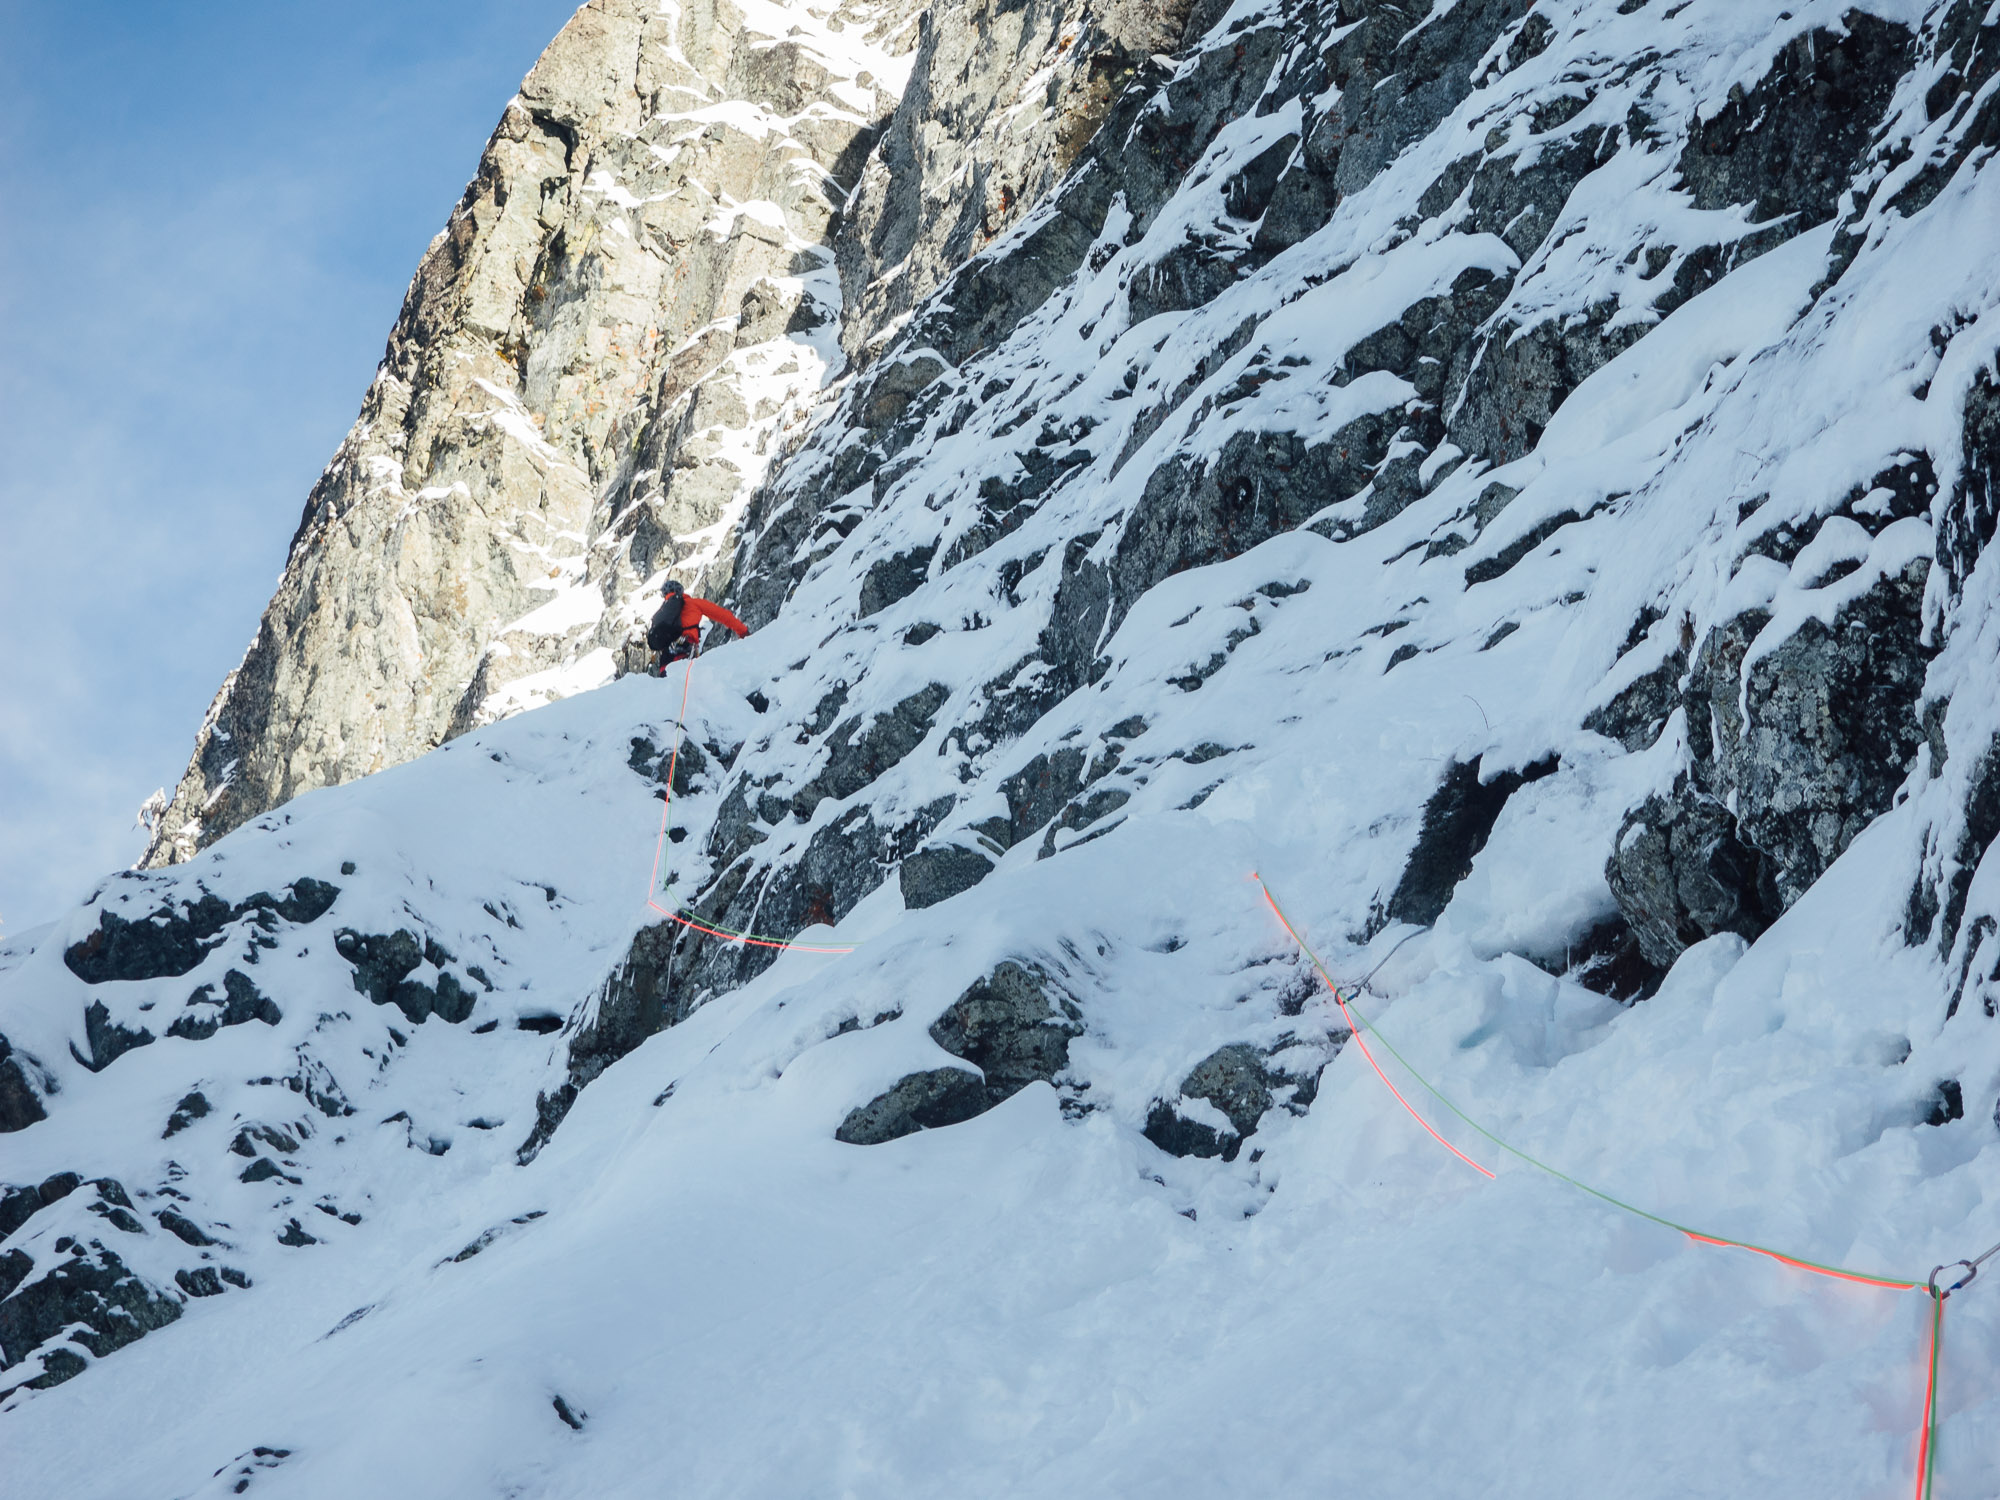
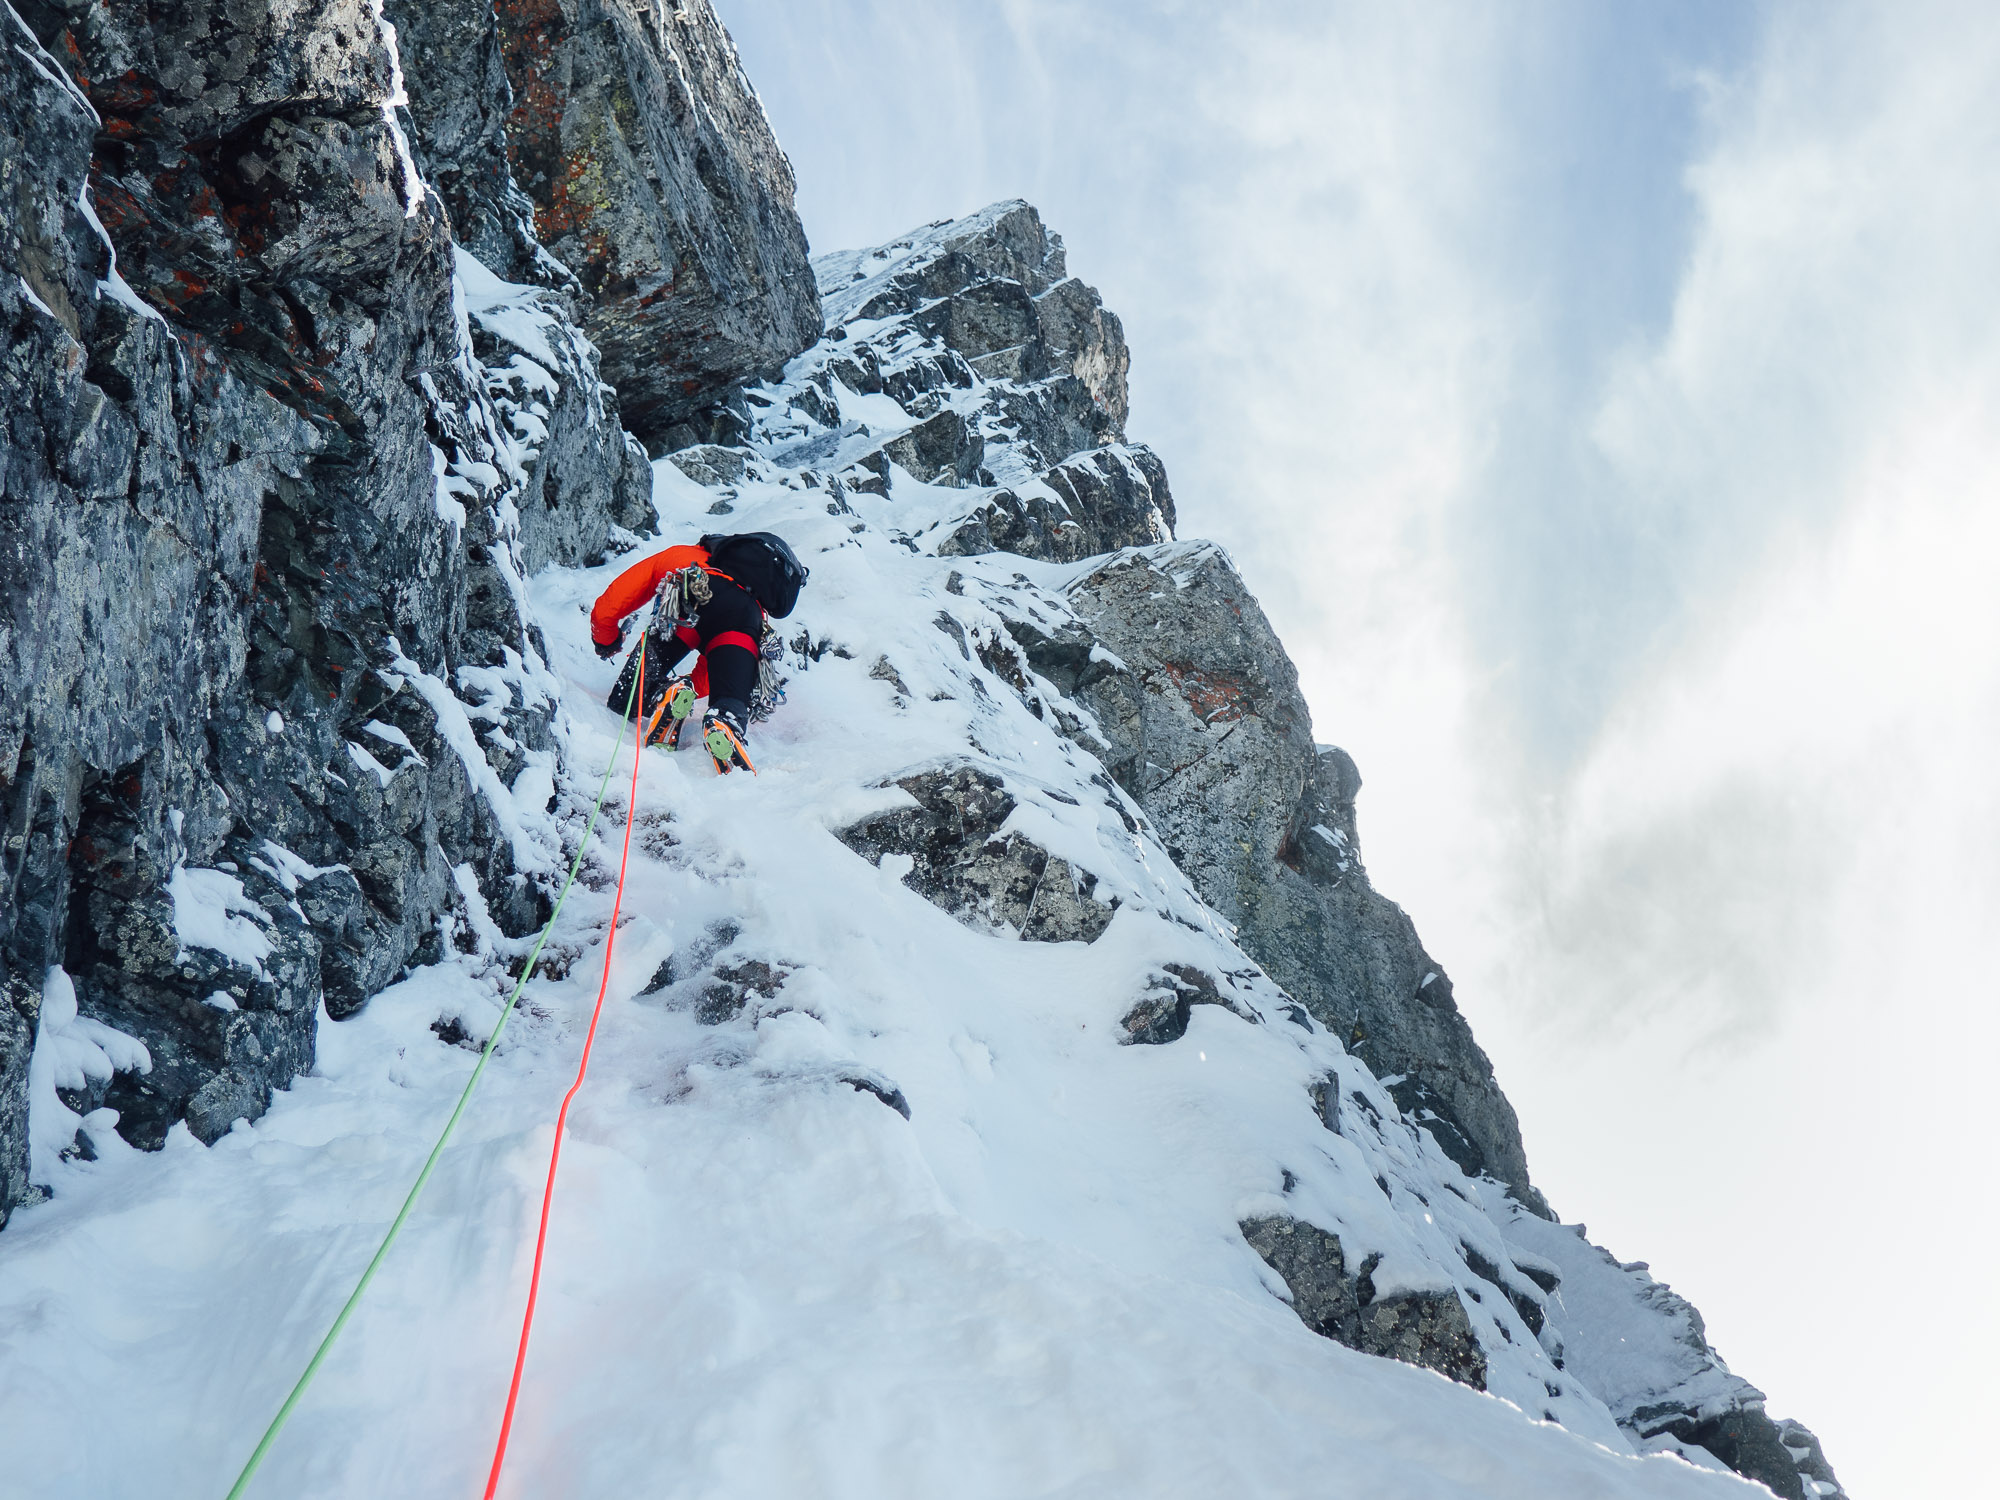
I led the easy first pitch, probably 50-60 meters, placing one cam. Travis led the second pitch, a traverse to the left with an occasional short steep step, bringing us to a belay off a dead tree at the base of the main bit of the route—a steep rightward leaning ramp. Because I'm new to this kind of climbing, Travis took off again. He made quick progress, finding decent protection and several fixed pins. Around 40 meters up, on a steeper step, his pick and front points blew at the same time and his body silently fell backward. The rope started pulling though my belay device. I grab it, brake it, and get pulled into the snow in front of me. “Are you alright?” I yell up to him. I think I hear a “yes,” as Travis slowly gets back up and starts to climb again. An old pin held his fall—his first alpine fall, a fall many people never take.
The climbing on the third pitch was steep and interesting, involving all kinds of frozen stuff to poke, and a bit of rock grabbing as well. Travis again took the fourth pitch as the ramp continued rightward up one last steep section to easy climbing taking us to the base of the route’s crux pitch, “the 5.8 crack.” That doesn’t sound intimidating, but climbing a crack covered in snow and ice while wearing ski boots isn’t easy. I took this pitch, so I wouldn’t feel like a total wimp, pulling on a couple pieces and then tiptoeing above small cams in icy cracks to the top of the route. Travis followed by free climbing the pitch, saying it was “actually kinda hard.” We exchanged high-fives, happy that we finally got to climb the route. We unroped and carefully walked off to the right and descended back down to our skis.
Archive
2023
Dreefee and Crystal Dawn
Rubbernecker
2022
Long's Peak Diamond
Seattle Design Festival Interview
Seeing Circuits: an Interview with the Bouldering Project
2020
Vanishing Point 2.0: A Classic Route Modernized
Interview with Steven Dimmitt
Training Using Circuits
Cuba
2019
Dark Side of Liberty
The Bugaboos
Blue Jeans Direct: The End of the Canadian Rockies Ticklist
The Path
The Shining Uncut
Castles in the Sky
Scarface
Index's First 5.14
Turkey
2018
Patagonia
2017
Dark Side of the Valley
Vanishing Point
Winter Climbing
First Route in the Alaska Range
New York Gully