Vanishing Point 2.0: A Classic Route Modernized
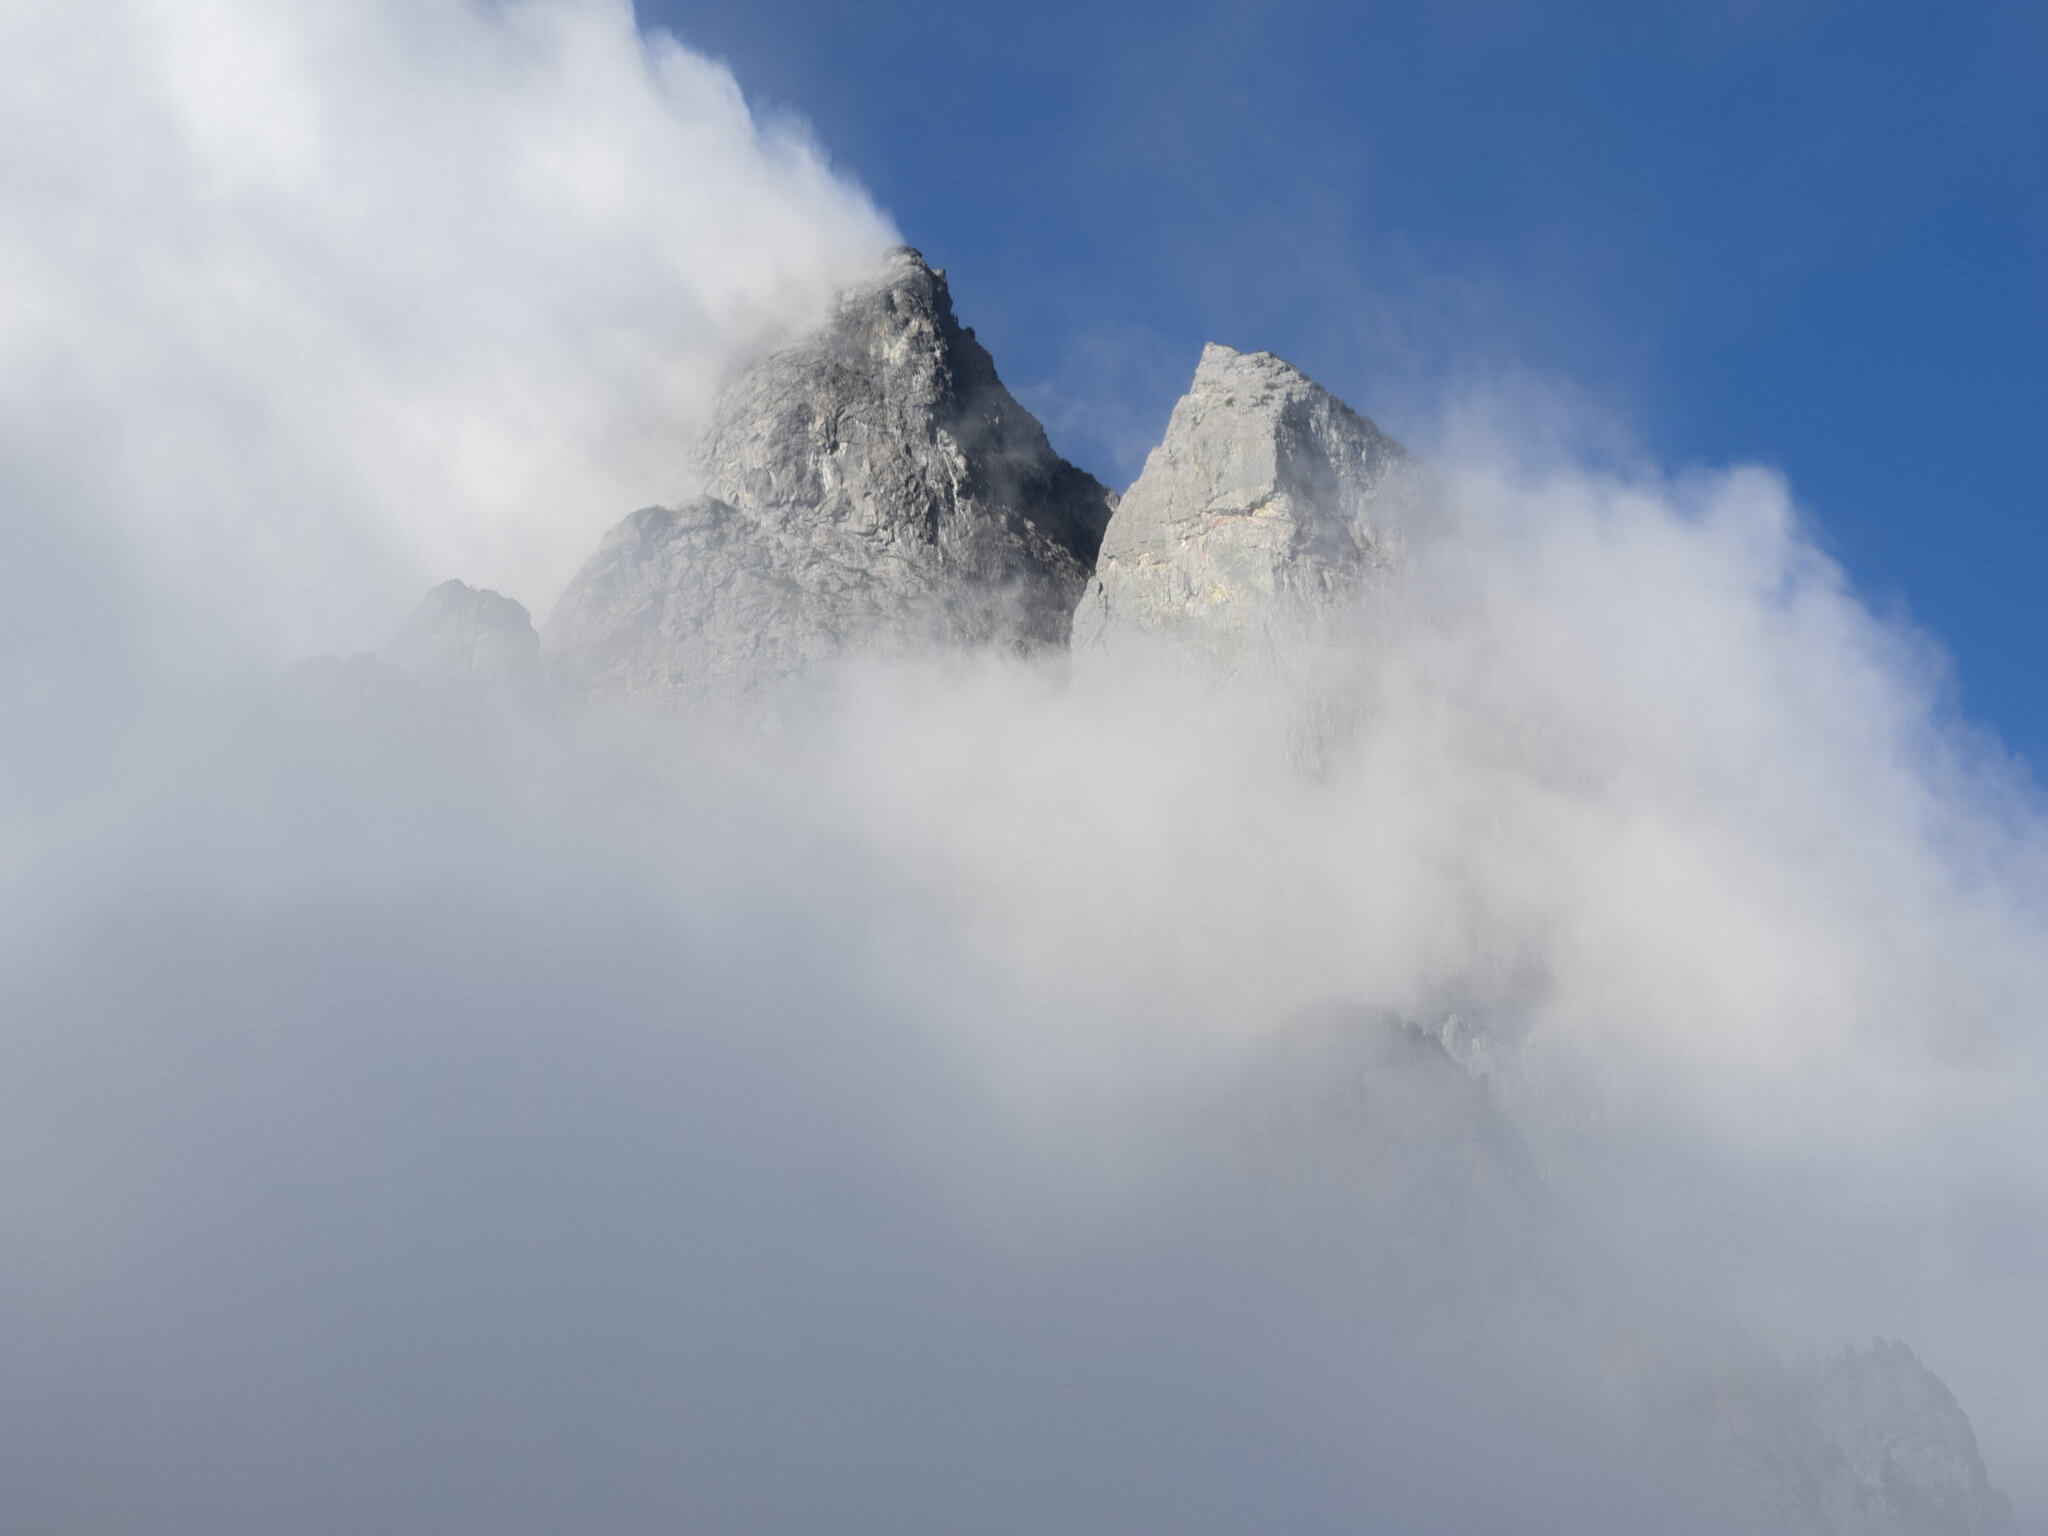
Ever since climbing Dolomite Tower, a subpeak of Mt. Baring, in 2017, I fell a little in love with that face. I hiked several of my friends and family out to Barclay Lake to show it off. The climbing on Vanishing Point, the one modern-ish route on the tower (put up in 1998 by Brian Burdo, and now fully modern thanks to 2020 efforts on it), is fun and the setting spectacular. Climbing it with my good friend Travis Kemp left an impression. I couldn’t forget it. And I wanted to experience it again or give back to the wall in some way that would encourage others to experience its magic as well.
Climbing Vanishing Point is serious. The approach is very technical and hard to get right even with good information. The climbing on the tower is hard, sustained, exposed, and sometimes straight-up dangerous. Travis and I got really spooked on pitch 5, when we realized a whole part of the pitch had fallen off, taking with it a few bolts. It took us over an hour to figure out how to get around it. We went into survival mode after that and climbed quickly to the top of the wall. There were runouts, a death flake, and hanging belays. We enjoyed it, but it felt real. I was scared to shit but afterwards thought it was the coolest wall I had ever climbed.
Fast forward to the insane year of 2020. I didn’t have climbing plans for the summer when the lockdowns happened this spring. I realized that I might not be able to leave Washington State this year, so I decided to revisit Dolomite Tower, with a trailhead only 1.5 hours from my place in Seattle. I convinced my good friend Mike Kerzhner to drive up from Portland to climb Vanishing Point again. Memories can be deceptive, so I wanted to re-remember what it was like up there.
Story of our June Climb
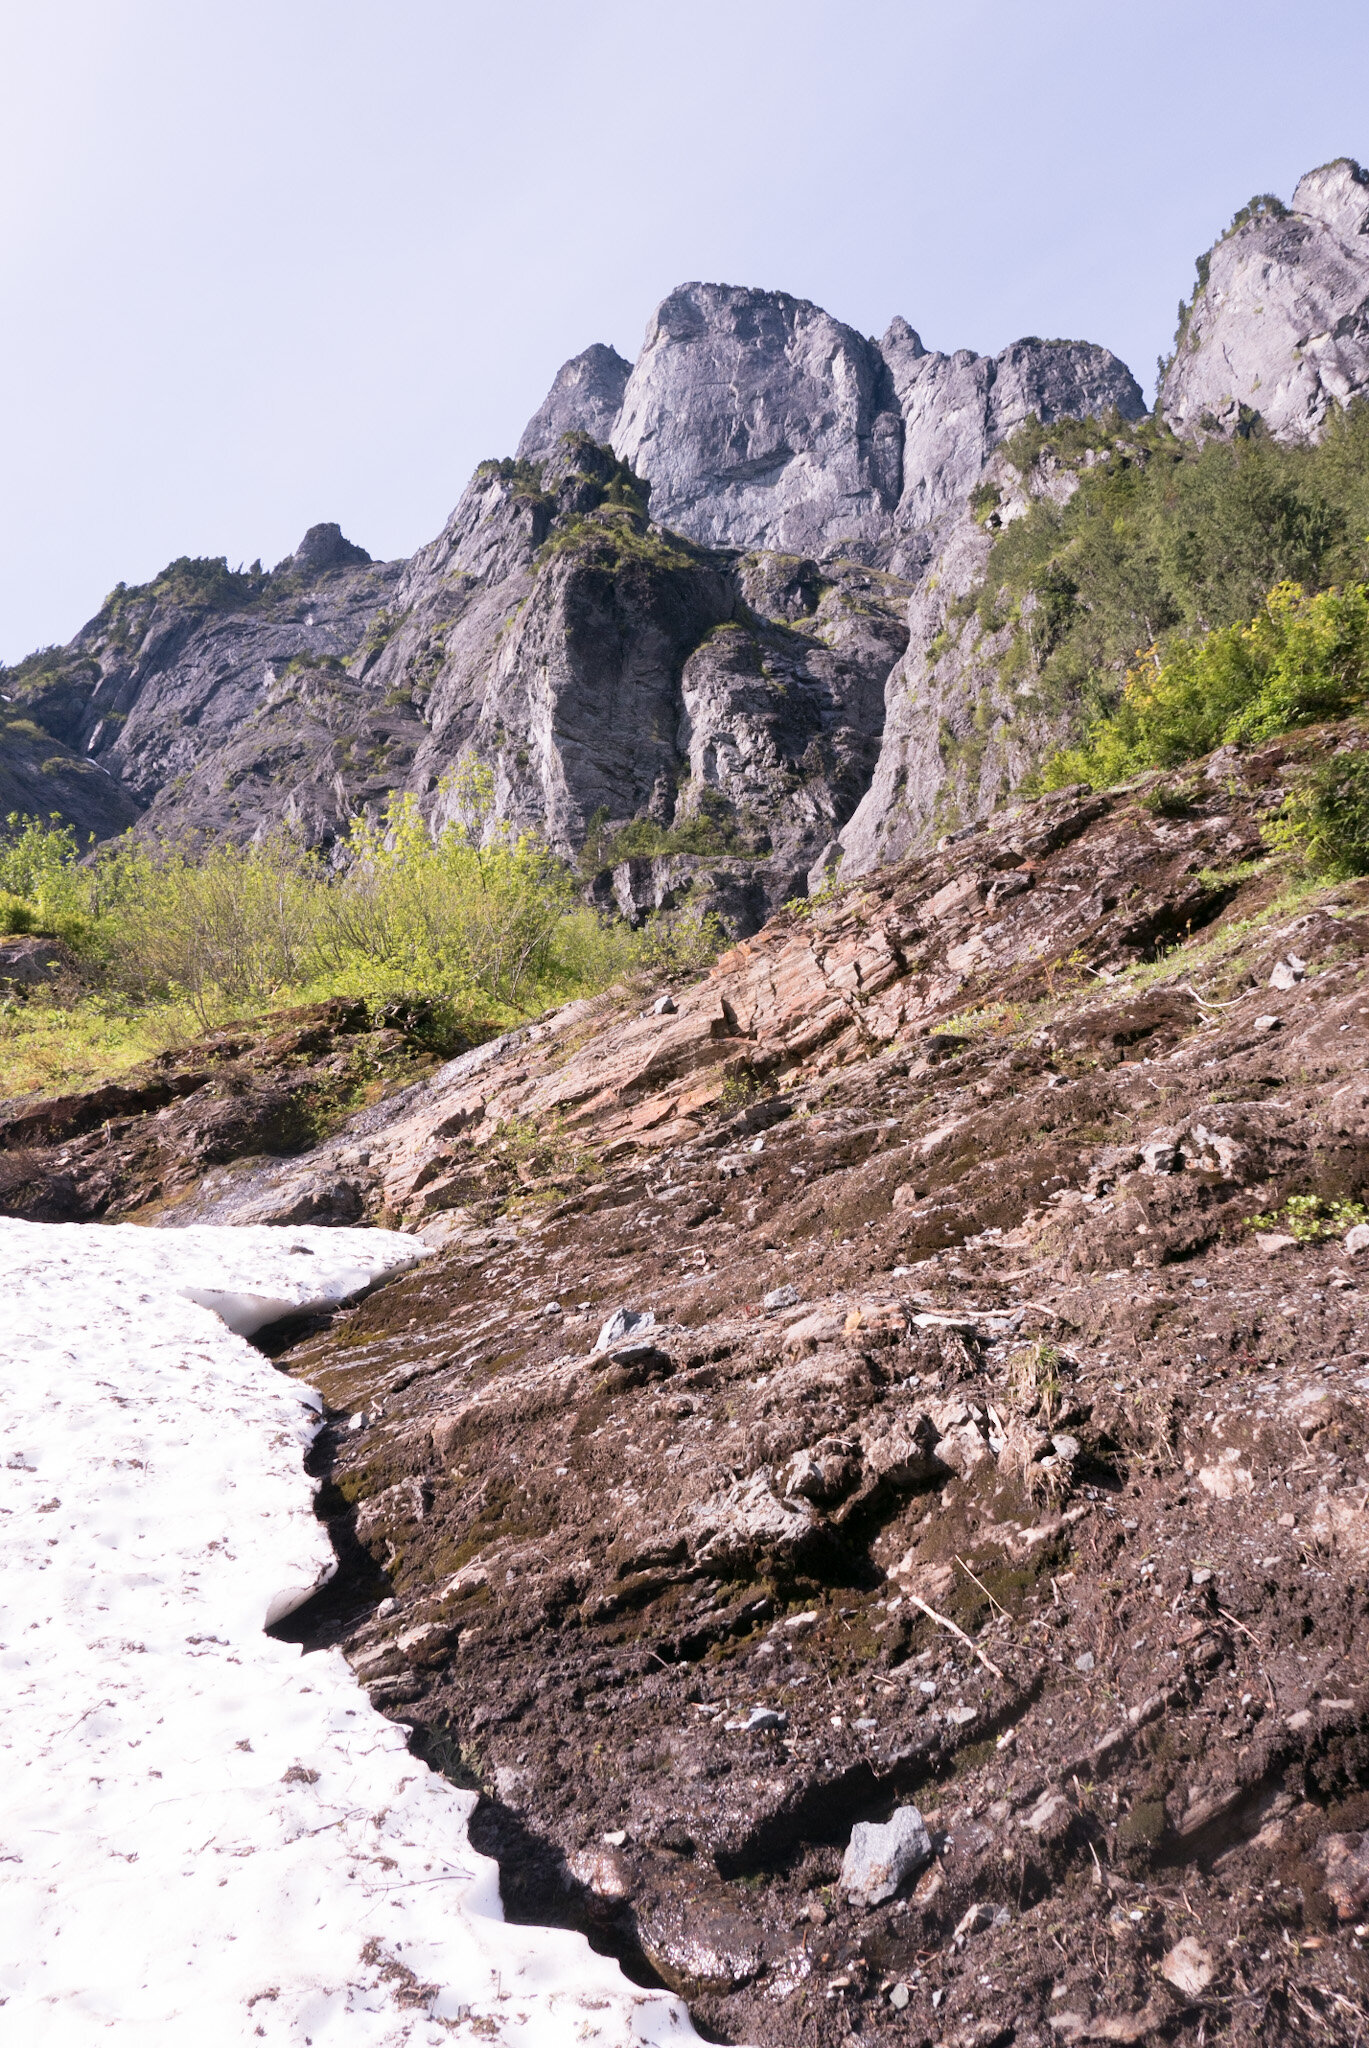
Mike and I woke up in Seattle at 5am, June 19th, made coffee and started driving. We were leaving the Barclay Lake trailhead around 7am. The first 20 minutes of the approach is spent on a flat trail in a beautiful forest—a mental warmup for what you’re about to experience. After about a mile, you’ll have to thank the trail for what it’s given you and brake right. Thankfully, if the approach is done correctly, there is minimal bush-whacking. Mike and I pushed through bushes for a few minutes to gain a boulder field, crossed it, and entered a wash. The wash takes you up to a gaping gully, which you avoid by escaping right on a ramp into a steep forest. In June, Mike and I were kick stepping up snow to gain the ramp.
Climbing the forest is my favorite part of the approach. If you’ve spent a lot of time on the walls in Squamish, you’ll feel right at home climbing up the jungle gym of tree roots. Brian Burdo, and probably other first ascensionists of Dolomite Tower and Mt. Baring routes, left behind several fixed lines to help haul yourself up the steep slope. They also serve as a nice guide. The ropes eventually take you up to a perch overlooking the gully and slabs that must be climbed to the base of the tower.
Mike and I packed all of our water, but we felt really silly for doing that once entering the gully. For the rest of the approach, flowing water was always nearby. And this flowing water made approaching that day a mini-epic for us.
We scrambled up the gully to approximately the spot where I remembered roping up and starting up a bolt-protected slab, but we couldn’t find the first bolt. We looked around for 20 minutes and still couldn’t find anything. I was starting to mentally prepare to turn around and bail. I roped up and started climbing up a slab that seemed to look right to see if a bolt would appear. It was wet and slippery, with no protection, so I didn’t make it very far before deciding to come back down. Mike thought a series of narrow ledges going out left looked promising. I knew that was not where the bolts would be, but I thought I might be able to protect it with gear. Right after I started out the ledges, Mike finally spotted the bolt we were looking for. It was in a waterfall right above us! It looked like the 2 pitches of bolted slab was completely running with water. There was no way we were going to make it through the runouts between bolts in a slabby waterfall, so I continued trying to find a way around. I ended up getting two pieces of gear in and slinging a finger’s width branch of a bush for about 200 feet of climbing. Not ideal.
We made it up the rest of the approach slabs, which included climbing through another waterfall and once going the wrong way up unprotected wet dirt. I was hoping the approach would feel easy the second time but because of the early season water and snow, it took longer and felt much scarier. I have since been back with Luke Stefurak to fix up the approach pitches. We put in a handful of bolts to protect the easier alternative route up the slabs (avoiding the waterfall early-season), and we installed rap anchors so that climbers can reverse the approach safely. Luke and I foreran the approach reversal and it felt great. Because an easier section of slab is now protectable, it’s pretty reasonable to climb the whole thing in approach shoes, which is really good news for our feet.
The climbing on Vanishing Point was mostly uneventful compared to the approach. The third runout was still scary, and the flare a little wet and desperate. We were able to easily climb around the section of roof that had fallen off on pitch 5. The eighth pitch was also still scary. The death flake on pitch 9 is still on the wall. By the time we got to the 5.12 pitch out the huge roof (pitch 11), we barely had enough left in the tank to get through it. Mike and I both didn’t fall, but we felt like we had to fight for it. We were 15 hours car-to-car, pretty reasonable if you’re trying to free climb every pitch. It’s a big climb.
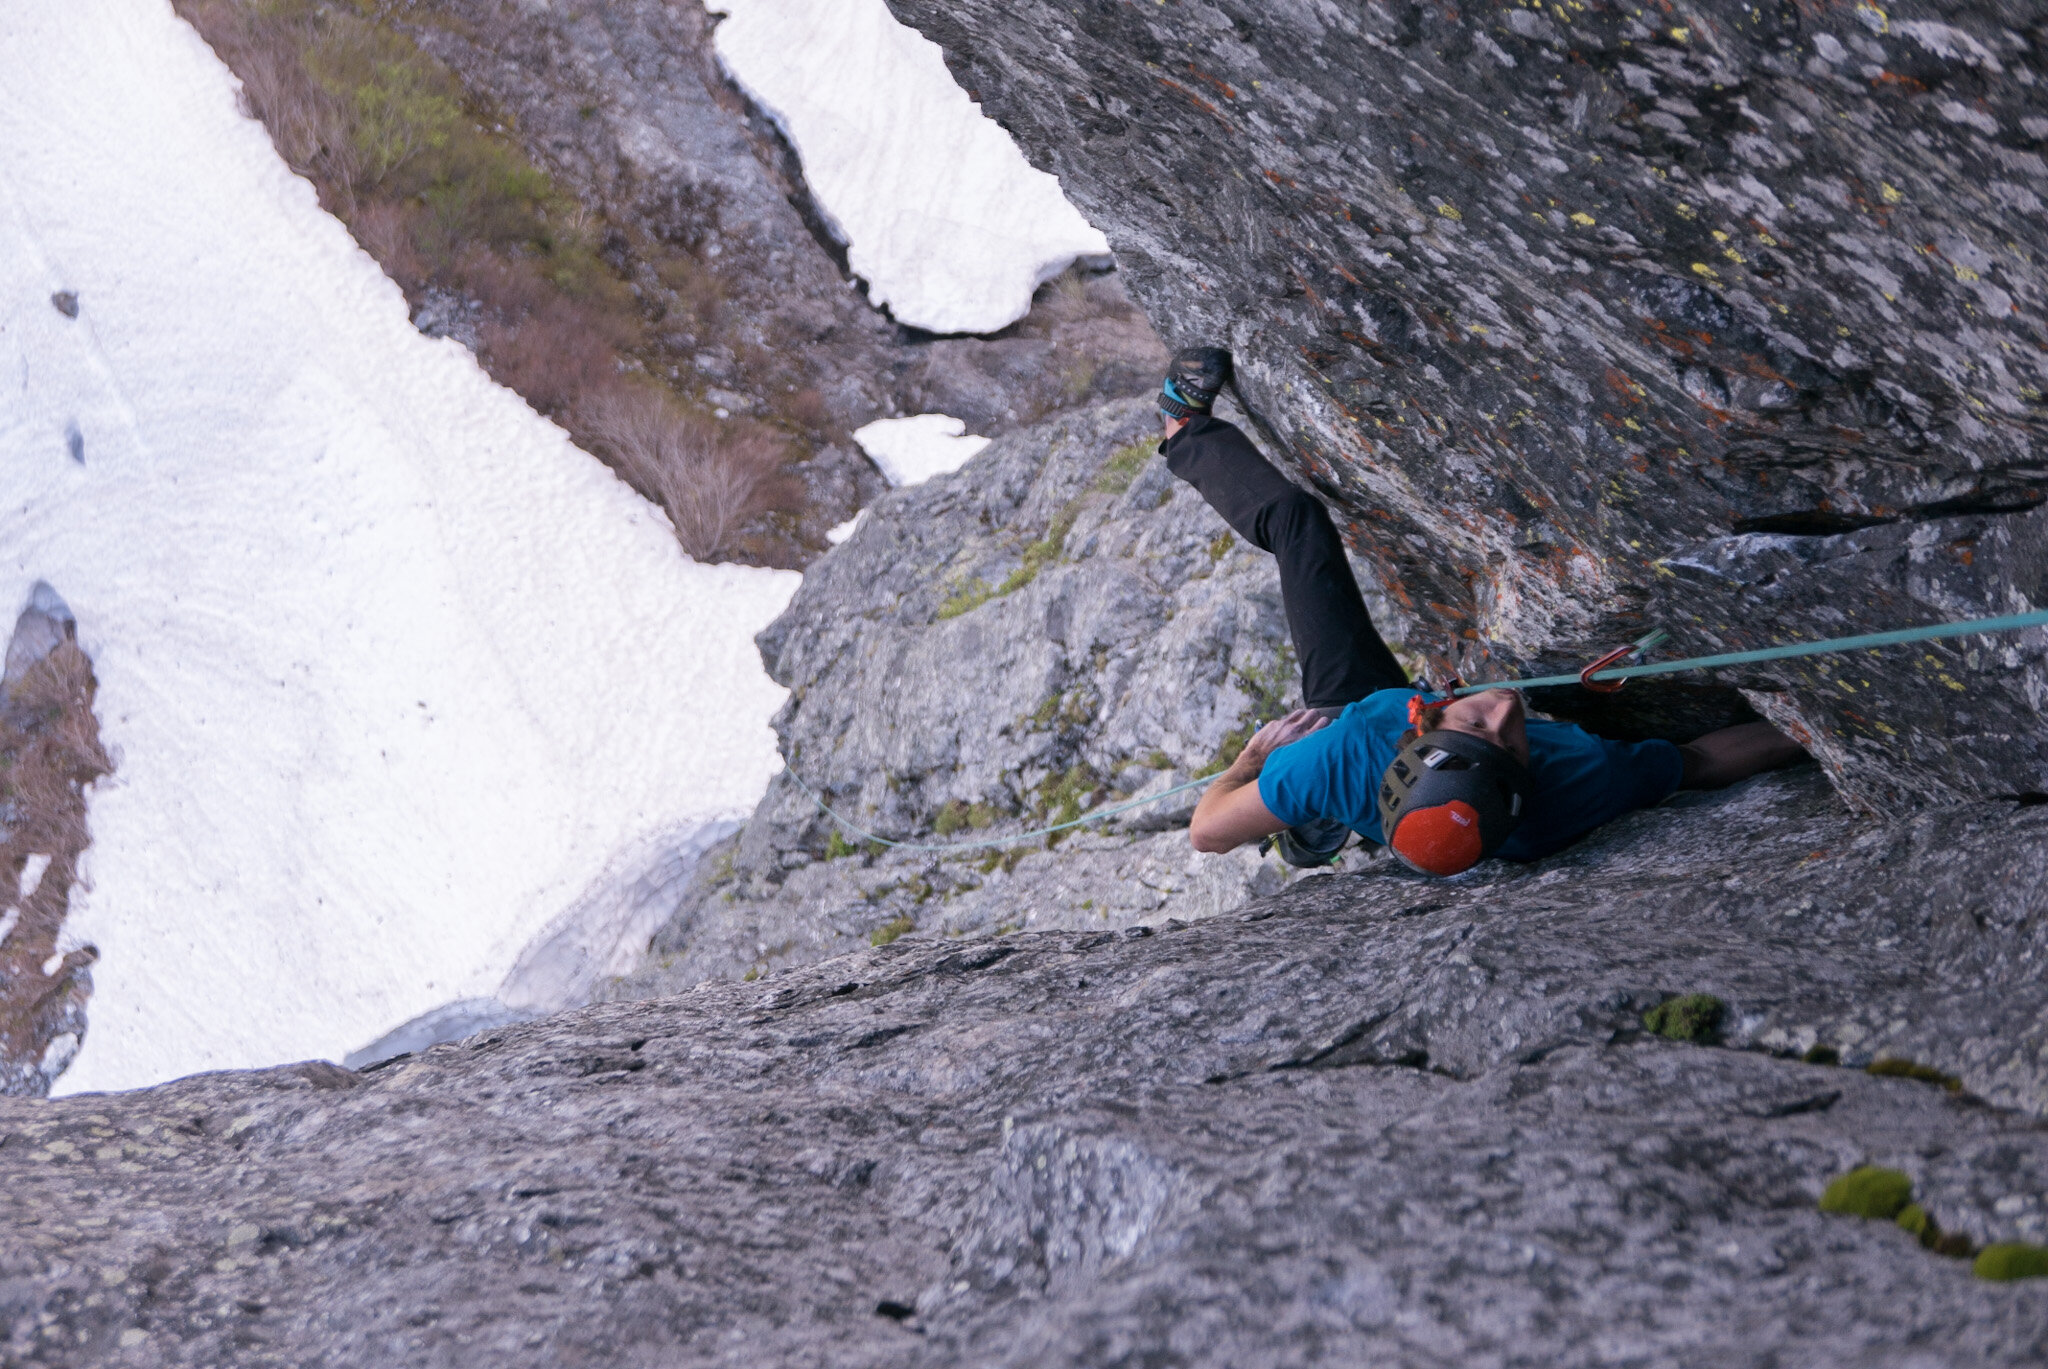
Mike on the pitch 3 flare (5.11+).
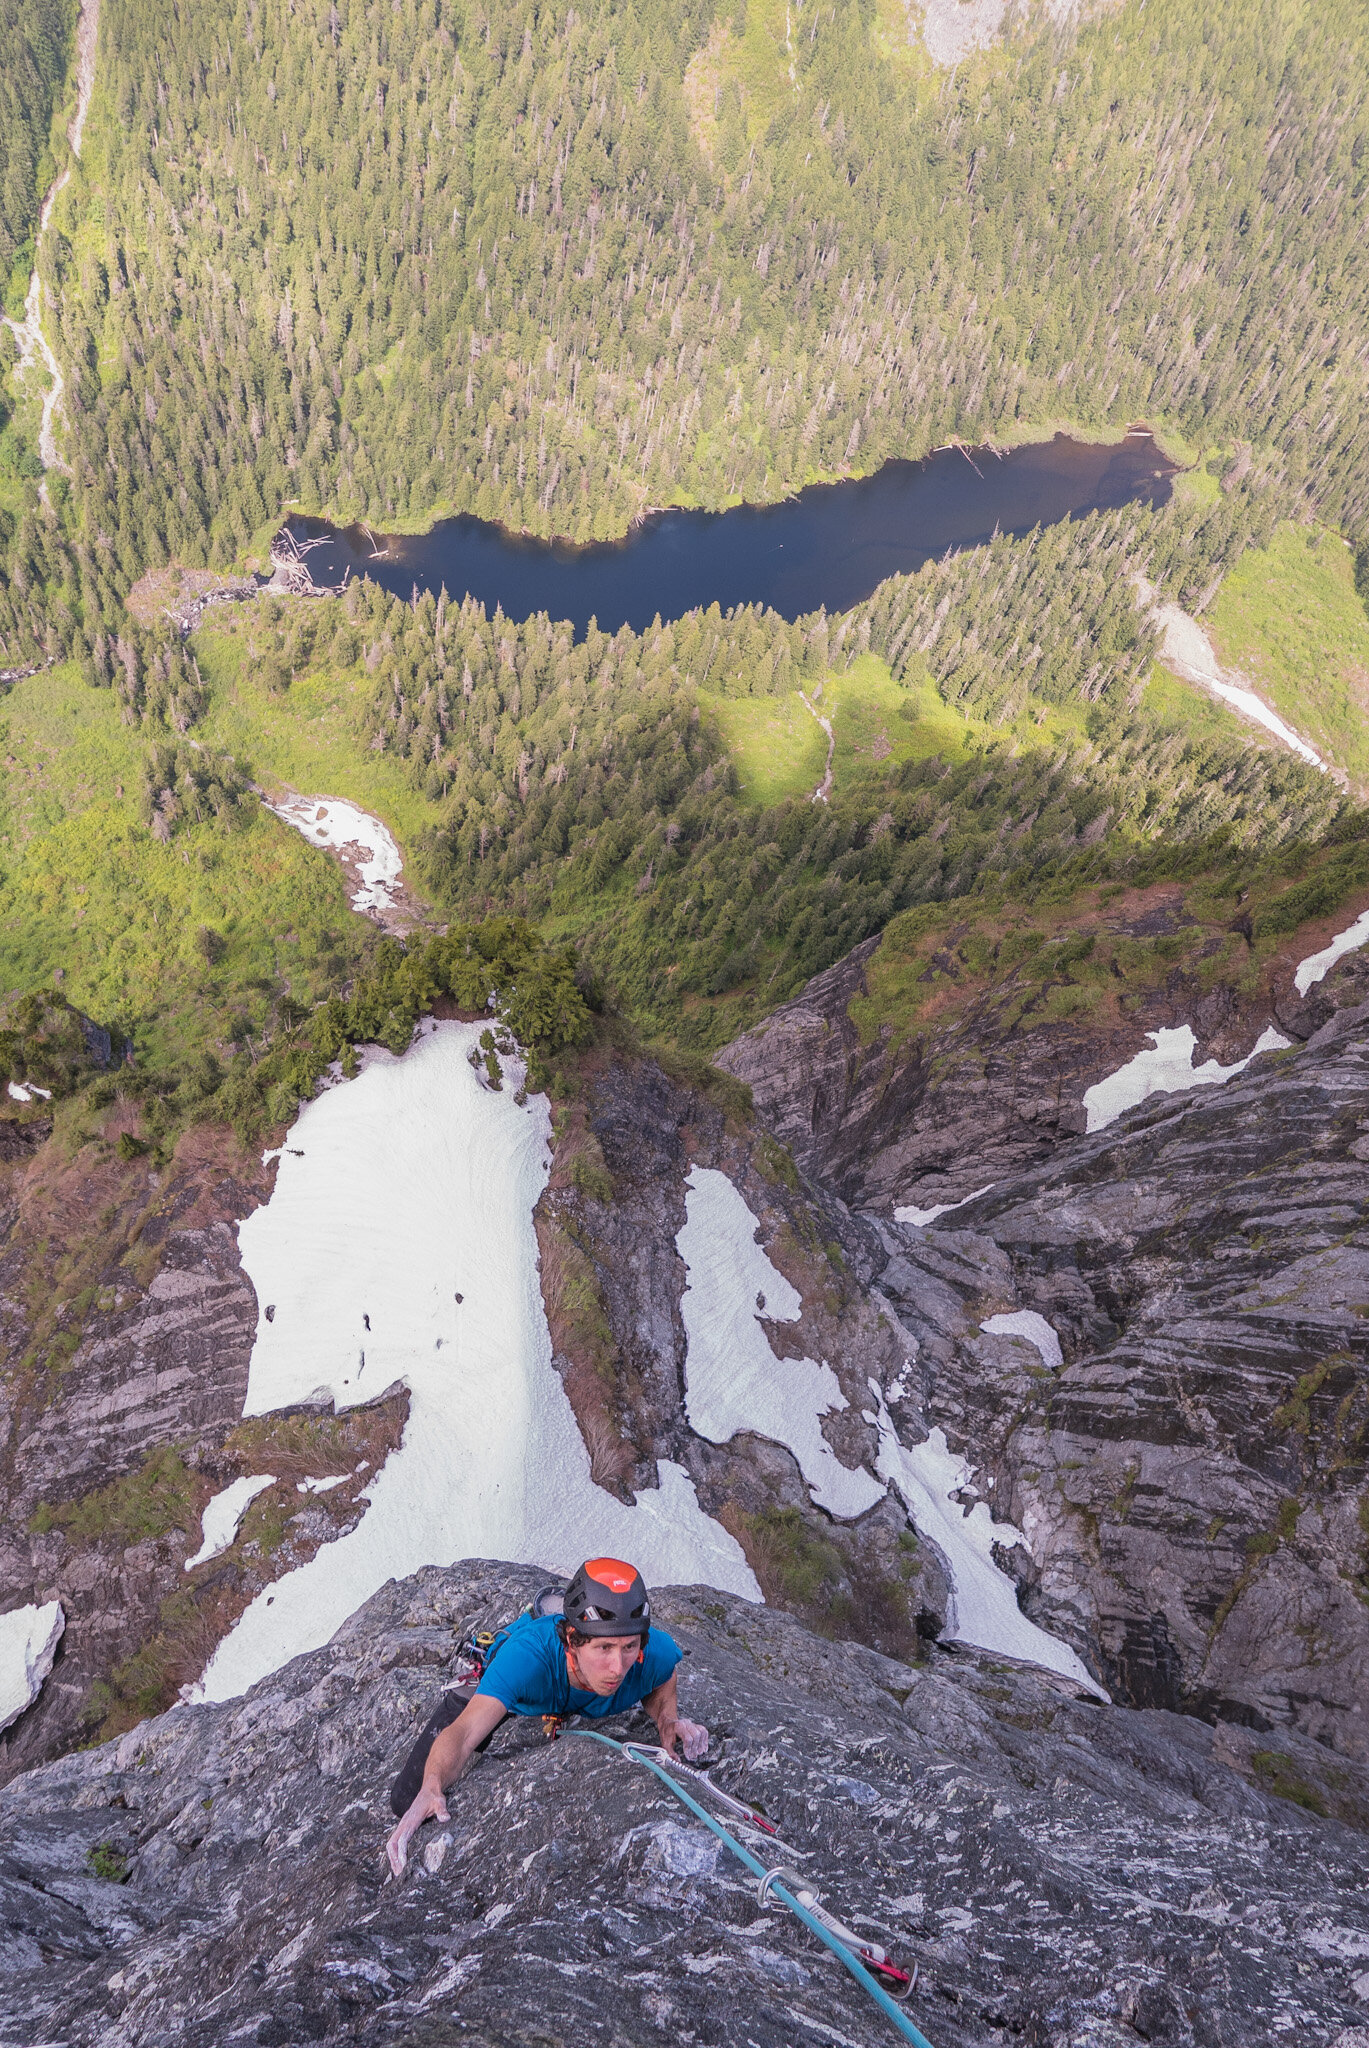
Pitch 6 (5.11+).
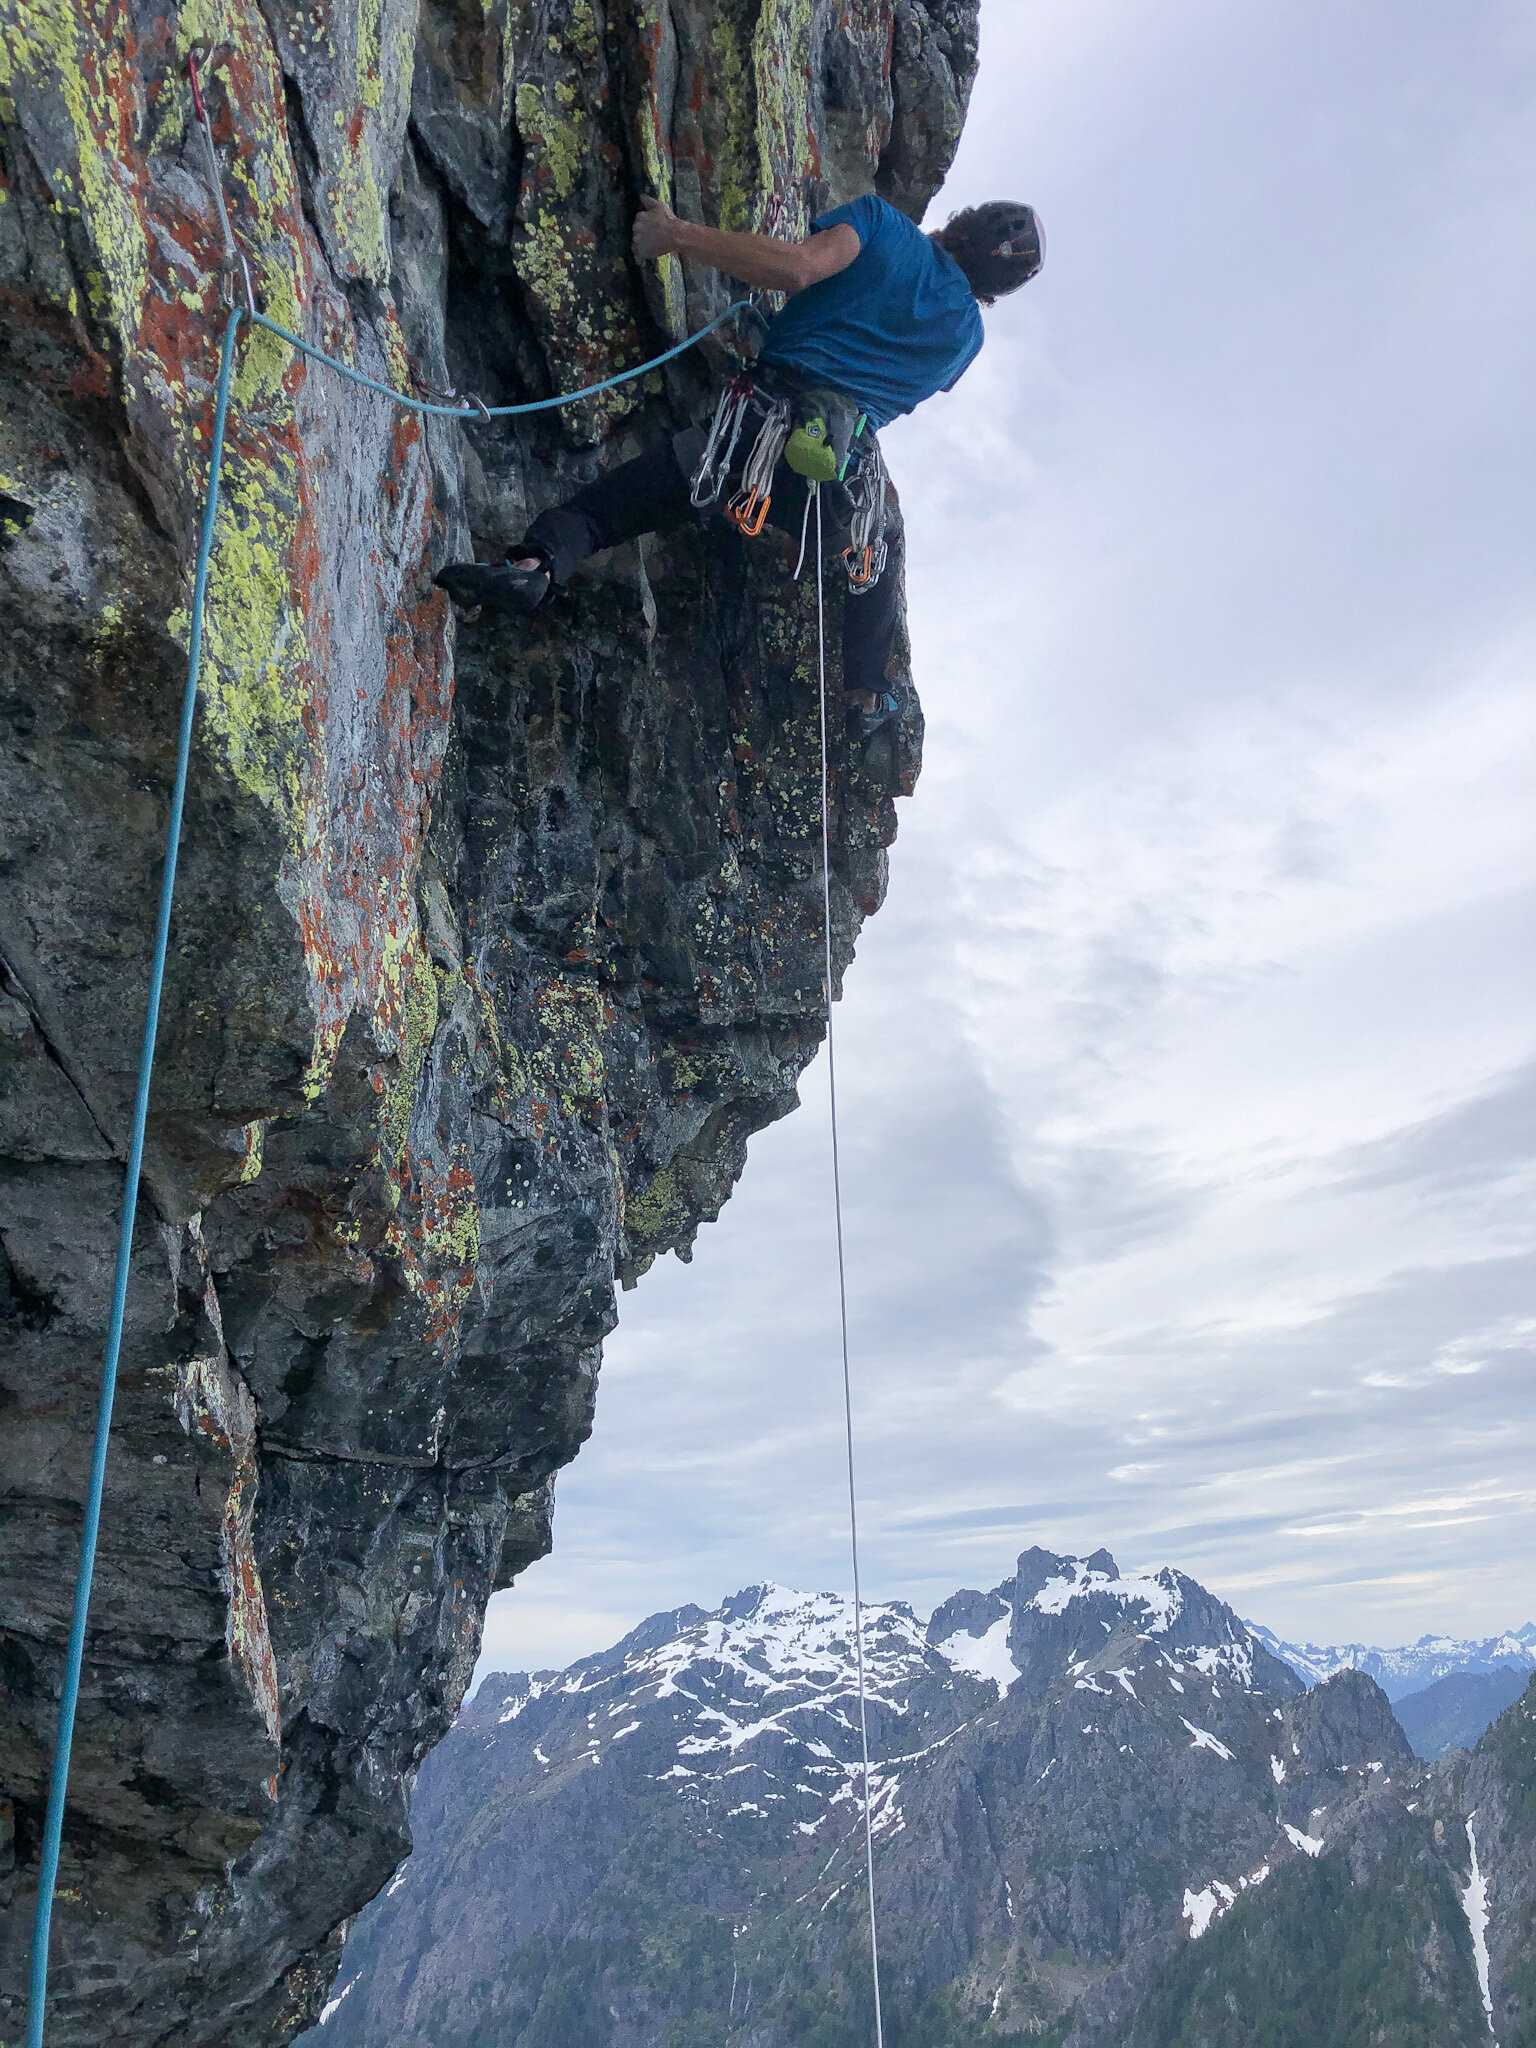
Mike starting out the huge roof on pitch 10 (5.11).
I had been on the route before so I was happy to send, but Mike onsighted, which hadn’t been done. I think we might have been the 3rd and 4th ascents of the route after Brian Burdo (FA, 1998) and Ben Gilkison (2012). I’m really curious if anyone else climbed it, let alone sent, between 1998 and 2012.
Vanishing Point 2.0
Vanishing Point was as good as I remembered but also scarier than I remembered. After climbing it again, I felt that certain decisions could be made to make it safe. Loose rock could be pulled off, sketchy flakes could be avoided (or pulled off!) and unnecessary runouts could be protected. The involved approach could be dumbed down as well.
Overall the rock is really good, and I think it’s just a matter of mindset. We’re used to immaculate granite out here and Dolomite Tower definitely is not that. It’s more featured and overhung, and the cracks are few and far between. But the position and the interesting face climbing make it truly worthwhile. I feel strongly that it is a gem in Washington, if not the country. If the Dolomite Tower was actually in the Dolomites, I’m sure it’d be littered with amazing routes.
Sure enough, through a group effort this summer, headed by Dan Kluskiewicz and Matt Corroll, Vanishing Point was modernized. Mike and I slipped in the last ascent of the “old” Vanishing Point experience.
All the anchors have been replaced and the rest of the protection has been updated to stainless steel. Dan and Matt placed two bolts to protect the unnecessary runout on pitch 3. On pitches 9/10, they re-routed the route slightly to avoid the “death flake.” Now you don’t have to touch it at all. There was a lot of discussion about whether to add a bolt to the runout on pitch 8, but Dan and Matt decided against it. Maybe it’s for the better to not dumb the route down too much. Pitch 8 will remain a mental crux of the route, but a much more reasonable one compared to what used to be on pitch 3.
The approach is much less committing too. Luke Stefurak and I took charge of making it safe and easier to follow. We updated the rap anchors and moved already existing fixed lines to better spots. A big mental aspect of climbing Vanishing Point before was feeling like you really didn’t want to reverse the approach. If you needed to bail, it seemed like it’d be better to bail upward. Now that’s not the case. Just turning around with a single 70m is safe. (We tried it!)
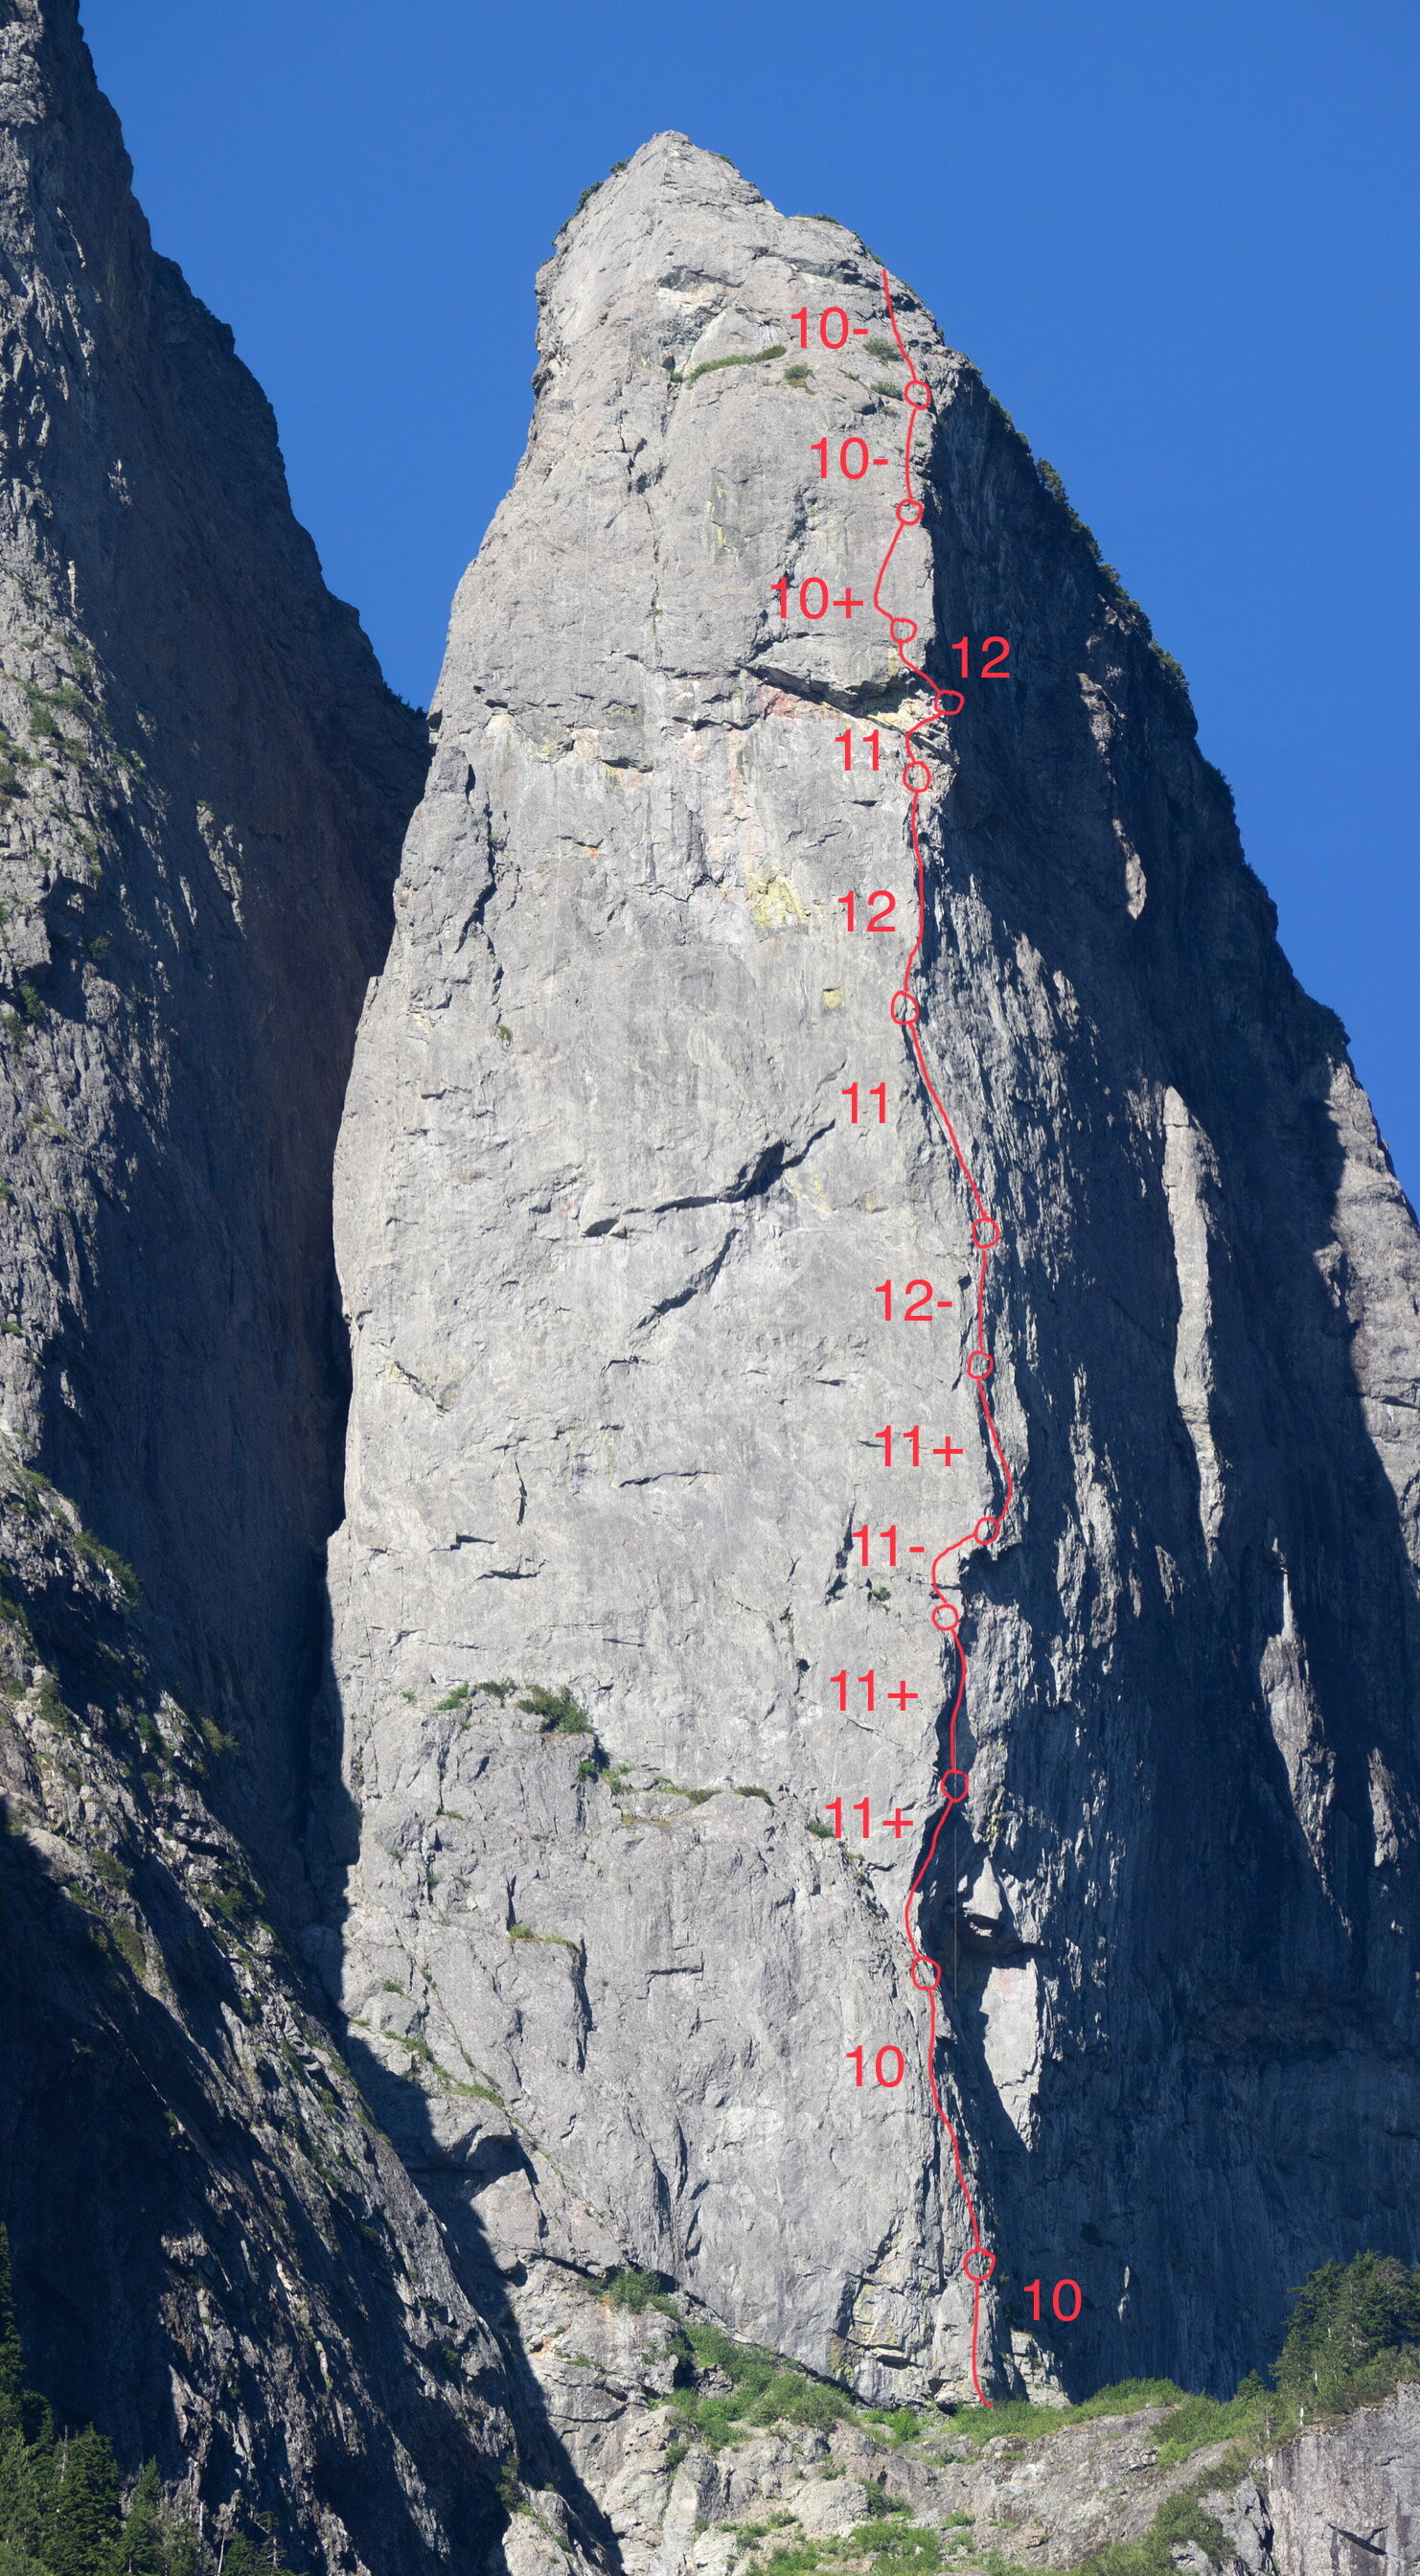
Vanishing Point topo.
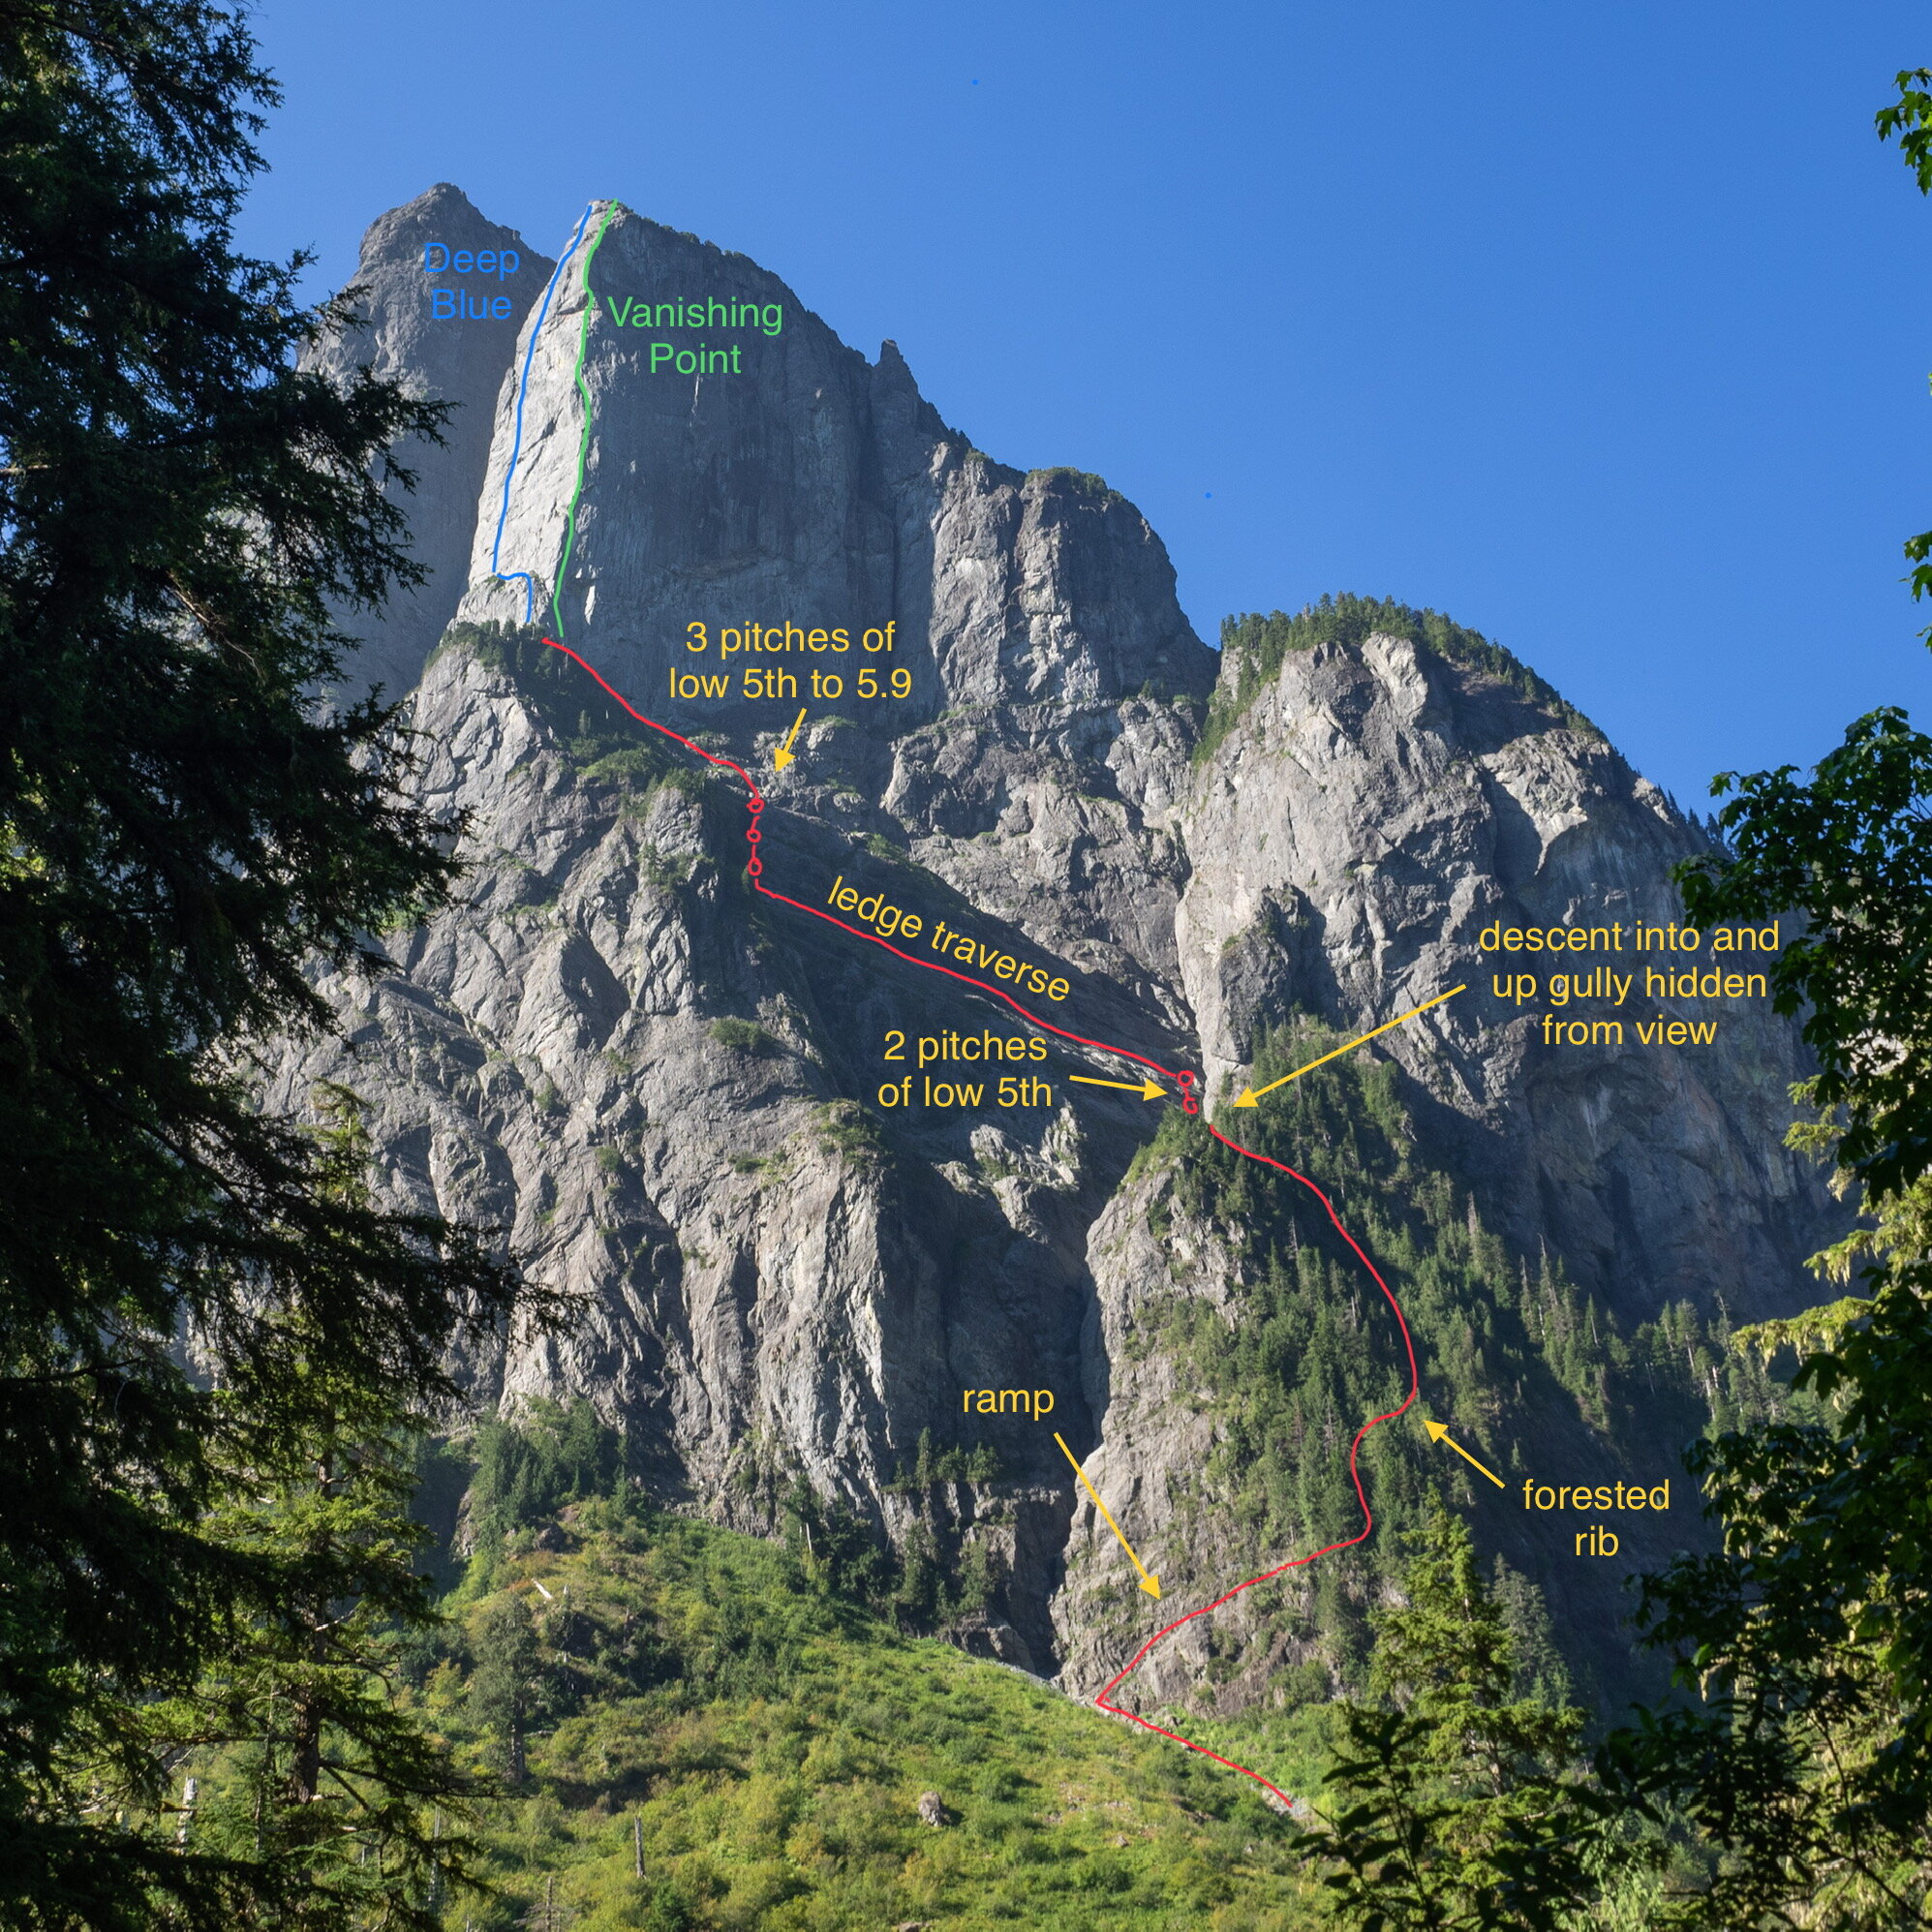
Dolomite Tower approach overview.
Approach Beta
1. Start at the Barclay Lake trailhead.
2. Hike main trail to a bridge across large creek (about 1 mile). The creek is dry mid-to-late summer. Don’t cross it.
3. Before the main trail crosses the creek, break into forest to the right of a large boulder.
4. Walk through forest (no trail) till it opens up then bushwhack a little to boulder field.
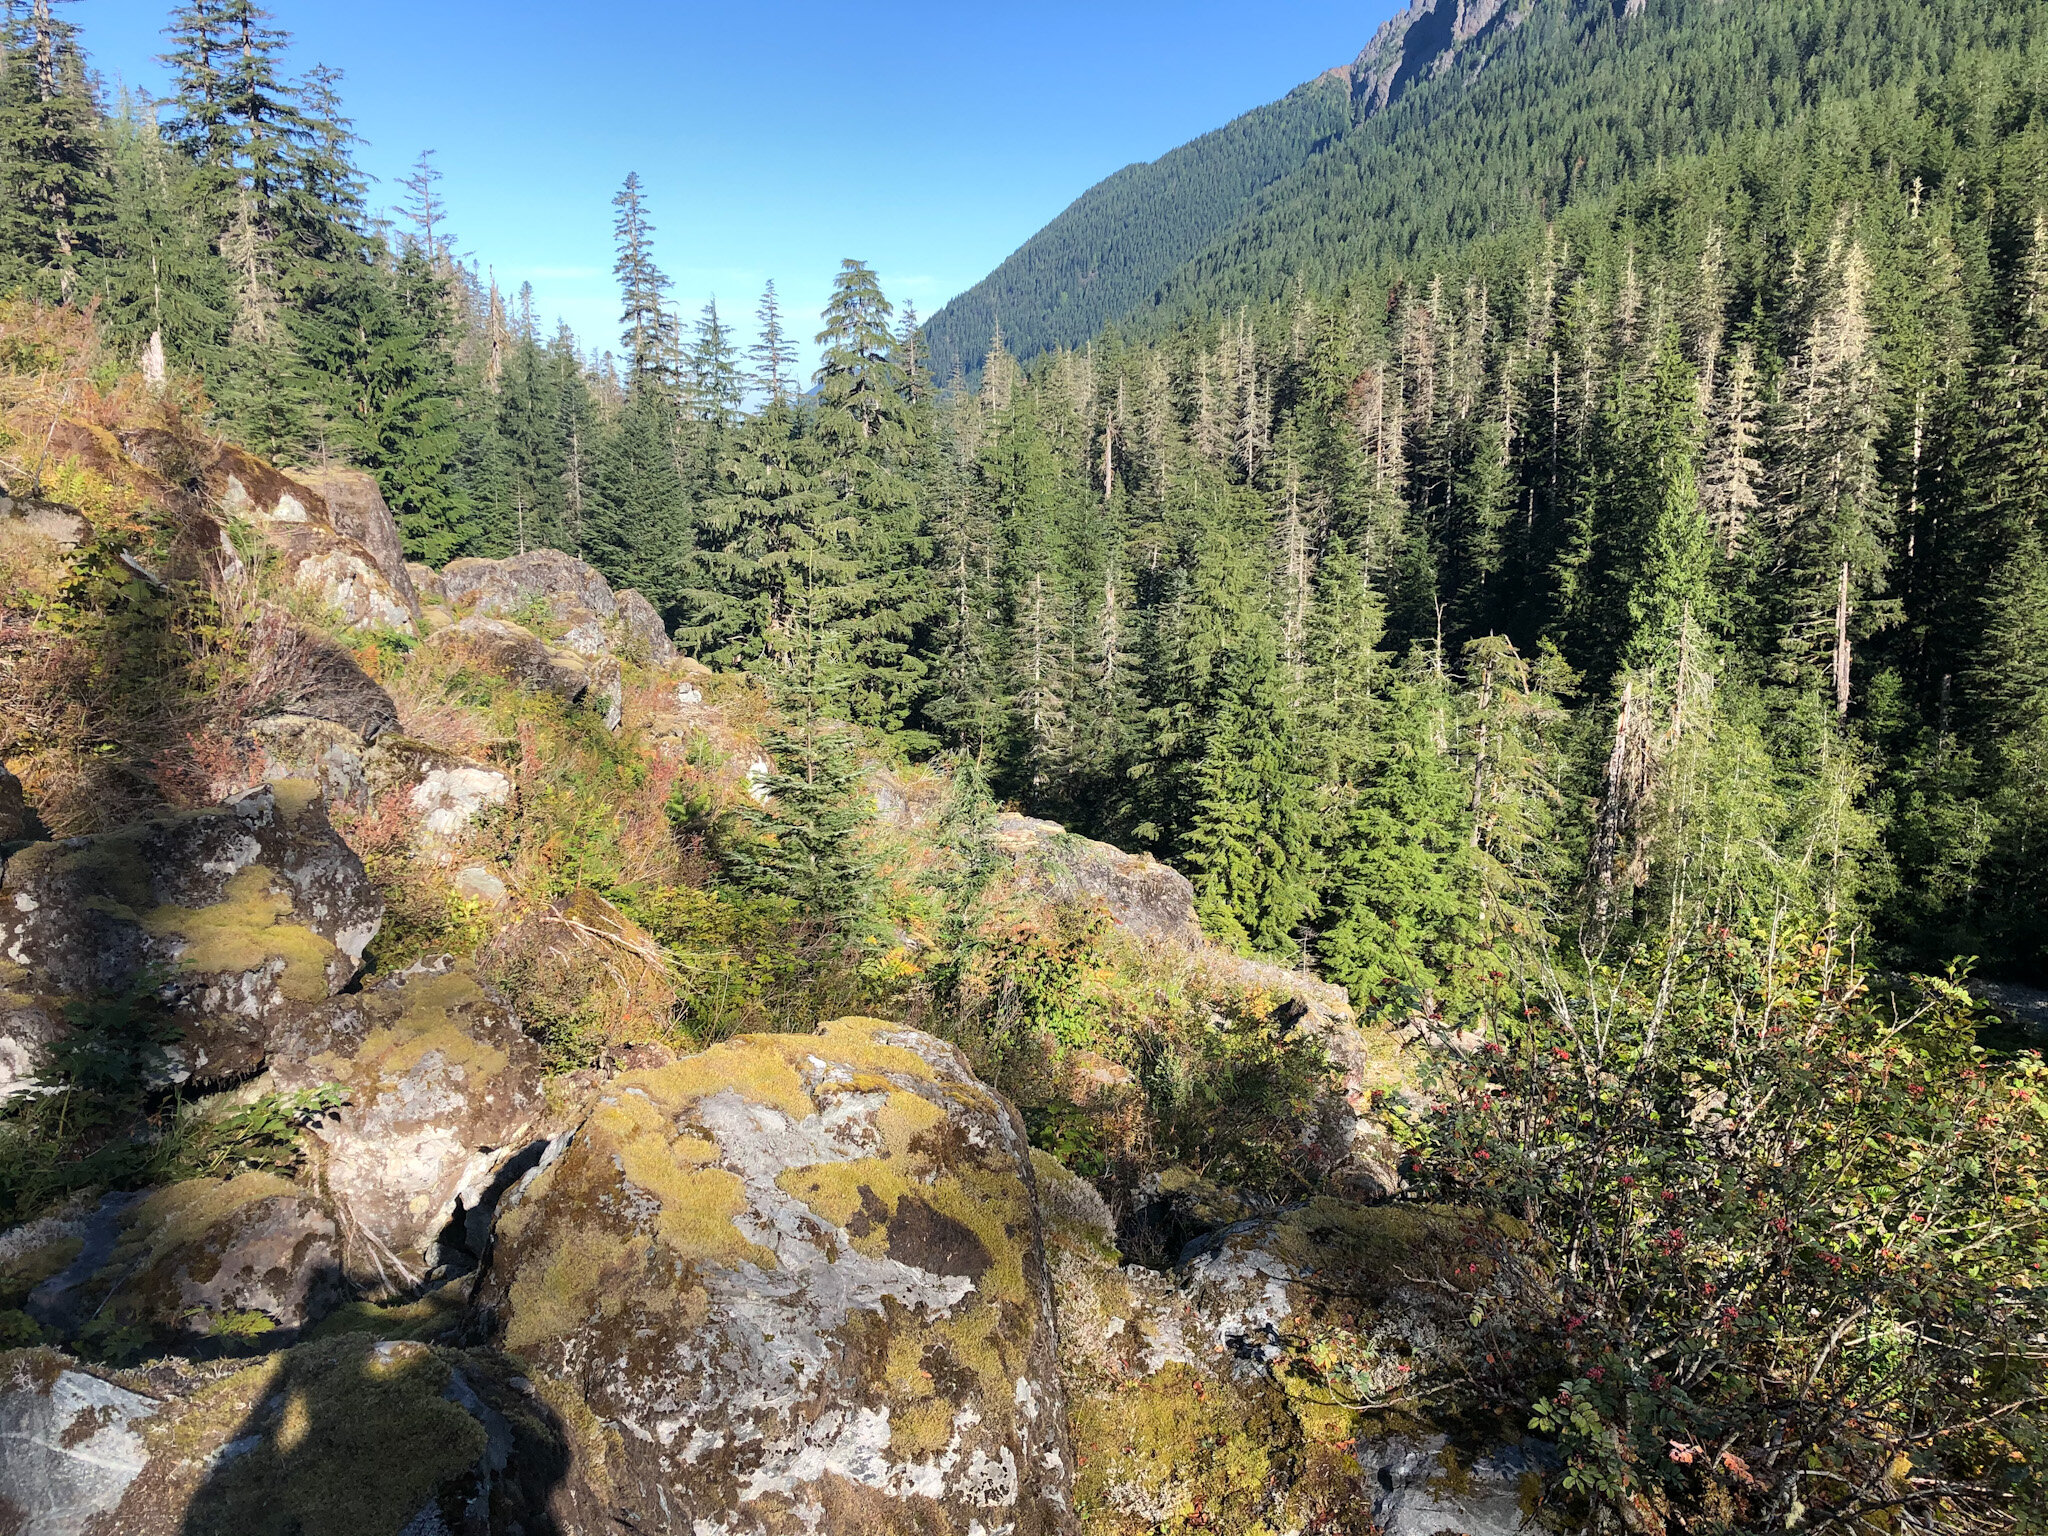
Looking back across the boulder field. The main trail is just in those trees.
5. Traverse boulder field until under some large trees and a open wash should appear.
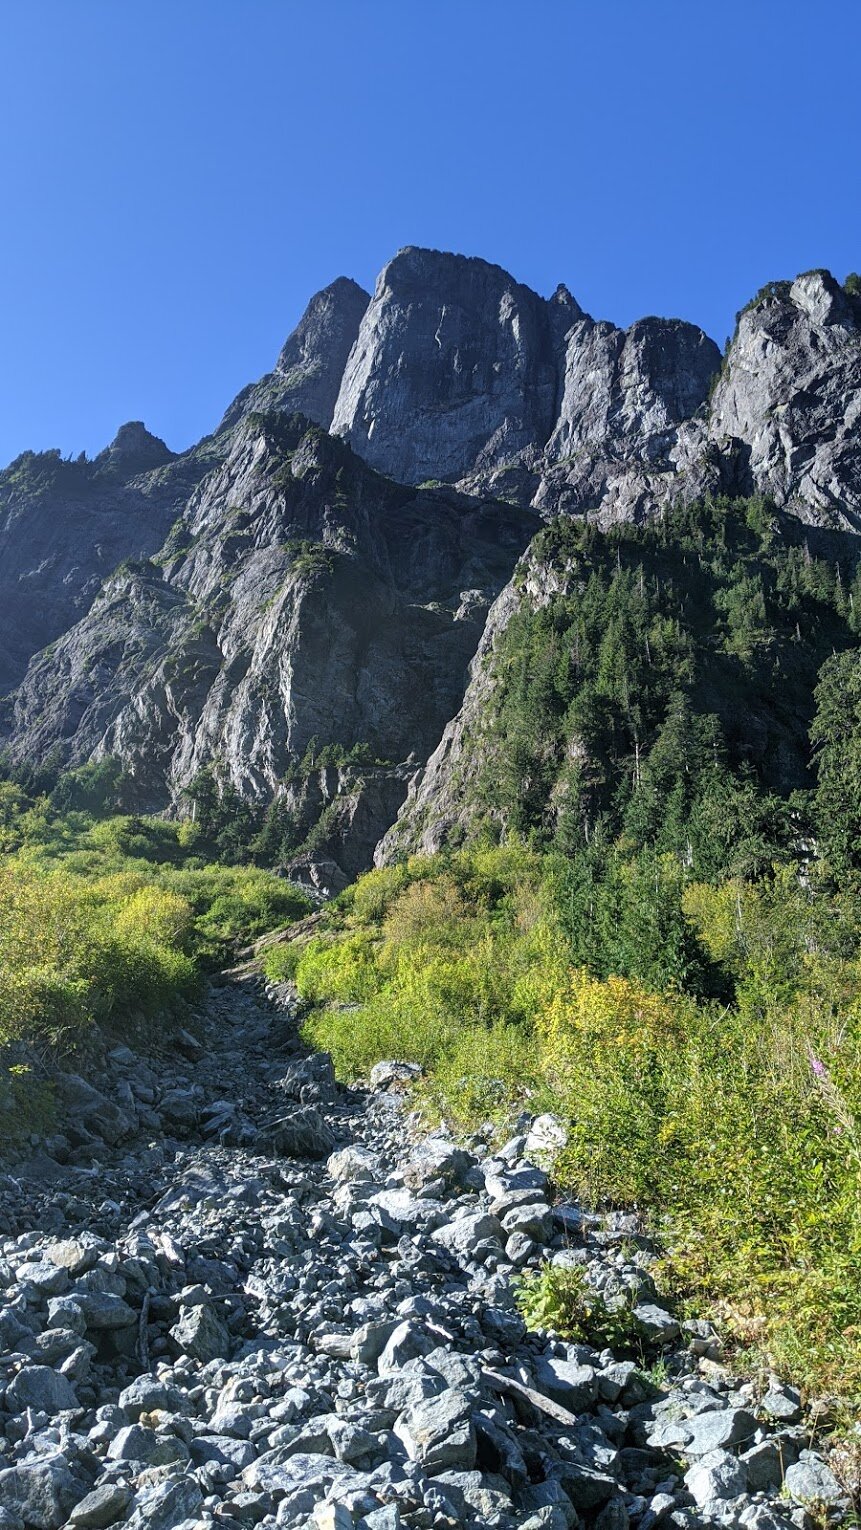
Looking up the wash (photo Luke Stefurak).
6. Climb wash to a steep, chossy, dirty waterfall. Climb around right side, staying out of bushes (exposed).
The dirty waterfall. It’s steeper than it looks.
7. Continue up wash to a ramp which takes you up right into the forest before a gaping gully. There’s some hand lines on the ramp (exposed!).

The ramp leaving the wash into the forested rib. The gaping gully is to the left.
8. Batman up first steep rope in forest and then head hard right. You should end up at a small rock face with a bolt and fixed lines.
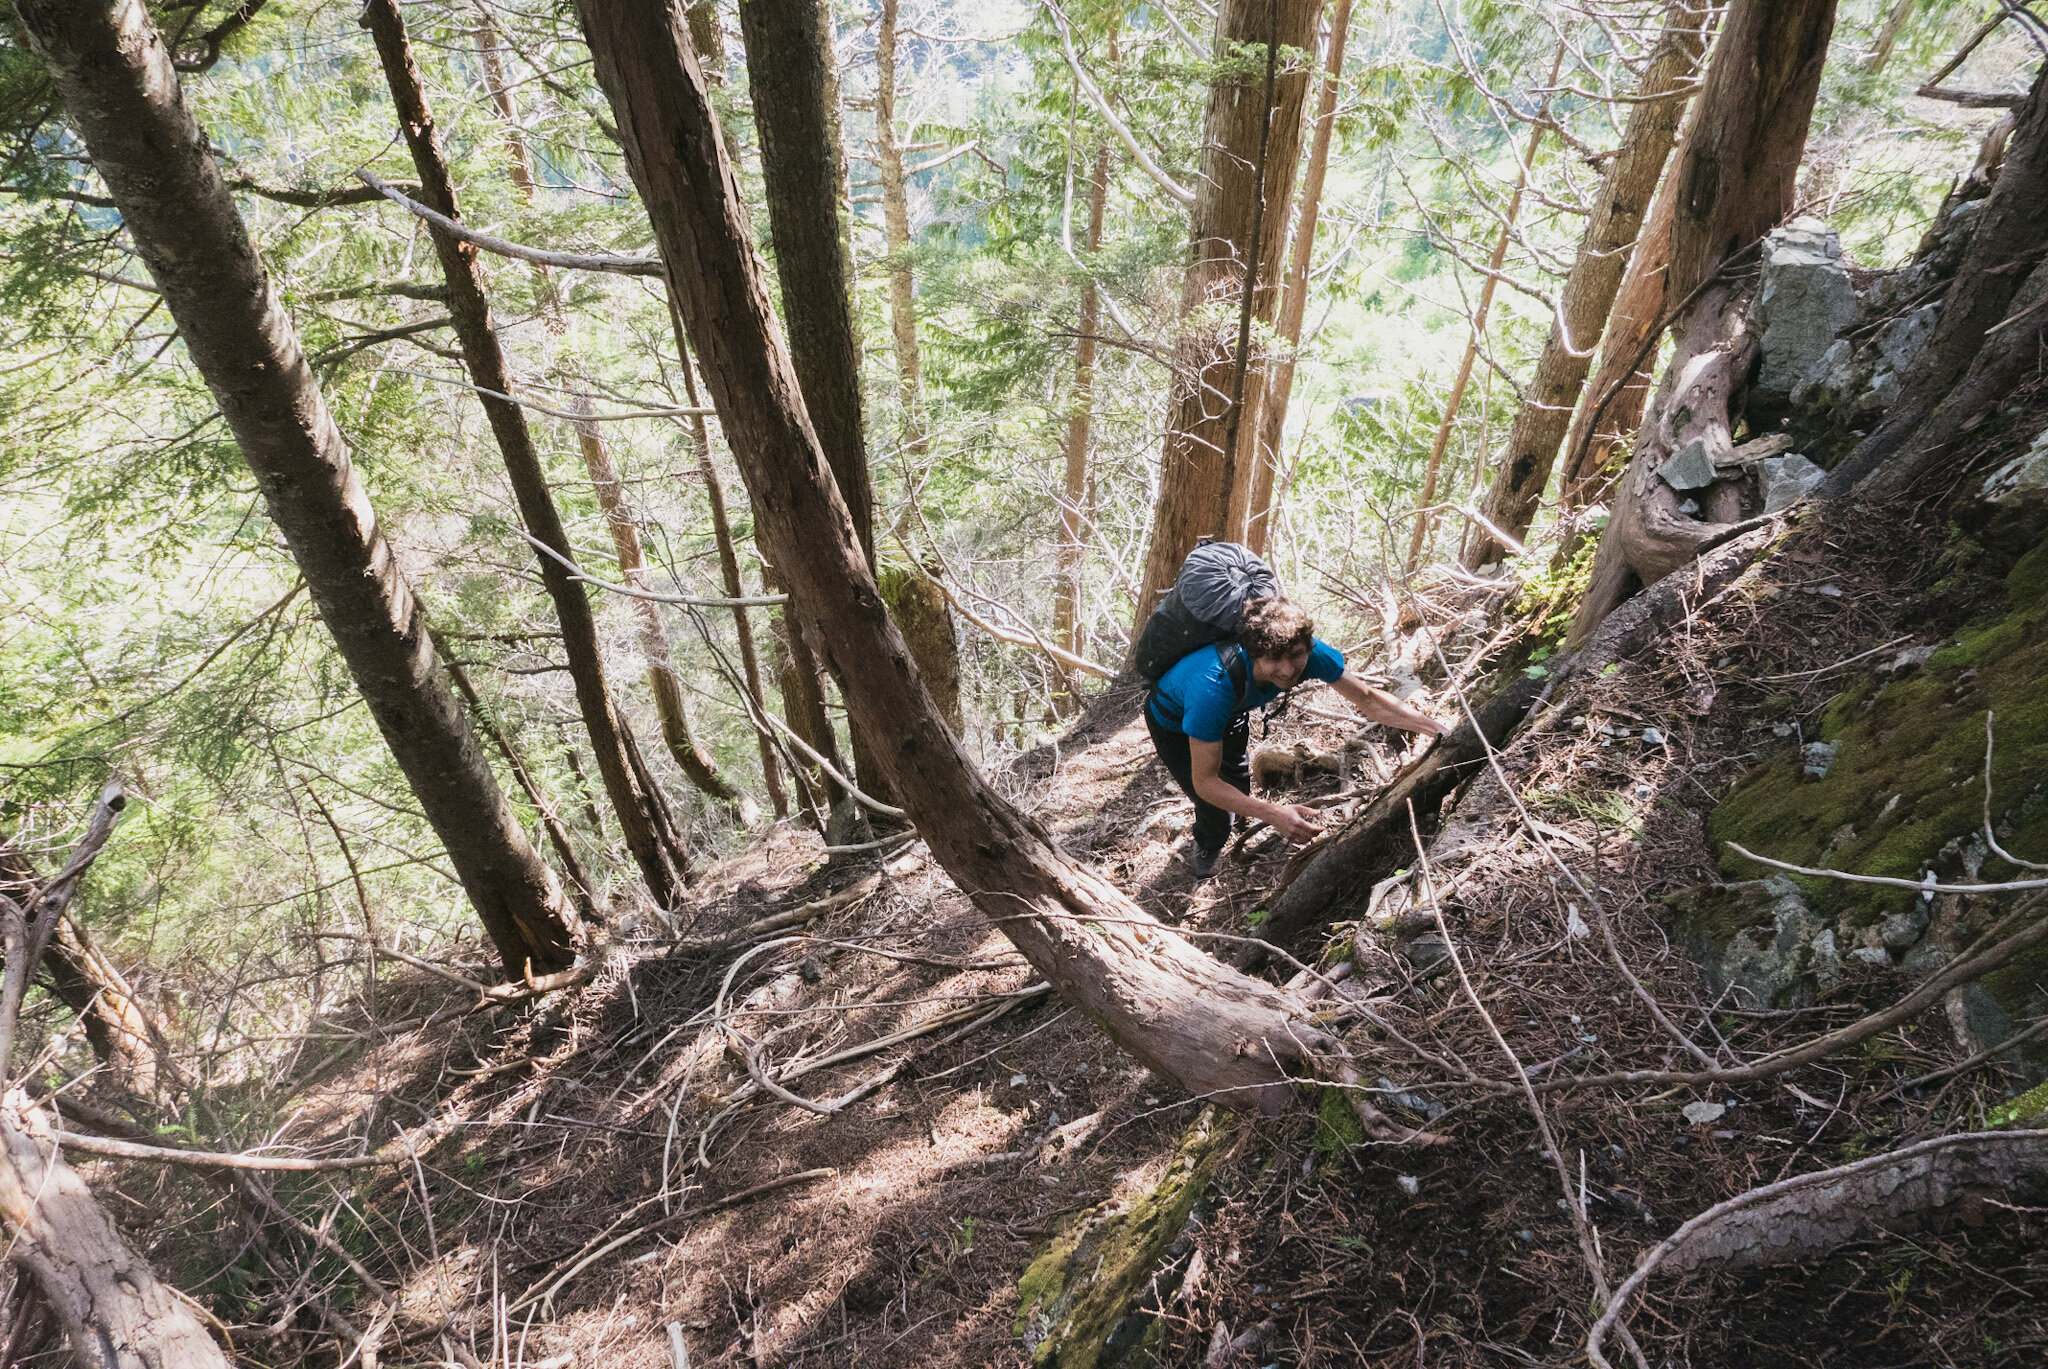
Mike climbing up the first fixed line in the forest.
9. Climb past bolt and head right again. Fixed lines then guide you the rest of the way to the top of the forest rib.
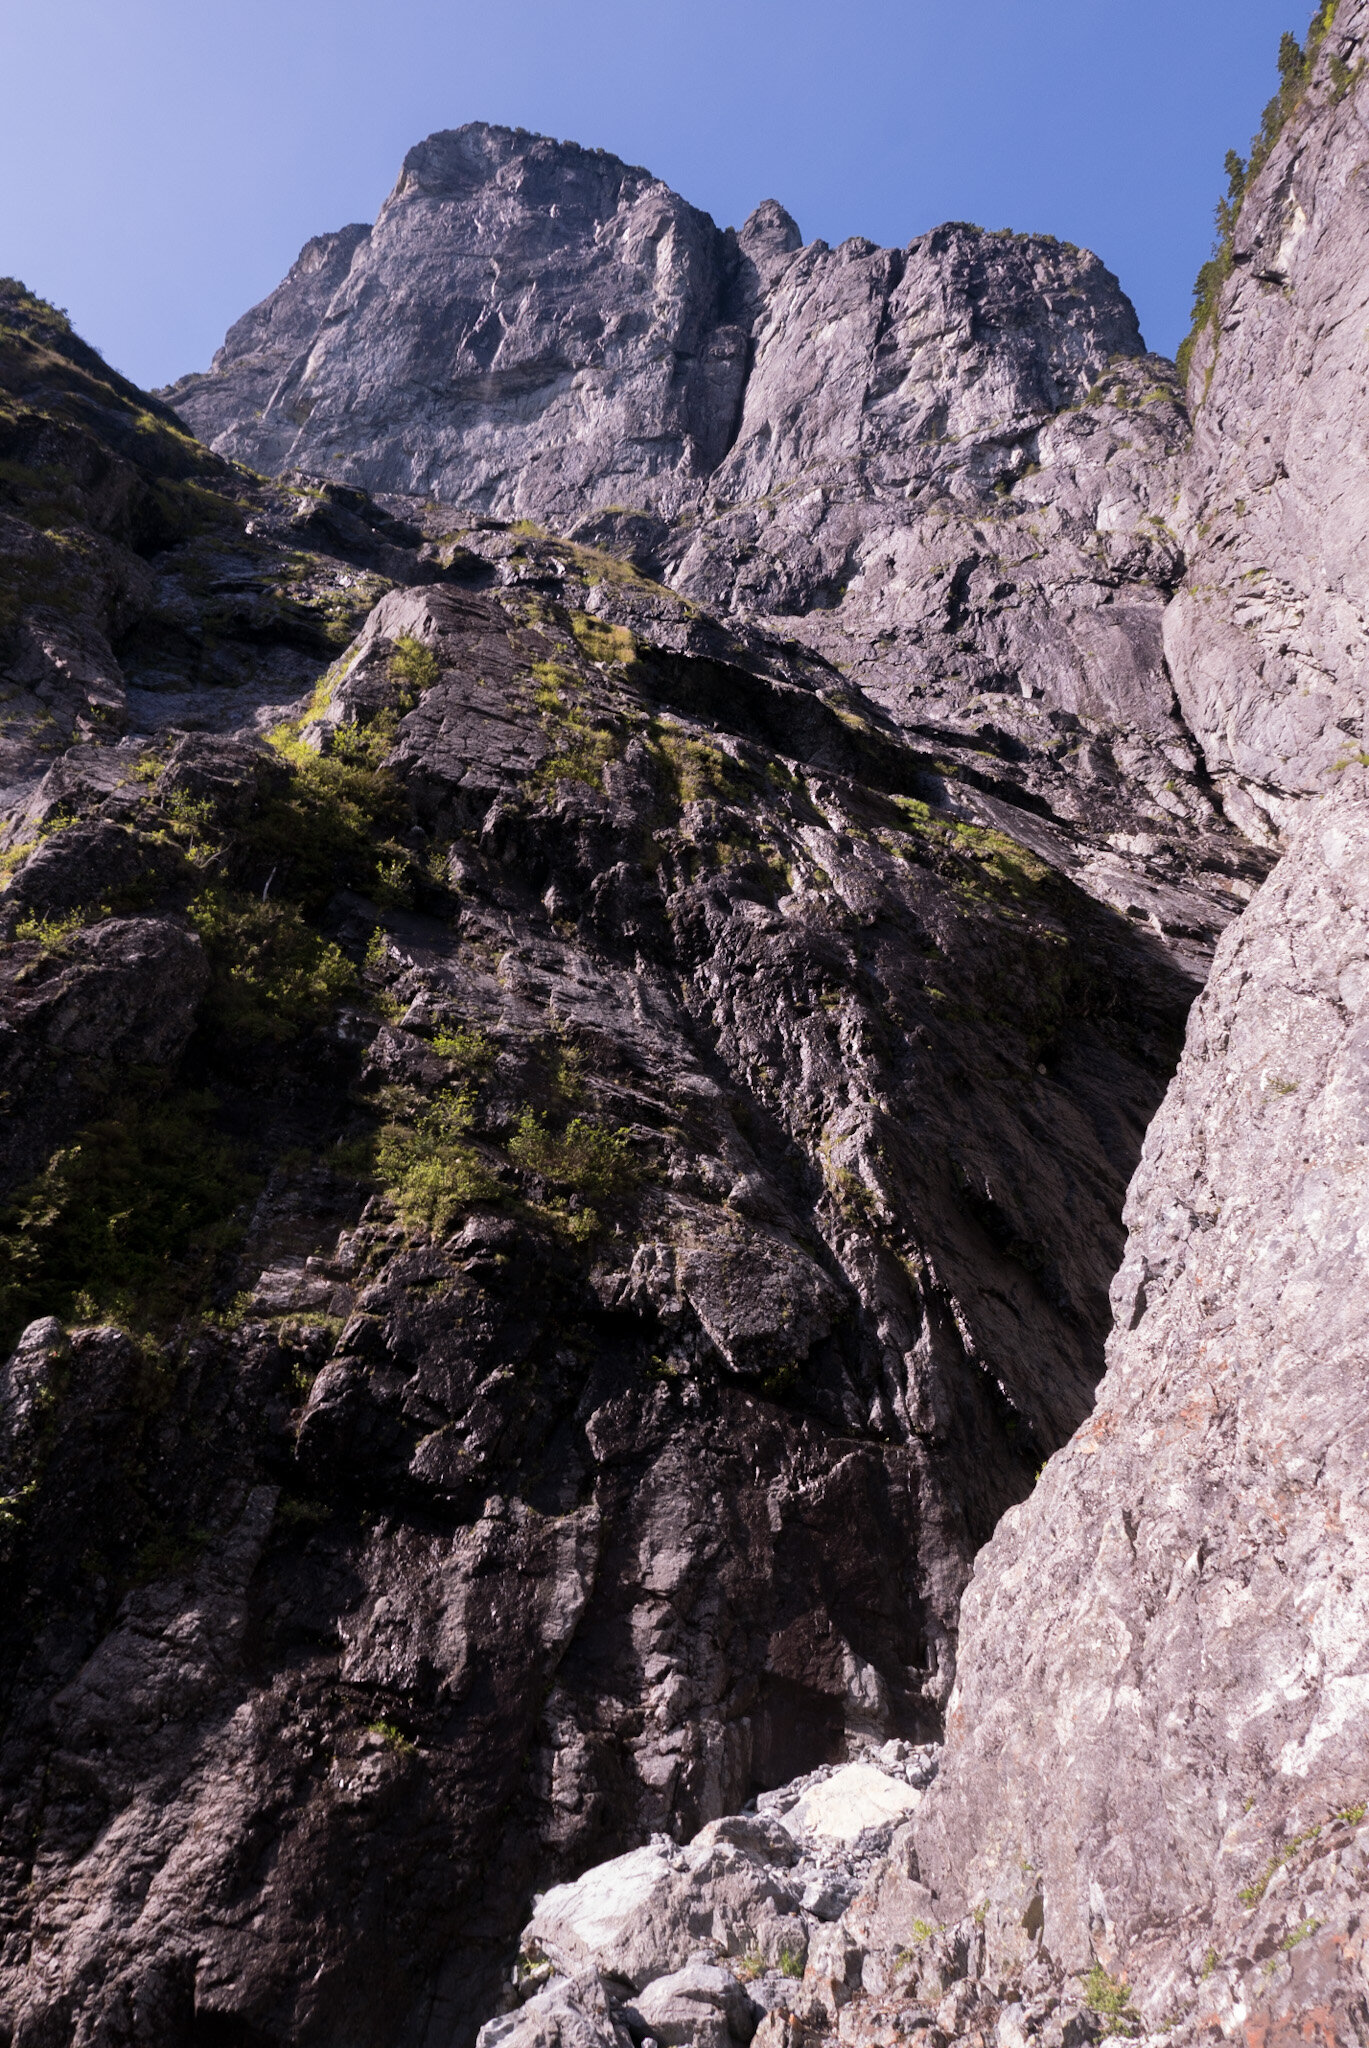
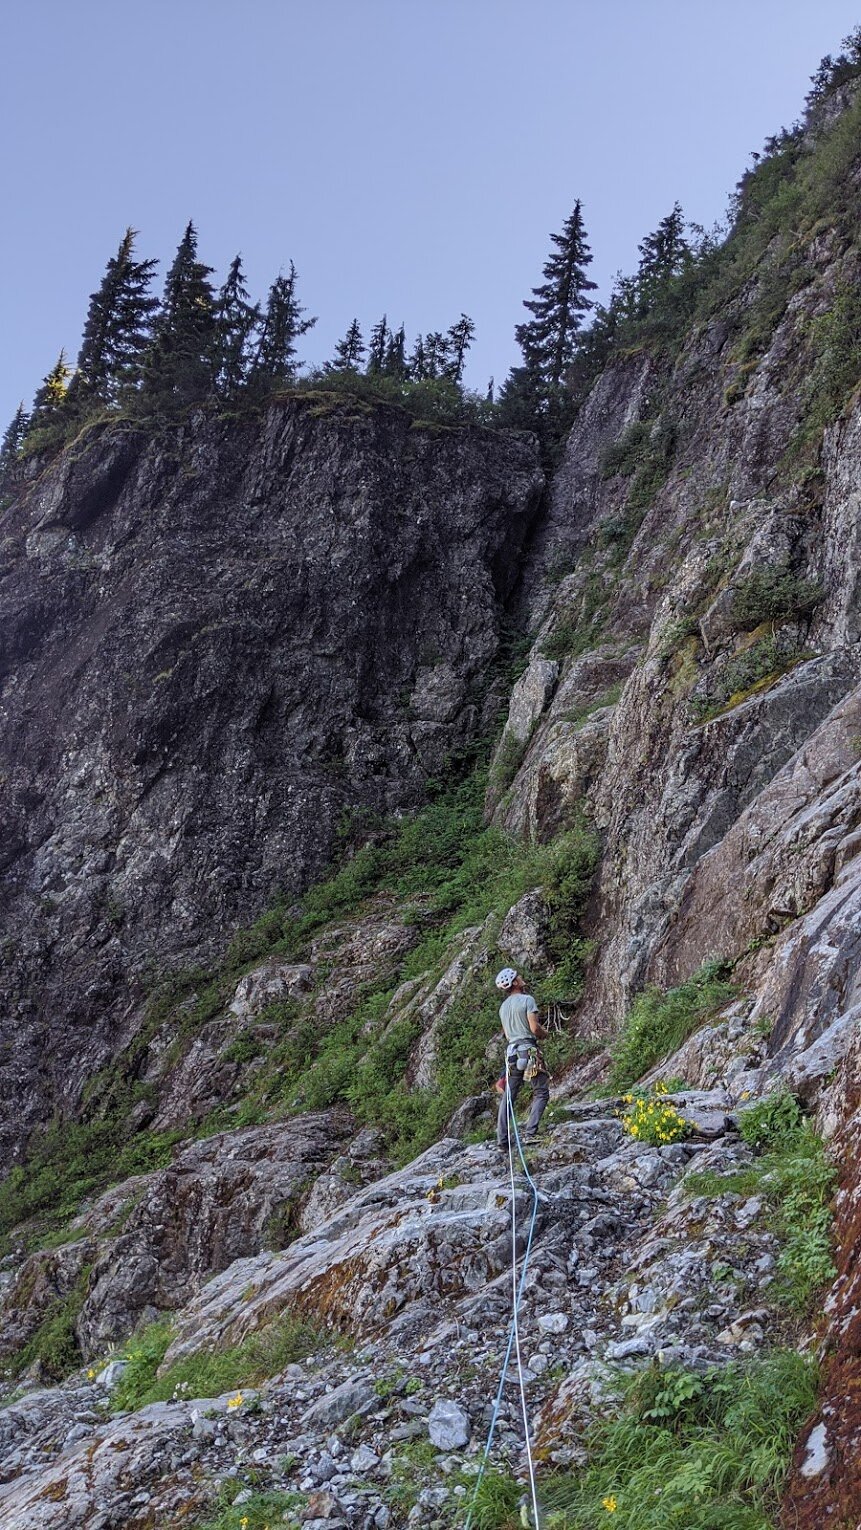
Looking up at the slabs from the top of the forested rib. You must descend into the gully from here.
10. Descend into gulley. Climb gulley up and over a low 5th step with a fixed line attached to a bolt.
The low 5th step in the gully (photo Luke Stefurak).
Looking down the gully from the top of the low 5th step. The top of the forested rib is in view.
11. Continue up about 50m to where you need to rope up. You should see Burdo’s old bolt and a newer looking bolt to the left. Go left. Climbing straight up on Burdo’s old bolted slab line is possible late season (it’s a waterfall early season), but it’s harder and might require putting on climbing shoes!
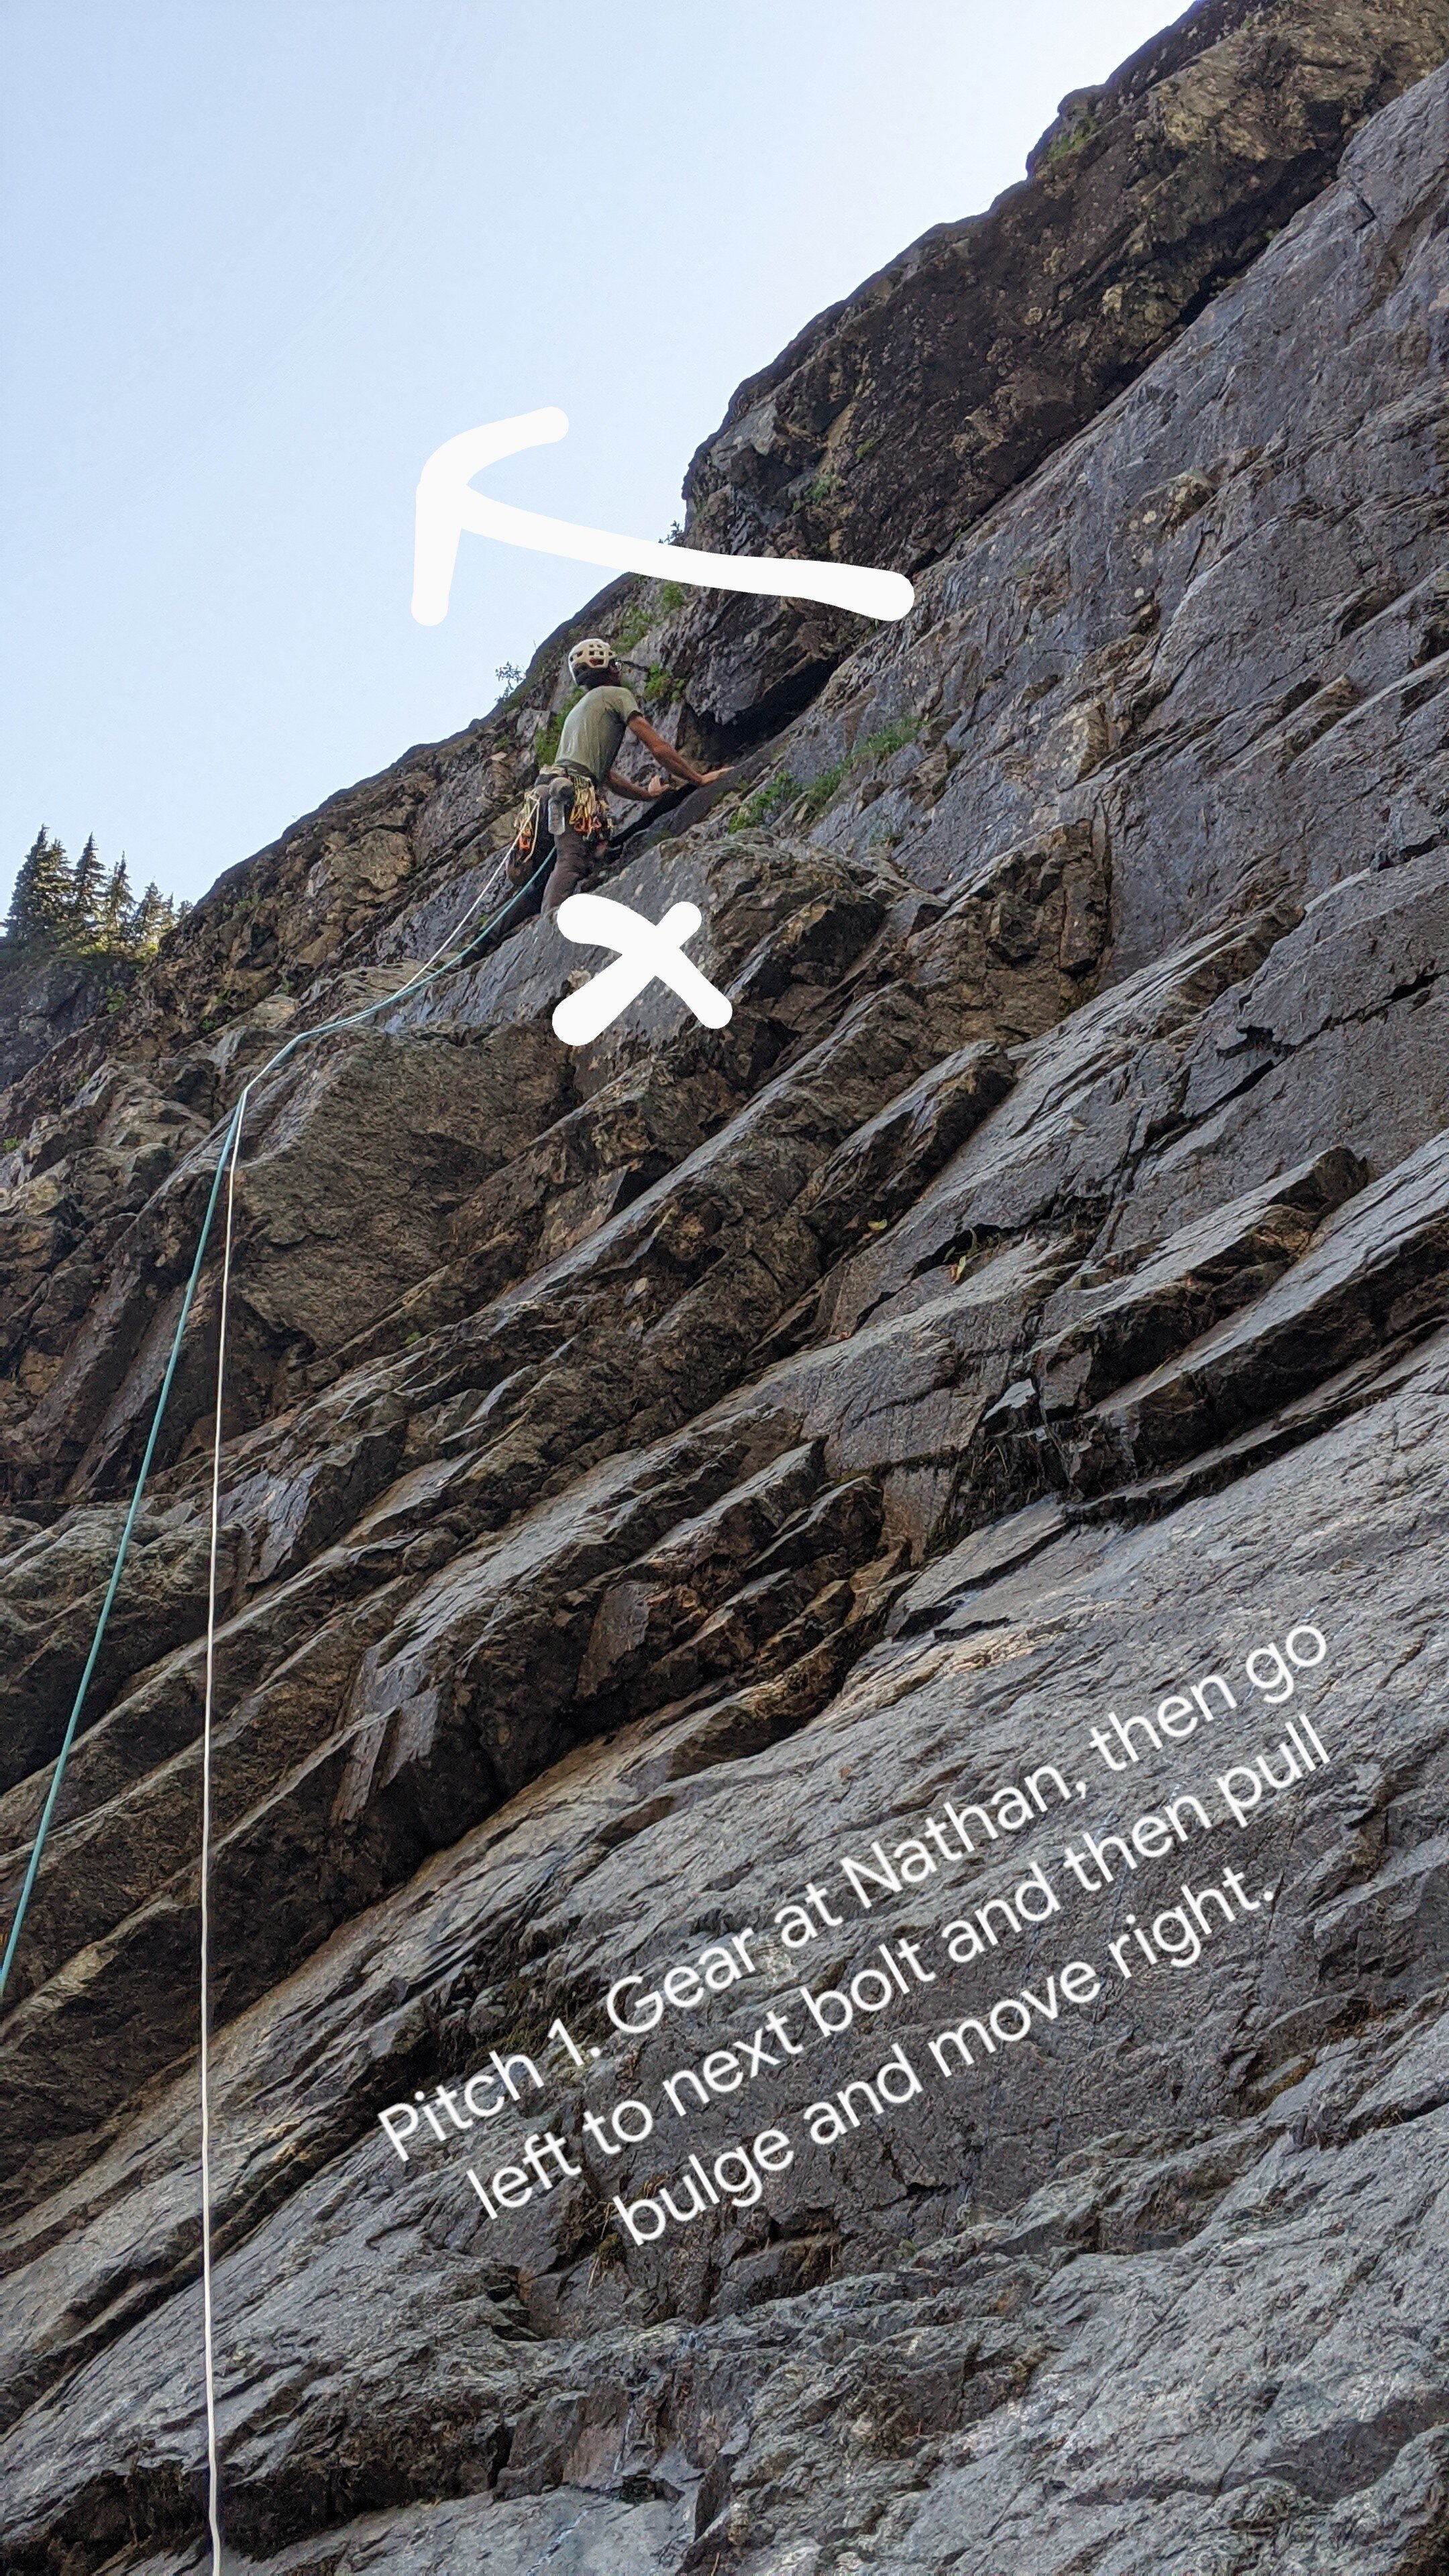
There is a bolt at the “X” now. Should be easy to spot from the gully (photo Luke Stefurak).
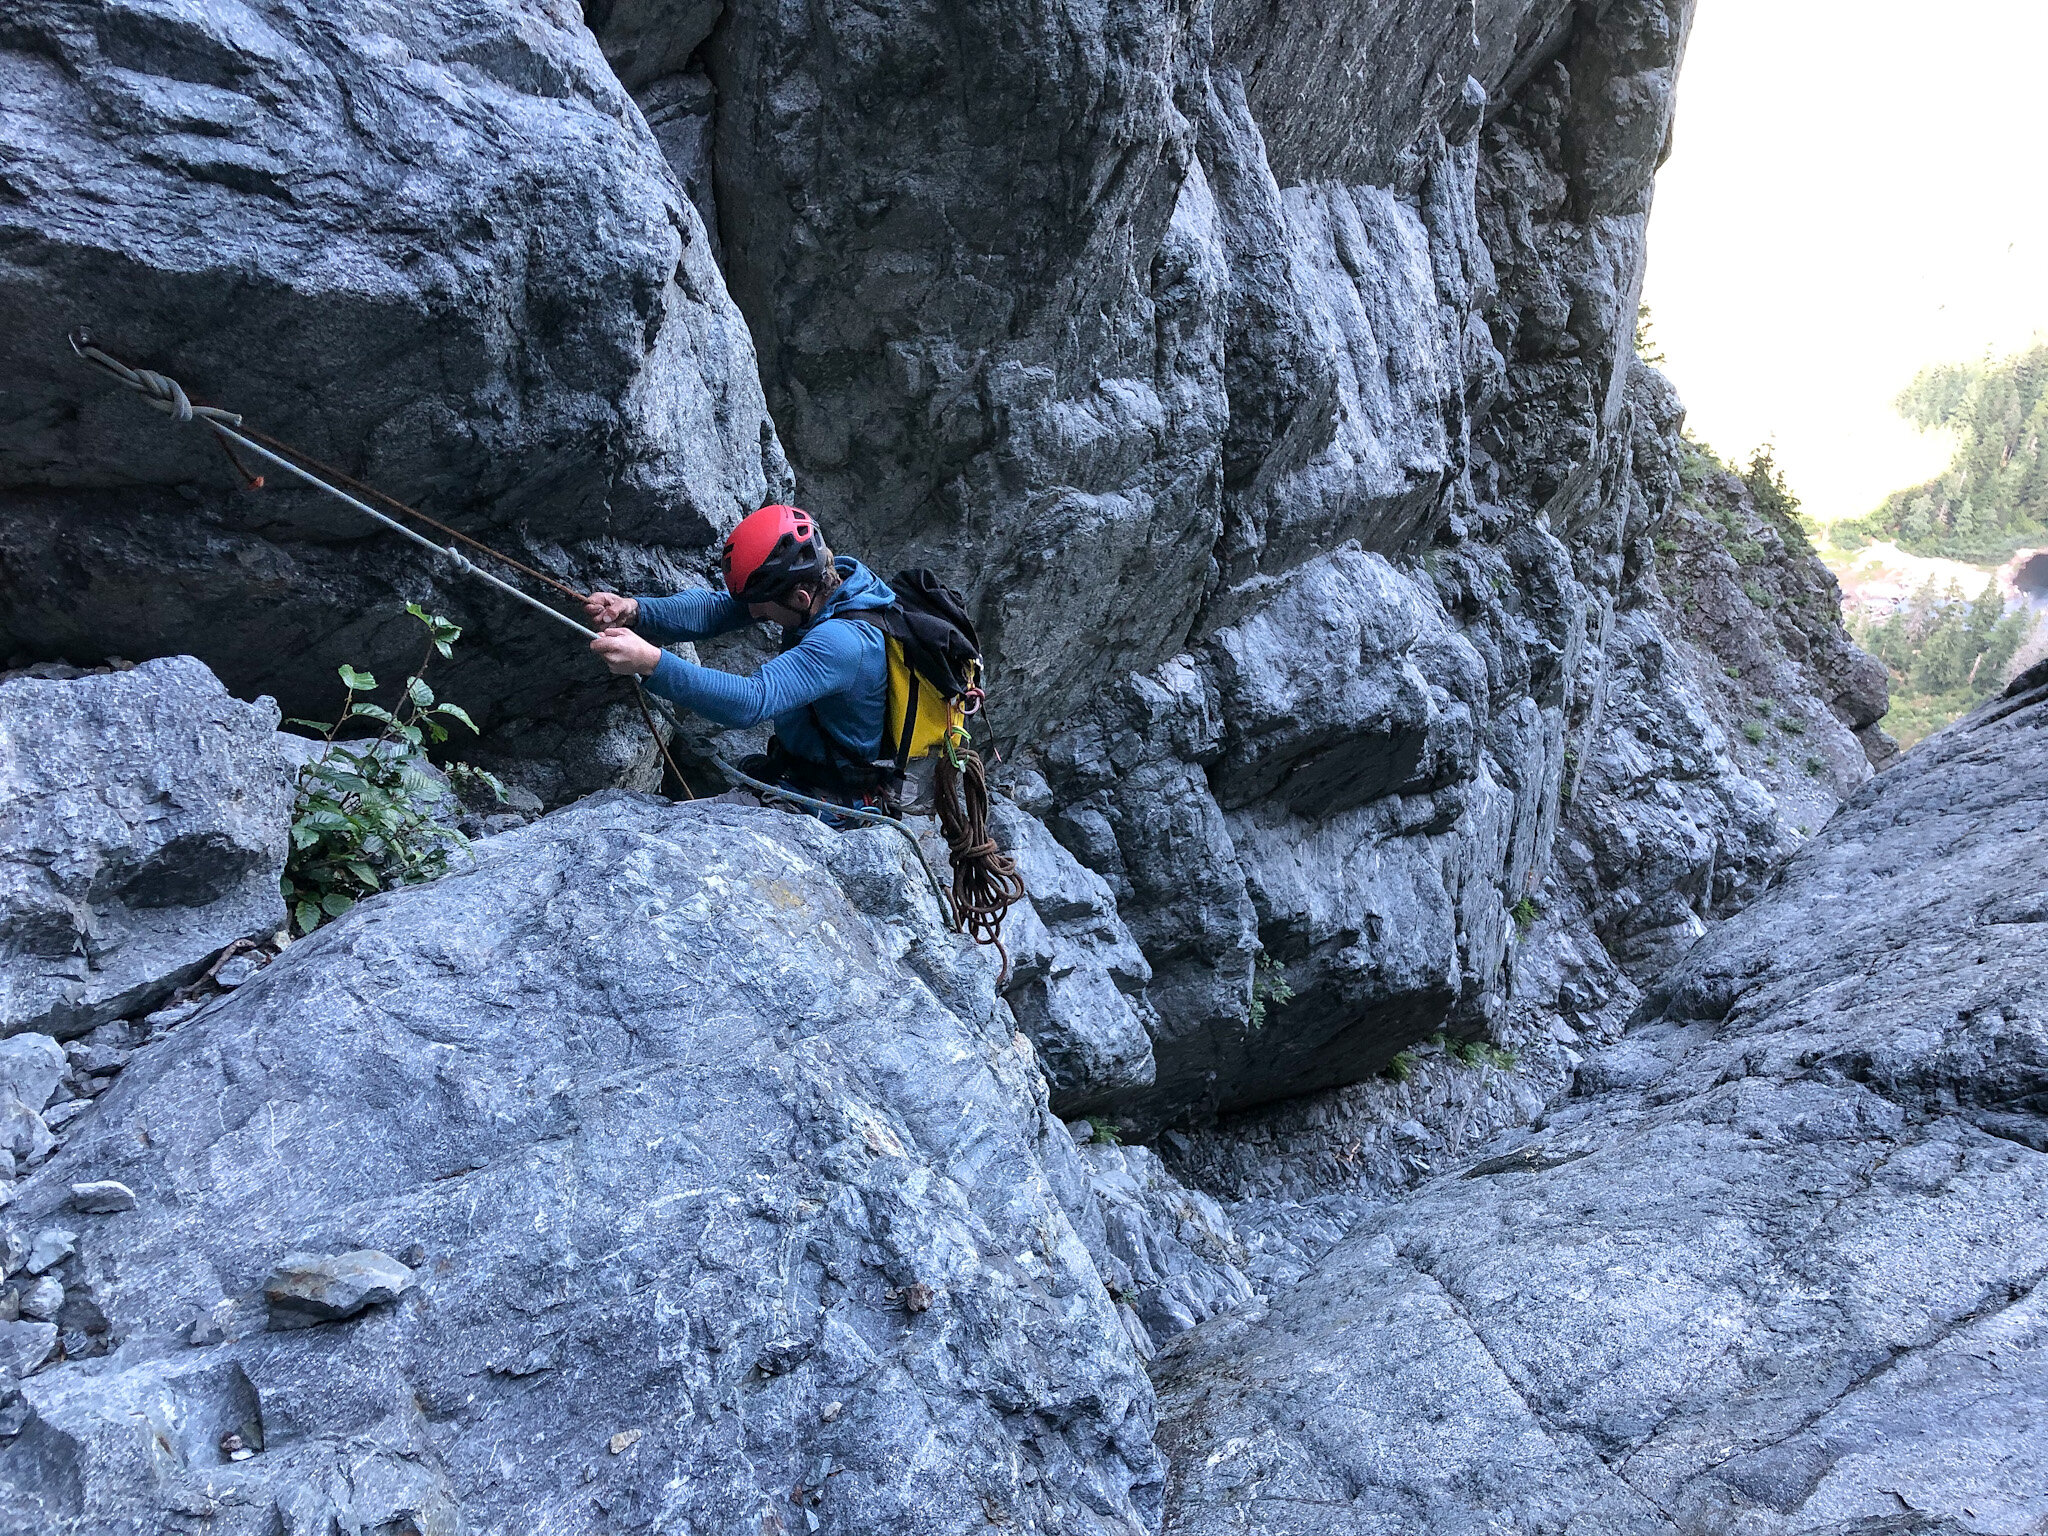
12. Climb left on ledges 10-15m and then up/right at the 2nd bolt. Climb past a 3rd bolt to a rap anchor (35m).
13. Continue up and right on easy slabs passing 3 bolts to a large ledge with a rap anchor (another 35m).
14. Coil up some of the rope and traverse the ledge left till you’re beneath a gully on the left side. There’s an exposed section early on the traverse with a bolt.
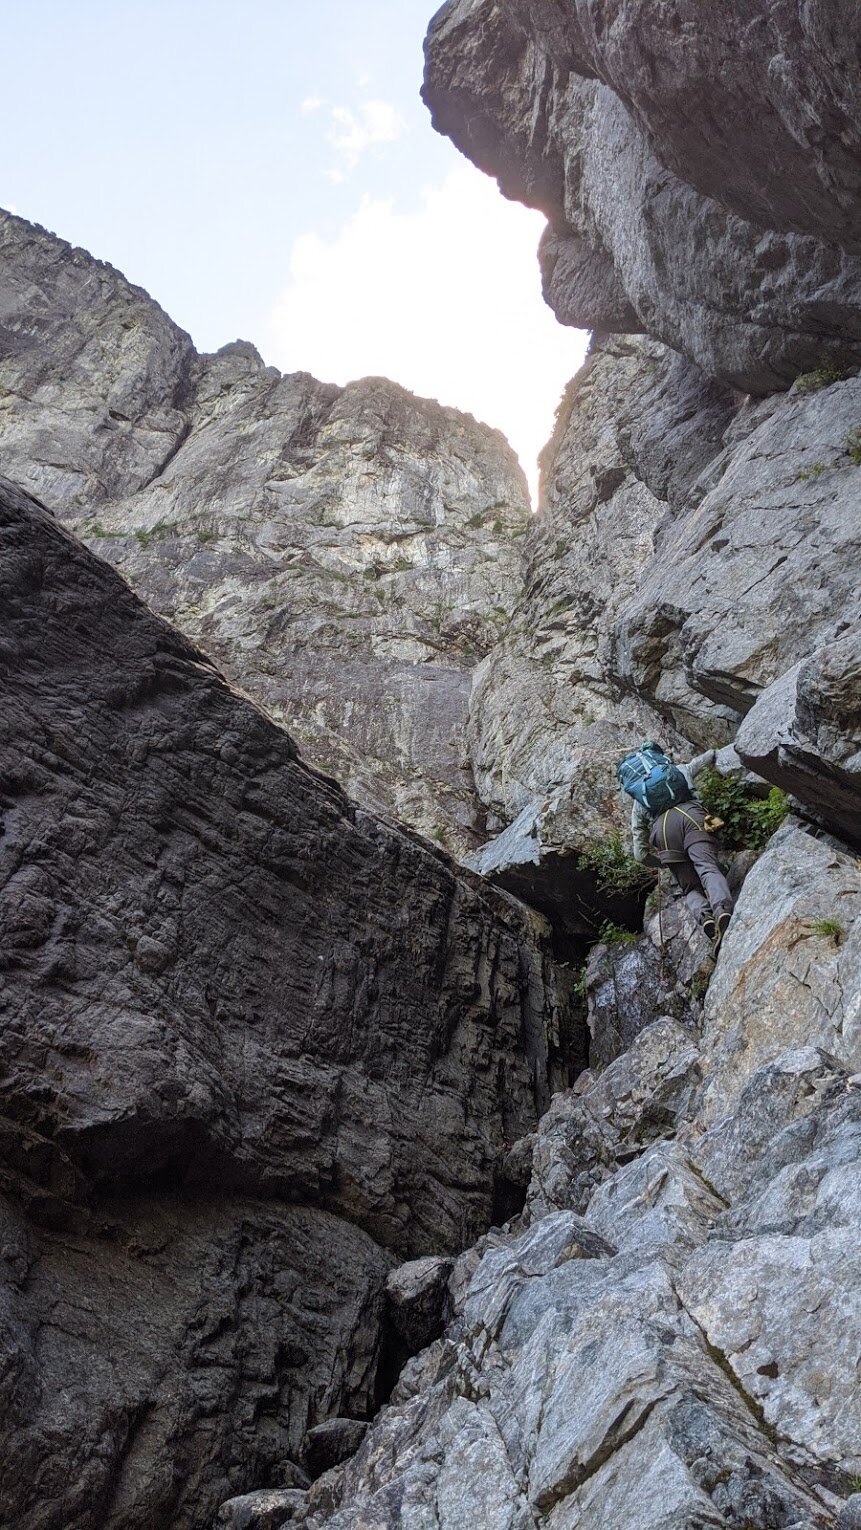
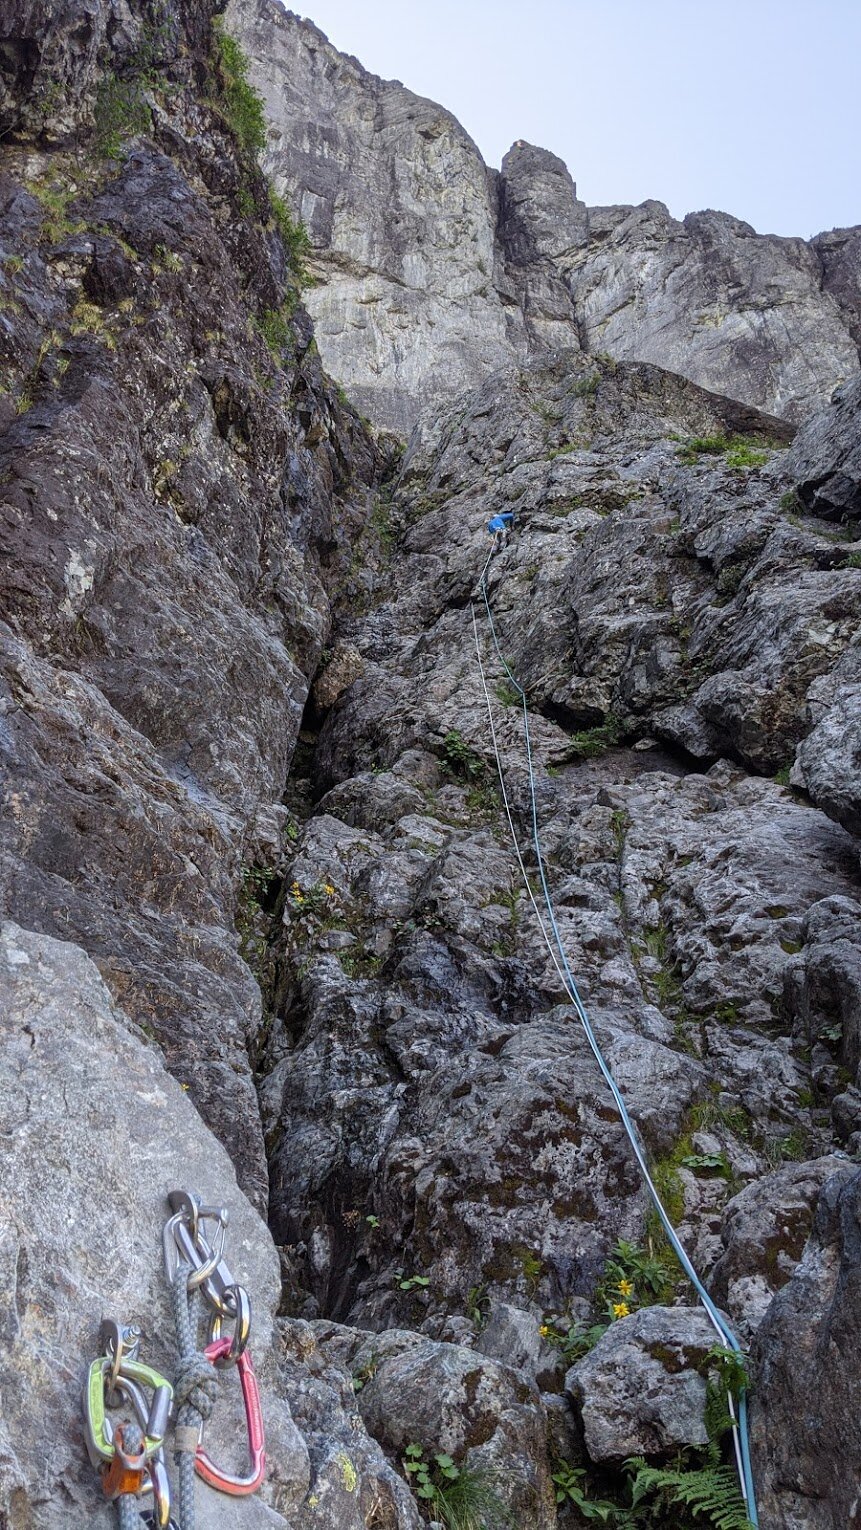
Near the end of the ledge walk, looking up at the next 3 pitches of climbing (photo Luke Stefurak).
15. Start climbing below an old bolt. Climb past this bolt and up to a constriction with a rap anchor (30m). This constriction in the gulley is usually running with water.
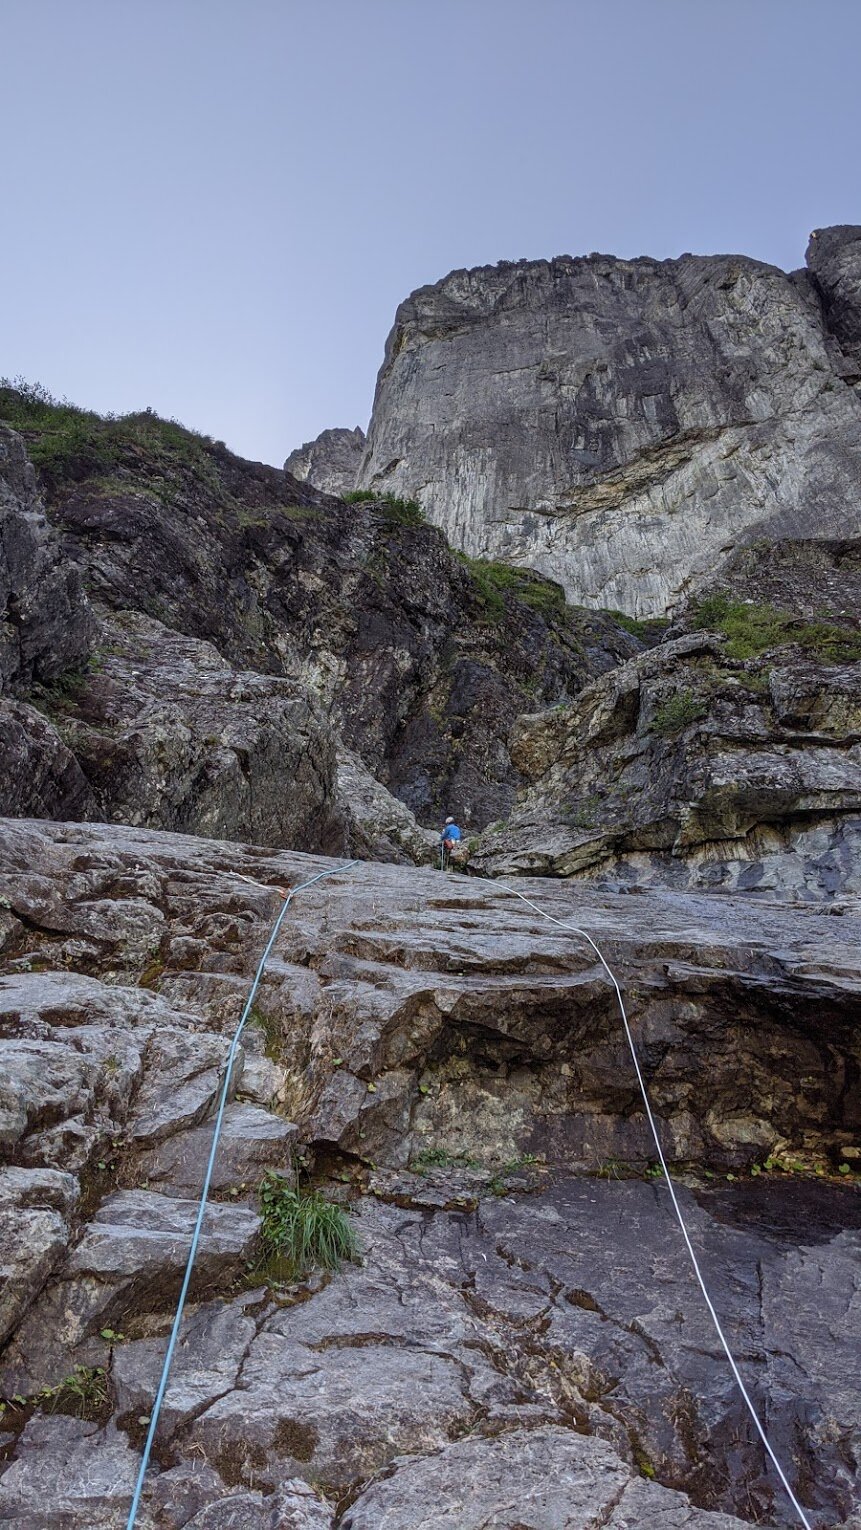
After the ledge traverse, this is the first of 3 pitches (photo Luke Stefurak). See the approach overview photo.
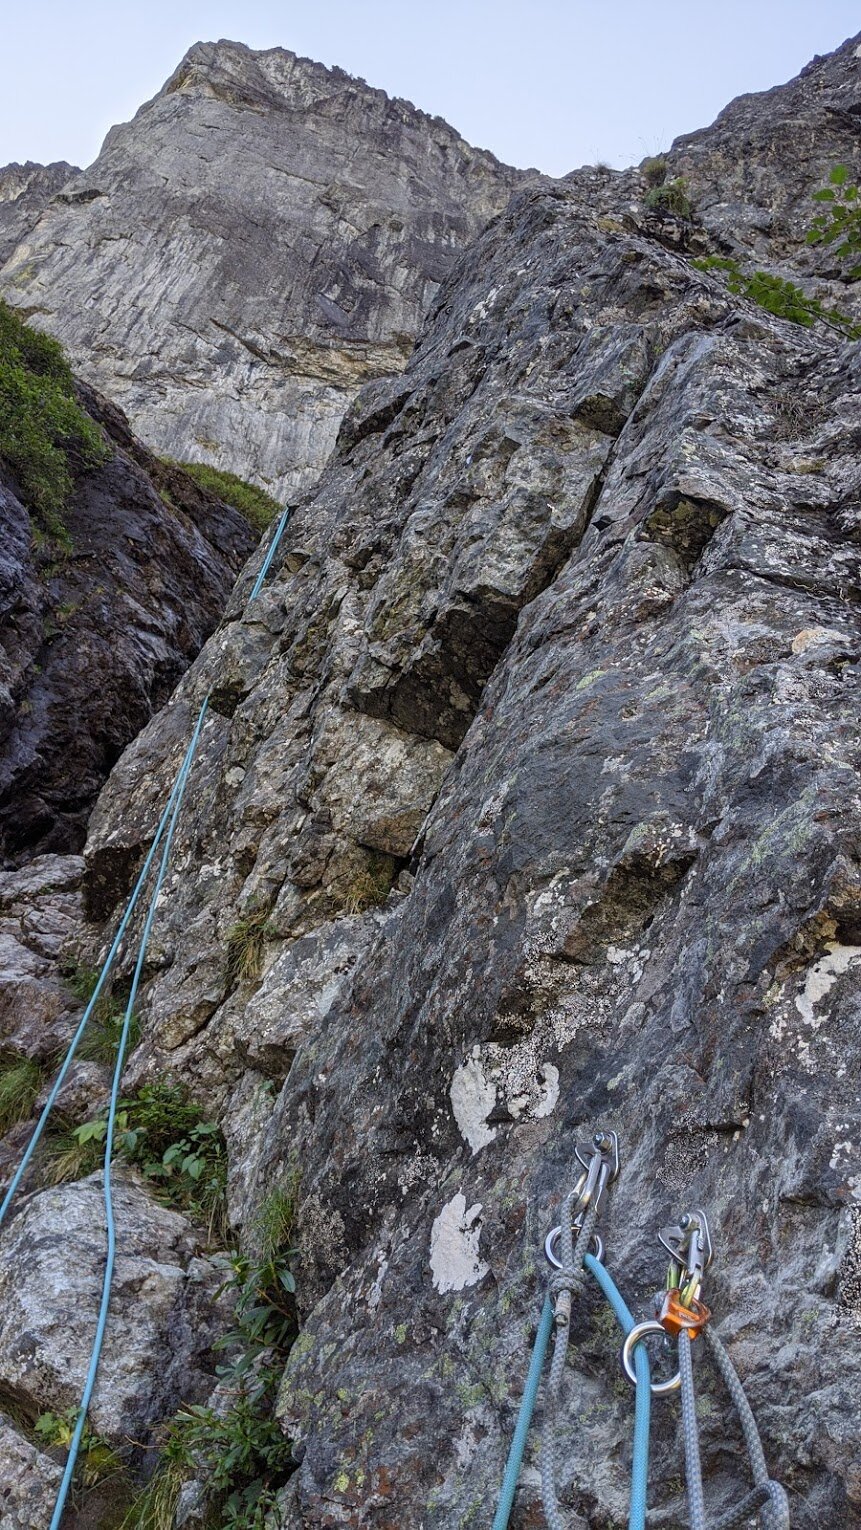
16. Continue up right side of gully (natural pro) to another rap anchor (35m).
2nd pitch after from the ledge (photo Luke Stefurak).
17. Climb past old bolts on the 5.9 crux of the approach and up to an old anchor with a newer bolt beside it (30m).
3rd pitch from the ledge (photo Luke Stefurak). This is the crux of the approach and it’s maybe 5.9 and protected well, albeit with old bolts. I was very comfortable climbing the pitch in approach shoes.
18. Unrope and scramble up and left to the base of the tower. Going left will lead you past some 4th class and an old Burdo anchor (maybe stay roped up for this option). Going straight (towards the wall) and then left will lead you to a a point where you can either climb dirt and trees or bushwhack around to the left to reach the base of the route. There’s broad ledge to relax on below the route.
If you nail the approach with this excellent beta, it should take about 3 hours to get to the base of the tower. There’s broad ledge to relax on below the route. If you walk along the wall left of the start of Vanishing Point, you should be able to find running water through mid-July.
Archive
2023
Dreefee and Crystal Dawn
Rubbernecker
2022
Long's Peak Diamond
Seattle Design Festival Interview
Seeing Circuits: an Interview with the Bouldering Project
2020
Vanishing Point 2.0: A Classic Route Modernized
Interview with Steven Dimmitt
Training Using Circuits
Cuba
2019
Dark Side of Liberty
The Bugaboos
Blue Jeans Direct: The End of the Canadian Rockies Ticklist
The Path
The Shining Uncut
Castles in the Sky
Scarface
Index's First 5.14
Turkey
2018
Patagonia
2017
Dark Side of the Valley
Vanishing Point
Winter Climbing
First Route in the Alaska Range
New York Gully